Buy BIT-2 (Upgrade from BIT), get a free gift with purchase:
Important Note: This is an upgrade path for existing owners of Rob Papen BIT. For the standard purchase path, click HERE.
BIT stands for Back In Time… and now to move to time travel level 2!
Instead of combining the best of analogue modeling with hybrid synthesis in which you can see with the other Rob Papen synthesizers, BIT-2’s main focus is on analogue Modelled Synthesis.
The idea behind BIT-2 is that the classic analogue type of synthesis has its own charm and simply has not yet been covered in this form by the Rob Papen brand.
Although BIT-2 has no patch cables, it is modular by all means! The Modulation Matrix is used for the patching, however also included is the smart ‘advanced’ panel below the Oscillators. With these advanced features (accessed by switching the ADV switch), you can quickly make several connections such as LFO and Envelope to the Oscillator parameters.
New additions to BIT-2 can be found in its Oscillators. Here you will find SuperSaw and SuperSquare waves, which are multiple Oscillators generated inside Oscillator 1 and/or 2. They give even more flexibility in creating sounds.
Kept from the previous version is the option to modulate Oscillator 2 by Oscillator 1 in several ways which expands the sound palette massively with Phase Modulation, Frequency Modulation, and Ring Modulation!
The two top-notch analogue modeled Filters are expanded in BIT-2 with new modes further enhancing its capabilities for sound shaping.
New inside BIT-2’s arpeggiator/sequencer is the option to dynamically change the start step and end step number, resulting in interesting real-time changing patterns! Another newly added feature is the ‘Magic’ parameter that allows you to alter the played arpeggiator/sequencer in a musical manner. The arpeggiator/sequencer can also work as a modulator and includes an additional free row that you can use to modulate other parts of BIT-2 by using the Modulation Matrix.
The AMP section of BIT-2 has been expanded with multiple distortion options and all are at a per ‘voice’ level, avoiding ugly sounds if you play chords.
An addition of a ‘Ribbon Controller’ found in the lowest section of BIT-2’s GUI allows you to change multiple parameters in a dynamic way using your mouse or an external MIDI controller.
Finally, the finishing touch for BIT-2 is of course the FX section. Some superb-sounding FX have been added and improved. Our top-notch Reverb is also included inside BIT-2 which means you won’t have to go outboard for adding reverb.
As mentioned earlier BIT stands for ‘Back In Time’ however it can also mean ‘Be Inspired Today’ whilst using the Analogue Modelled Synthesizer V2!
Features
- 16voice virtual analog synthesizer
- Over 1500 top-quality presets
- 2 Oscillators with a dedicated advance panel offering an LFO and Envelope for modulating different parts of the Oscillator
- Classic waveforms in each oscillator included 'Tuned Noise'
- Super Saw 1/2/3 and Super Square 1/2/3 waveforms (generating a 3-oscillator sound within one oscillator)
- 2nd Oscillator has Sub-Oscillator with Sinus, Square, and Saw waveform
- Oscillator-2 can be modulated by Oscillator-1 in FM, PM, or RING mode
- Oscillator-2 can Sync to Oscillator-1
- Oscillators have a 'wave feedback' feature
- Dedicated Noise Oscillator with White and Pink Noise
- 2 analog modeled Filters with 38 different character Filter types and modes
- Filter Routing options: serial, split-oscillator, split-noise
- Dedicated Filter Envelope with Attack, Decay, Sustain, Fade, and Release
- Filter Envelopes with Tempo Bases Sync option and inverted mode
- AMP with velocity control and Attack, Decay, Sustain, and Release
- AMP distortions on voice level with 11 distortion types
- ARP/SEQ with 16 steps and many different modes and detailed features and options
- ARP/SEQ with automatable loop-start and steps number feature
- ARP/SEQ with magic mode for adding intelligent variations
- PLAY MODE with Poly, Poly MPE. Mono, and Legato modes including many different Unison modes
- Ribbon Controller with tempo-base spring back feature, quantized spring back, and unipolar or bipolar mode
- Chorus FX
- Flanger or Phaser FX
- Stereo Delay and HQ Reverb (serial)
- Bank manager
- 100%, 125%, 150%, and 200% size options
System Requirements
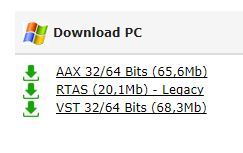
- PC: 32 & 64 bits VST, VST3, and 64 bits AAX for Windows 7 or higher (Note: PC AAX for PT 12 or higher)
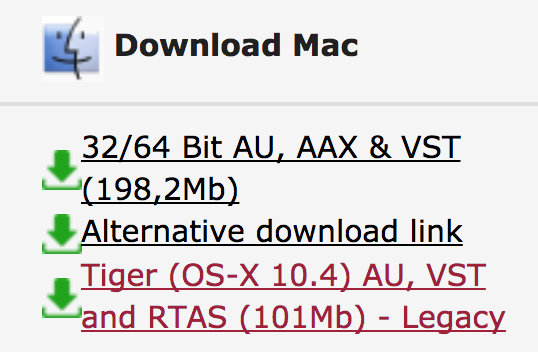
- Mac: 64 bits AU, VST, VST3, and AAX, for OS-X 10.13 or higher (M1 ARM processor compatible)
- The activation system is offline, which means that there is no direct connection between the plugin and the robpapen.com homepage.
- The software can be installed on 2 of your own computer systems
- NI NKS support is planned
(SubBoomBass is used as the example).
Mac
1. Visit Rob Papen and create an account by selecting 'Create Account'.


Note: If you already have an account set up with Ron Papen, 'Login' to your account and skip to step 4. of the installation process.


2. Enter your personal details, and once completed check the tick box that reads 'Yes, I agree to Privacy Policy Rob Papen' before clicking 'Send Registration'.

3. The registration of your account has successfully been completed > select 'click here to login' to access your account area.

4. Select the 'My Products' tab, which is located at the top-left corner of your account area.


5. Click the 'Register New' option.


6. Select the product that you have purchased, as well as the most recent version number (which in this instance is 'Online'), before manually entering/copying and pasting the 32-digit Serial Number that is provided within your User Account > once completed, click the 'Save' tab to register your software.
Note: Ensure that you select the correct 'Product' and 'Type', as well as checking that there are no spaces/mistakes when entering your Serial Number > if you receive a code error message of any kind, refresh the web page and manually enter the digits (including the '-' hyphens) before re-clicking the 'Save' option.

7. The registration of your software has successfully completed > select the 'Download latest version: SubBoomBass' hyperlink to navigate to the software download area.

8. Select the relevant format installer download (s) in accordance with your DAW's compability specifications, to inititiate the downloading of your purchased software.
Note: The product user manual is also obtainable from this location.


9. Once the software installer file has finished downloading, click the file entitled 'SubBoomBass_Installer.dmg' to launch the application installer application.
10. Double-click the 'SubBoomBass_Installer.pkg' application icon begin the installation process.

11. Click 'Continue' to verify the installation, if prompted to do so.

12. Click 'Continue' once again.

13. Read through the Licence Agreement > click 'Continue' then 'Agree'.

14. Manually enter/copy and paste the original 32-digit Serial Number that you were provided with, before clicking 'Continue' (the Serial Number is located in both your Plugin Boutique and Rob Papen User Accounts).
Note: Ensure that you select the correct 'Product' and 'Type', as well as checkingt that there are no spaces/mistakes when entering your Serial Number > if you receive a code error message of any kind, manually enter the digits (including the '-' hyphens) before re-clicking the 'Continue' option.

15. Review the installation before clicking 'Install', and then 'Continue Installation'.

16. The installation of your software has successfully completed > click 'Restart' to reboot your computer.
Note: Ensure that you have saved any important work that may be open within the applications you currently have open, before selecting the 'Restart' option.

17. After your computer has successfully restarted, open your DAW and locate/open your newly installed/activated software VST.
Note: If the software fails to appear, rescan your DAW's Plug-in selection.
The Software is now Activated and Ready for Use Within Your DAW!

Windows
1. Visit Rob Papen and create an account by selecting 'Create Account'.


Note: If you already have an account set up with Ron Papen, 'Login' to your account and skip to step 4. of the installation process.


2. Enter your personal details, and once completed check the tick box that reads 'Yes, I agree to Privacy Policy Rob Papen' before clicking 'Send Registration'.

3. The registration of your account has successfully been completed > select 'click here to login' to access your account area.

4. Select the 'My Products' tab, which is located at the top-left corner of your account area.


5. Click the 'Register New' option.


6. Select the product that you have purchased, as well as the most recent version number (which in this instance is 'Online'), before manually entering/copying and pasting the 32-digit Serial Number that is provided within your User Account > once completed, click the 'Save' tab to register your software.
Note: Ensure that you select the correct 'Product' and 'Type', as well as checking that there are no spaces/mistakes when entering your Serial Number > if you receive a code error message of any kind, refresh the web page and manually enter the digits (including the '-' hyphens) before re-clicking the 'Save' option.

7. The registration of your software has successfully completed > select the 'Download latest version: SubBoomBass' hyperlink to navigate to the software download area.

8. Select the relevant format installer download (s) in accordance with your DAW's compability specifications, to inititiate the downloading of your purchased software.
Note: The product user manual is also obtainable from this location.


9. After the software installer file has finished downloading, double-click the file entitled 'SubBoomBass_Installer' .zip folder to extract the .exe installer file.
10. Once extracted, double-click the .exe installer file to begin the installation process > click 'Next'.

11. Read through the Licence Agreement and select 'I accept the agreement' > click 'Next'.

12. Type in your preferred User Name, Organization and manually enter/copy and paste the original Serial Number that you were provided with, before clicking 'Continue' (the Serial Number is located in both your Plugin Boutique and Rob Papen User Accounts).
Note: Ensure that you select the correct 'Product' and 'Type', as well as checking that there are no spaces/mistakes when entering your Serial Number > if you receive a code error message of any kind, manually enter the digits (including the '-' hyphens) before re-clicking the 'Next' option.

13. Select a computer VST Plug-ins folder destination in which to install/save your software to > click 'Next'.

14. Select a computer Library location in which to install/save your software to > click 'Next'.

15. Select the software format (s) that you wish to install > click 'Next'.

16. Select a Start Menu Folder to create a shortcut to your new software installation > click 'Next'.

17. Review the installation and click 'Install'.

18. The installation of your software has successfully completed > click 'Finish'.

19. After your computer has successfully restarted, open your DAW and locate/open your newly installed/activated software VST.
Note: If the software fails to appear, rescan your DAW's Plug-in selection.
The Software is now Activated and Ready for Use Within Your DAW!

