Please note: Speaker is used as the example.
Windows
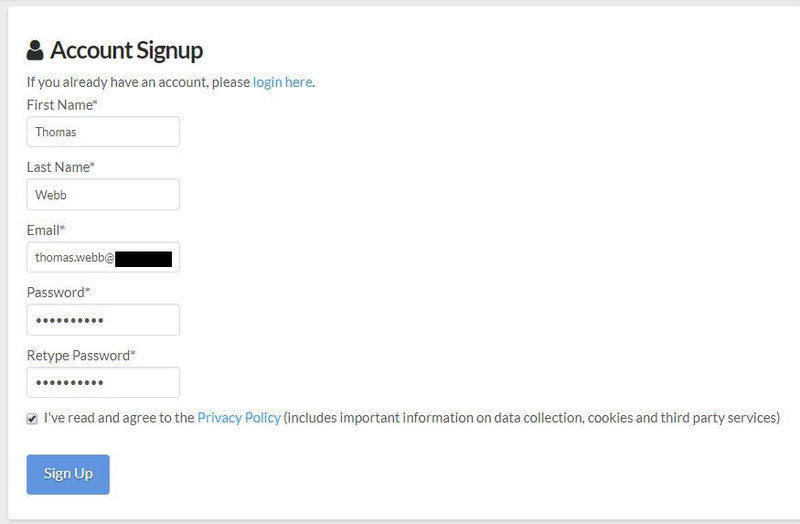
1. Visit the AudioThing Login/Registration Page and enter your personal details to set up an account > then read the 'Privacy Policy' and tick the box before clicking 'Sign Up'.
Note: If you already have an existing AudioThing account, Login here and skip to step 3 of the installation process.
2. A confirmation email will now be sent to your registered email > click the link within the email to activate your account and Login here.
3. Once logged into your account, visit the Redeem Page and copy and paste the serial number from your User Account into the box provided > then click 'Redeem'.

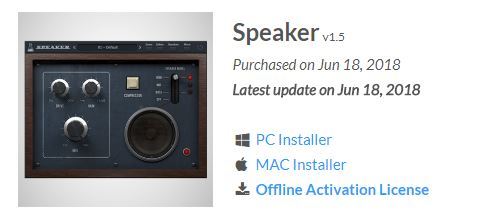
4. Download your preferred installer as well as the Activation Licence Key.
Note: Click the ‘license.atl’ file, e.g ‘speaker_license.atl’ to download it to your computer > be sure to save this to a memorable computer location so that you can easily locate and upload it when activating your software.
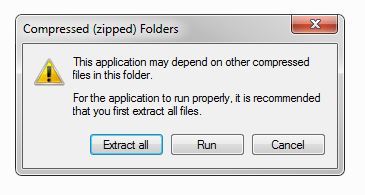
5. Double-click the compressed folder to reveal the installer file.
6. Double-click the extracted .exe file > click ‘Run' to open the installation window.
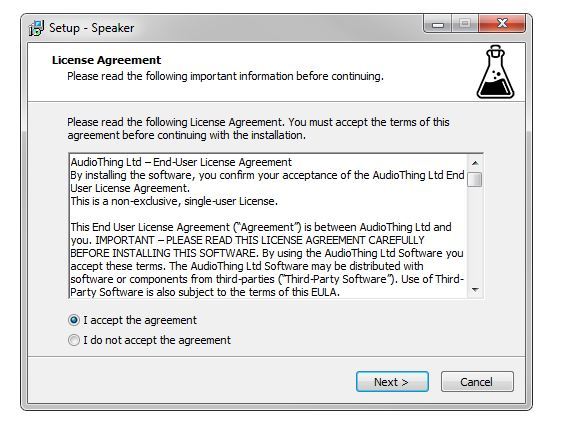
7. Read through the license agreement and click ‘I accept the agreement’ > click ‘Next’.
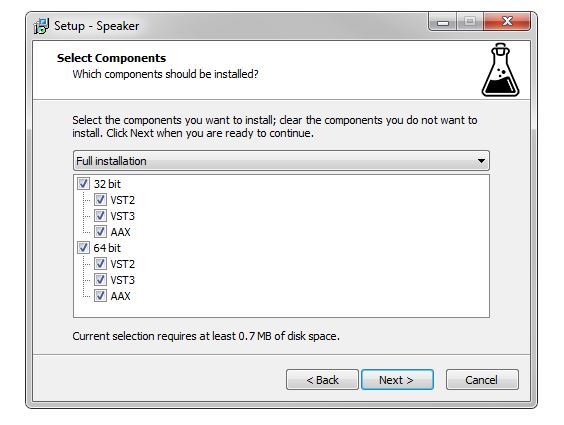
8. Select the component (s) that you wish to install > click ‘Next’.
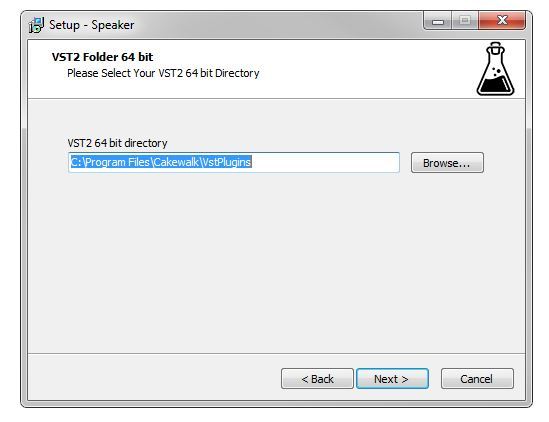
9. Choose and confirm the 64-bit plugin directory in which to save your software to > click ‘Next’.
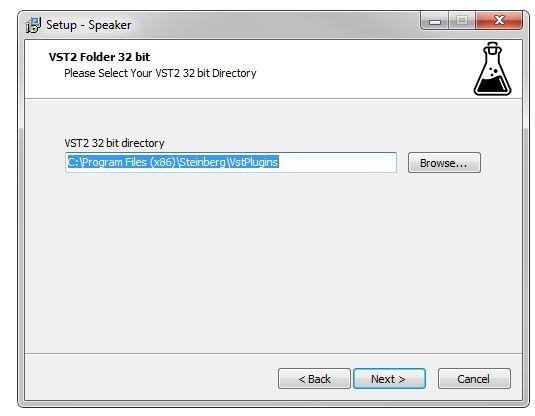
10. Choose and confirm the 32-bit plugin directory in which to save your software to > click ‘Next’.
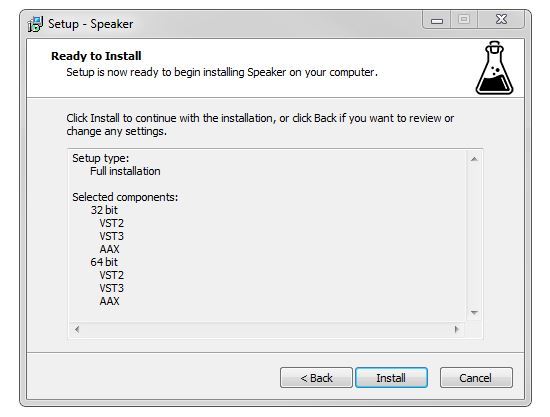
11. Review the installation and click ‘Install’.
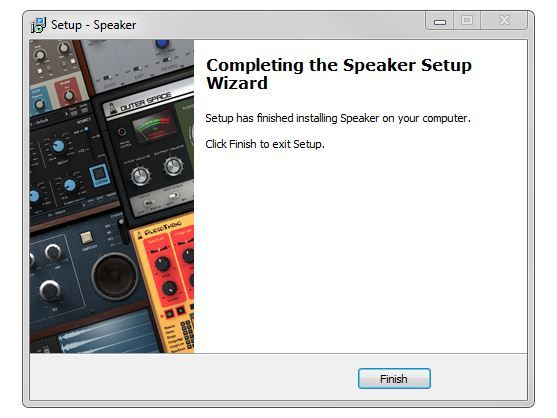
12. The installation of your software has successfully completed > click ‘Finish’.
Offline Activation
1. Restart your DAW, and rescan your plugin selection to show the new installation (in the event it fails to appear).
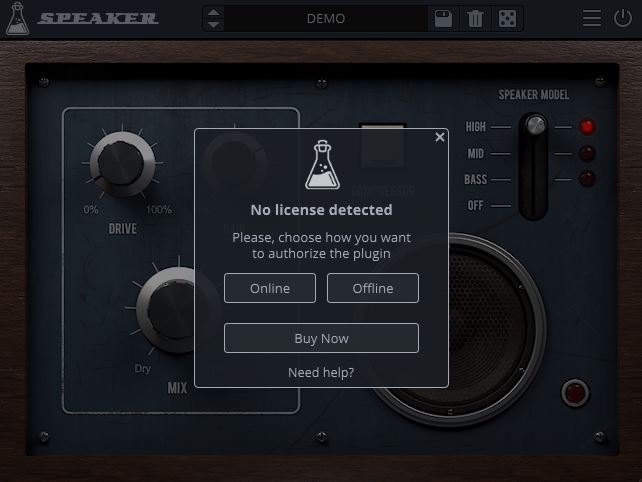
2. Locate and open the plugin on an appropriate track. You will be greeted by the window shown below > click 'Offline'.
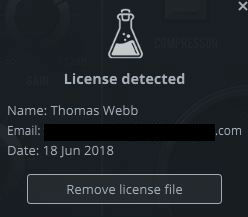
3. Load or drag and drop the downloaded Key License File into the box to activate your software.

4. The software is now activated and ready for use within your DAW.
Online Activation
1. Restart your DAW, and rescan your plugin selection to show the new installation (in the event it fails to appear).
2. Locate and open the plugin on an appropriate track. You will be greeted by the window shown below > click 'Online'.
3. Enter your registered account email and password details > click 'Log In'.
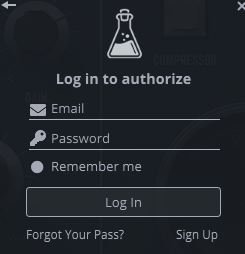
4. The software is now activated and ready for use within your DAW.
Mac
1. Visit the AudioThing Login/Registration Page and enter your personal details to set up an account > then read the 'Privacy Policy' and tick the box before clicking 'Sign Up'.
Note: If you already have an existing AudioThing account, Login here and skip to step 3 of the installation process.
2. A confirmation email will now be sent to your registered email > click the link within the email to activate your account and Login here.
3. Once logged into your account, visit the Redeem Page and copy and paste the serial number from your User Account into the box provided > then click 'Redeem'.
4. Download your preferred installer as well as the Activation Licence Key.
Note: Click the ‘license.atl’ file, e.g ‘speaker_license.atl’ to download it to your computer > be sure to save this to a memorable computer location so that you can easily locate and upload it when activating your software.
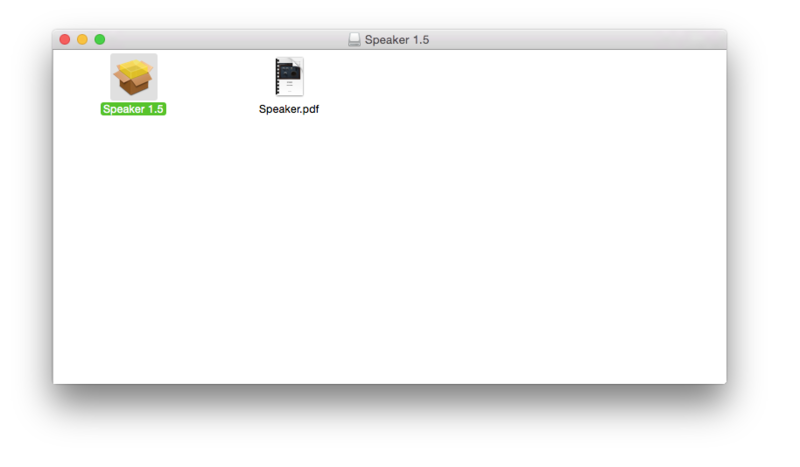
5. Double-click the .dmg file to open the installer window.
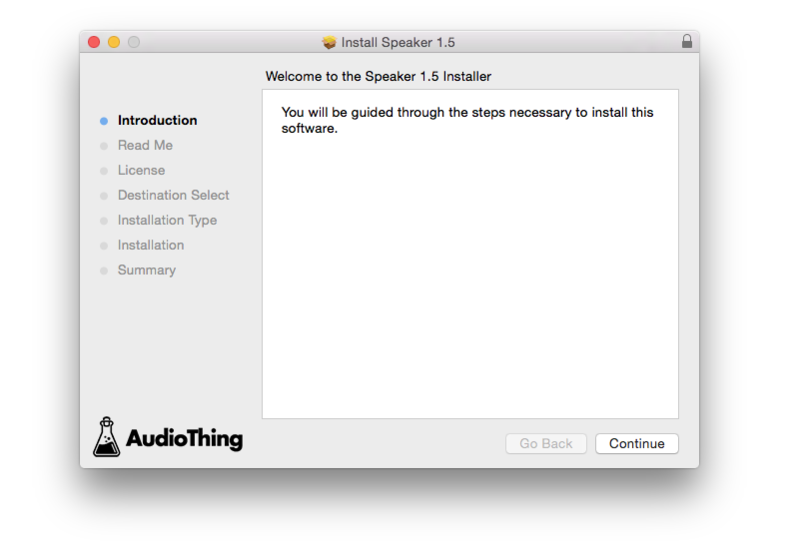
6. Double-click the installer icon to begin the installation process > click ‘Continue’.
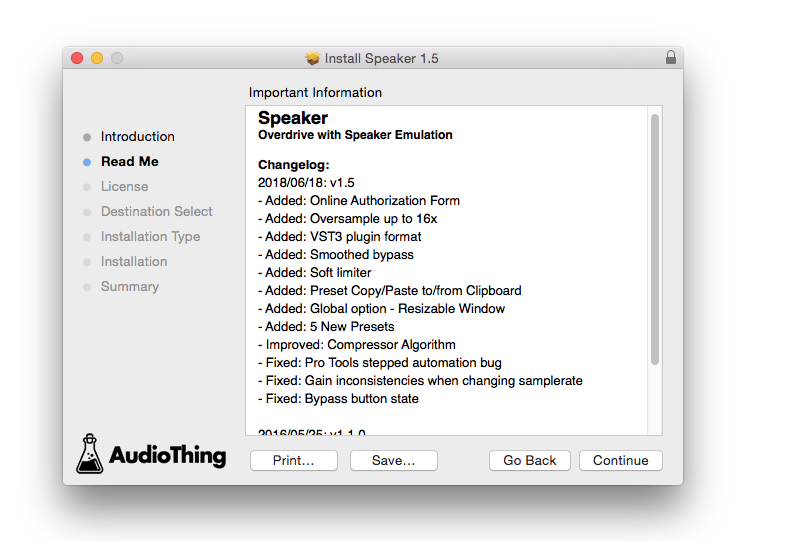
7. Read the info and click ‘Continue’.
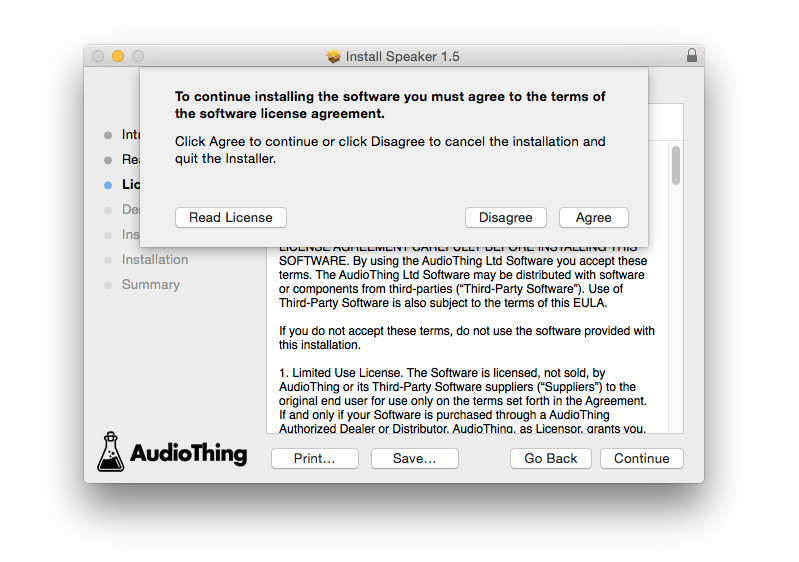
8. Read the Software License Agreement > click ‘Continue’ and then ‘Agree’.
8. Select the component (s) that you wish to install to your computer, and click ‘Continue’.

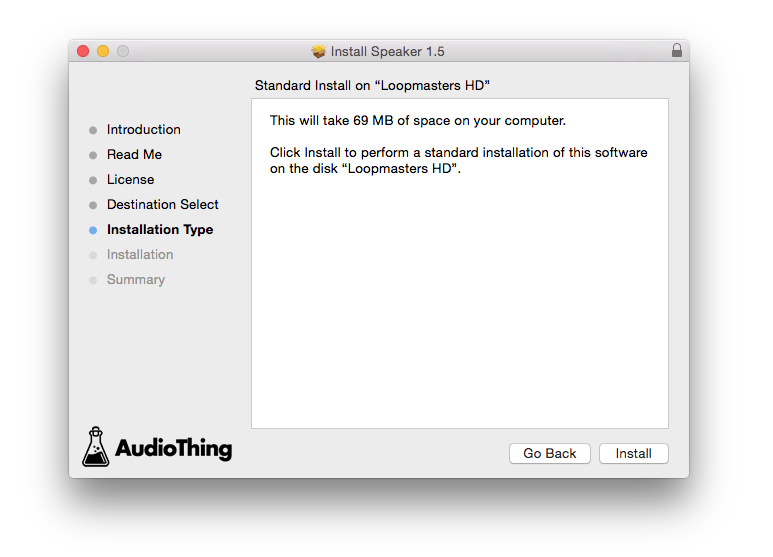
9. Review the installation and click ‘Install’.
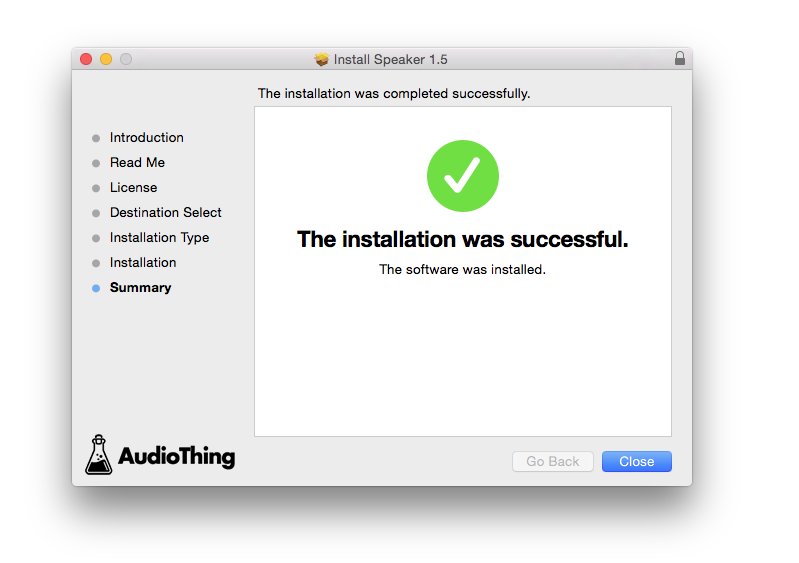
10. The installation of your software has successfully completed > click ‘Close’.
Offline Activation
1. Restart your DAW, and rescan your plugin selection to show the new installation (in the event it fails to appear).
2. Locate and open the plugin on an appropriate track. You will be greeted by the window shown below > click 'Offline'.
3. Load or drag and drop the downloaded Key License File into the box to activate your software.
4. The software is now activated and ready for use within your DAW.
Online Activation
1. Restart your DAW, and rescan your plugin selection to show the new installation (in the event it fails to appear).
2. Locate and open the plugin on an appropriate track. You will be greeted by the window shown below > click 'Online'.
3. Enter your registered account email and password details > click 'Log In'.
4. The software is now activated and ready for use within your DAW.


 Log In