Notes:
- House Arrest is used as the example.
- Pop-up windows must be allowed within your web browser's Settings area to allow the opening of the hyperlinks provided beow, which enable you to watch the tutorial videos.
Maschine has a slightly different install process depending on the version you have. Please follow the guidelines below and see the additional notes if you are experiencing difficulties.
1. Download the purchased Niche Audio software .zip folder provided within your User Account, to your computer.
2. Double-click the .zip folder to open and reveal its contents > save it to a computer location of choice, e.g documents or your external hard drive.
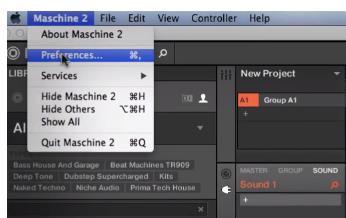
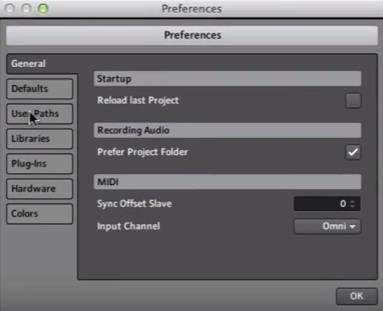
3. Launch Maschine and select the ‘Preferences’ tab via the drop-down selection, which is located via the ‘Maschine 2’ option at the top left toolbar.
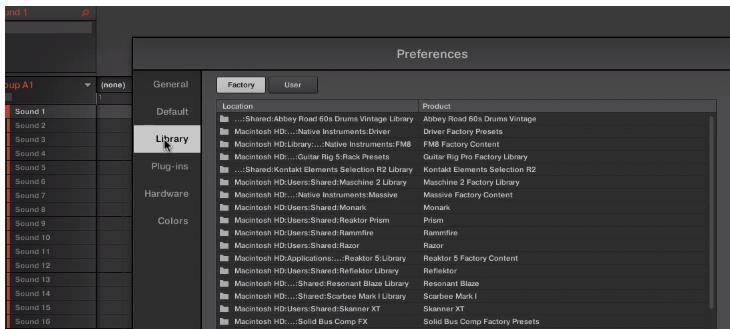
4. Select ‘Library’.
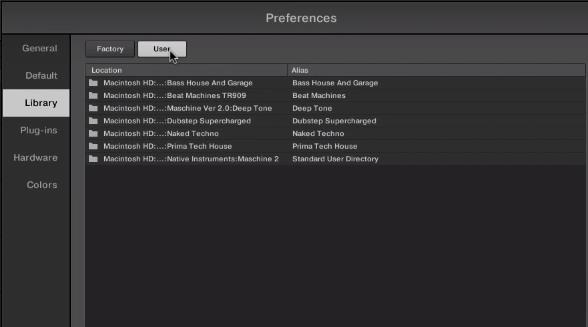
5. Click the ‘User’ tab.
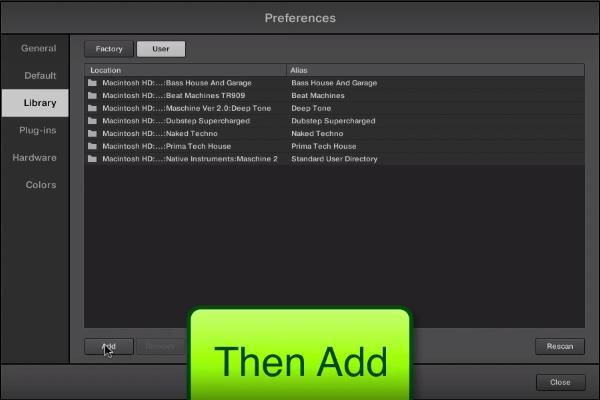
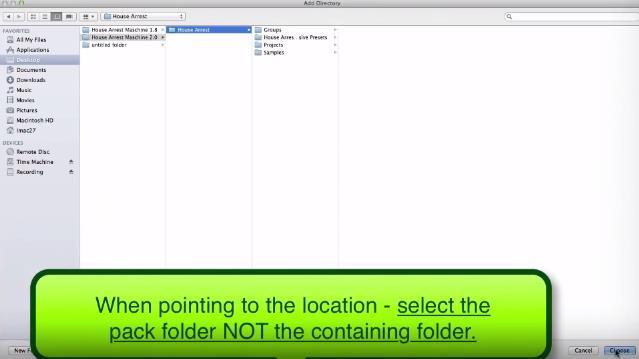
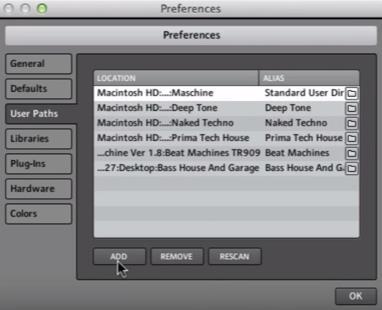
6. Click ‘Add’ to open the file browser, and then locate the pack’s main folder which contains sub-folders entitled ‘Groups’, ‘Massive Patches’, ‘Projects’, and ‘Samples’.
7. Be sure to select the main pack folder, which in this instance is ‘House Arrest’ > once performed, click the ‘Choose/Open’ option that is located at the bottom right-hand corner of the Mac - Finder/Windows - Library window.
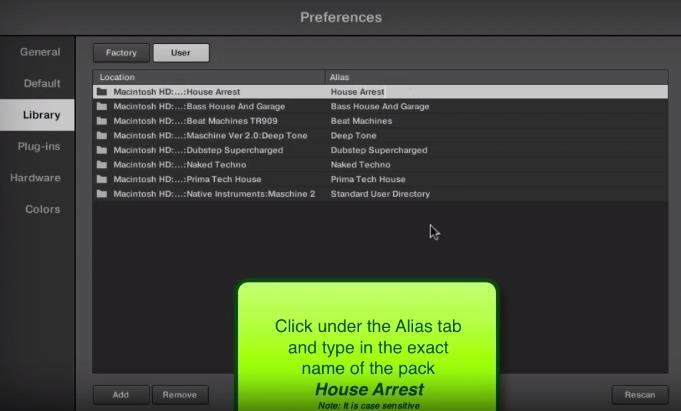
8. After the folder has been located, you will then need to enter and add an alias name for the pack e.g ‘House Arrest’ > double-click underneath the ‘Alias’ tab (where it reads ‘Click here to set an alias name’) and type the exact name of the pack, including numbers, capitals and symbols.

9. Once this has been performed, select ‘Close’ and the Niche Audio pack content will automatically upload to Maschine.
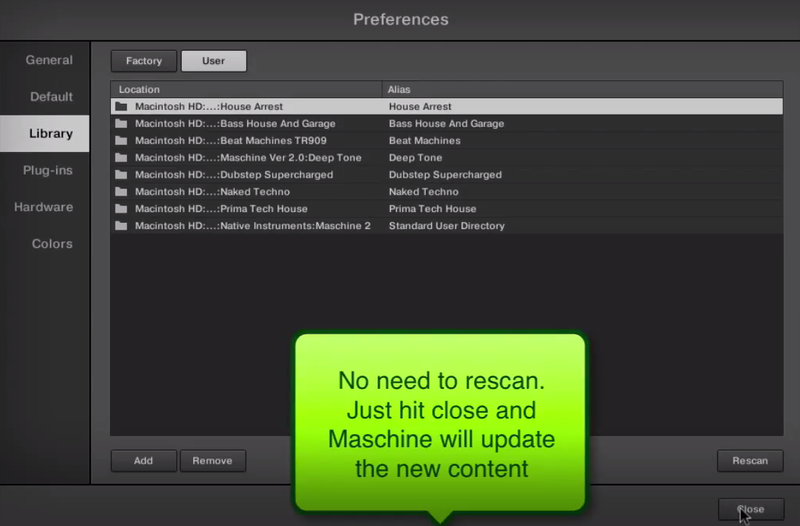
10. Select ‘Close’ once again to exit the preferences window, and you will then see the pack’s content within your user library!
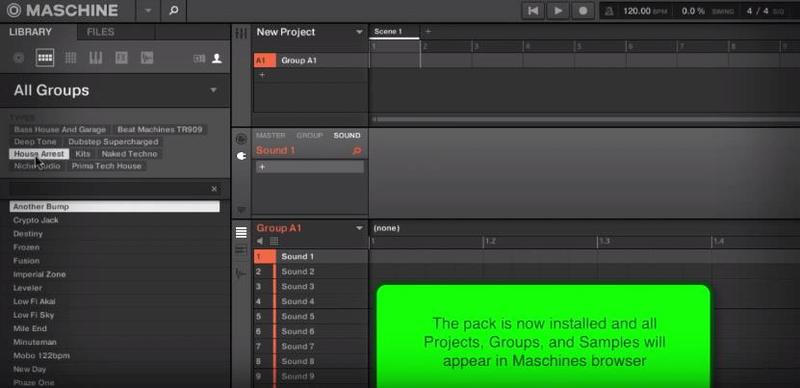
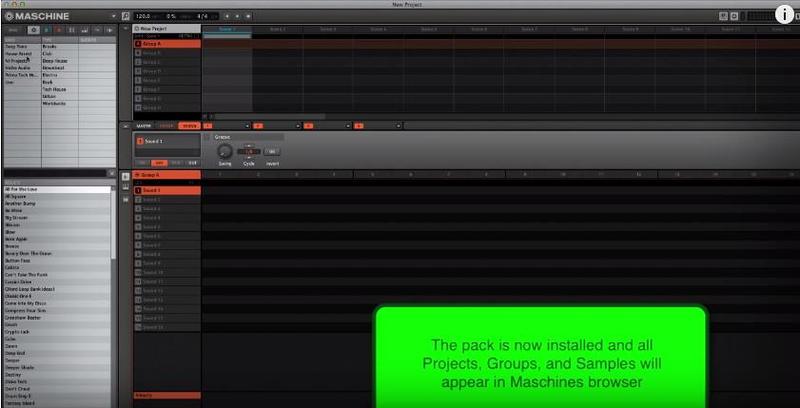
The Pack is now Installed and Ready for Use Within Maschine!
(Note: Skip to 2.02 mins)
1. Download the purchased Niche Audio software .zip folder provided within your User Account, to your computer.
2. Double-click the .zip folder to open and reveal its contents > save it to a computer location of choice, e.g documents or your external hard drive.
3. Launch Maschine and select the ‘Preferences’ tab via the drop-down selection, which is located via the ‘Maschine’ option at the top left toolbar.
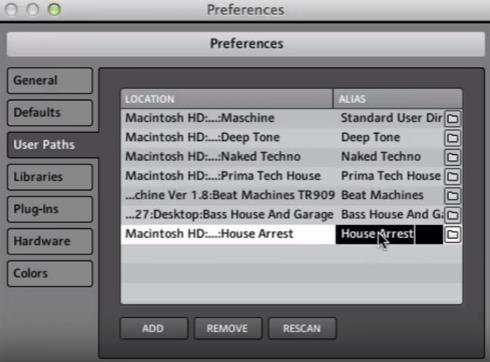
4. Click ‘User Paths’.
5. Click ‘Add’.
6. Locate the main Niche Audio 1.8 folder, which in this instance is entitled ‘House Arrest Maschine 1.8’.
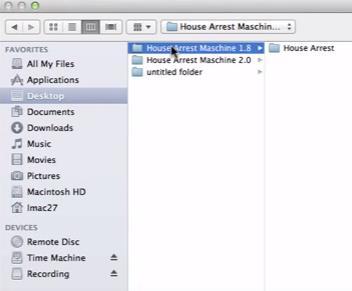
7. Be sure to select the main pack folder, which in this instance is ‘House Arrest’ > once selected, click the ‘Choose/Open’ option that is located at the bottom right-hand corner of the Mac - Finder/Windows - Library window.
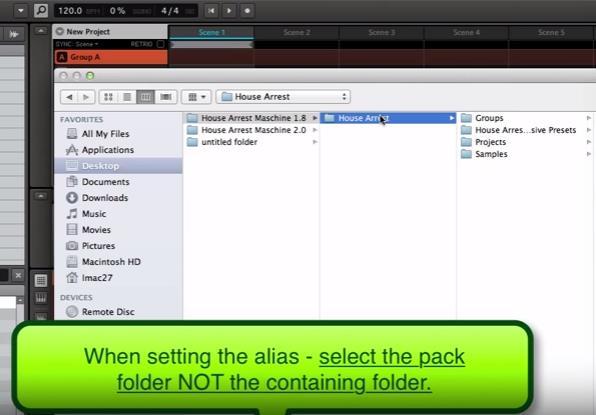
8. After the folder has been located, you will then need to enter and add an alias name for the pack e.g ‘House Arrest’ > double-click underneath the ‘Alias’ tab (where it reads ‘Click here to set an alias name’) and type the exact name of the pack, including numbers, capitals and symbols.
9. Once this has been performed, select ‘OK’ and the Niche Audio pack content will automatically upload to Maschine.
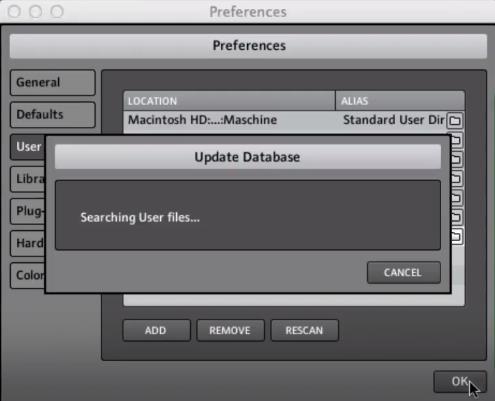
10. Select ‘OK’ once again to exit the preferences window, and you will then see the pack’s content within your user library!
The Pack is now Installed and Ready for Use Within Maschine!
Install Problem?
- If you have previously installed a Maschine Pack and the groups or projects are not loading, please ensure that you have installed the correct pack for your version of Maschine
- Also check that you have created an alias to the sample pack, so that Maschine can locate the projects: For example, the alias should be written as ‘House Arrest’
Note: The alias should not be written as ‘house arrest’
- If you do not type the exact name of the pack, it will not install correctly
- If you encounter any issues when attempting to install your purchased Niche Audio pack, it is advisable to uninstall the pack entirely from Maschine before re-installing it, to prevent any further cross-referencing problems
Uninstalling the Pack
1. Go to Maschine’s ‘Preferences’ tab, which is located at the top-left toolbar.
2. Select the ‘Library’ tab, followed by the ‘User’ option.
3. Remove any previous location path to the Niche Audio packs, and then close/quit Maschine.
4. Reopen Maschine and create a new project - this is necessary to clear the software history.
5. Quit Maschine, reopen it and follow the instructions from step 1 of the installation process.
Ableton Live Pack Installation Guide
(Note: Post Dubstep & Future Garage is used as the example).
1. Download the .zip folder provided within your User Account, and double-click it to extract its contents > save it to a computer location of choice, e.g documents or to your external hard drive.
2. Locate the .alp file and double-click it > Live will automatically open and ask where you would like to install the project folder.
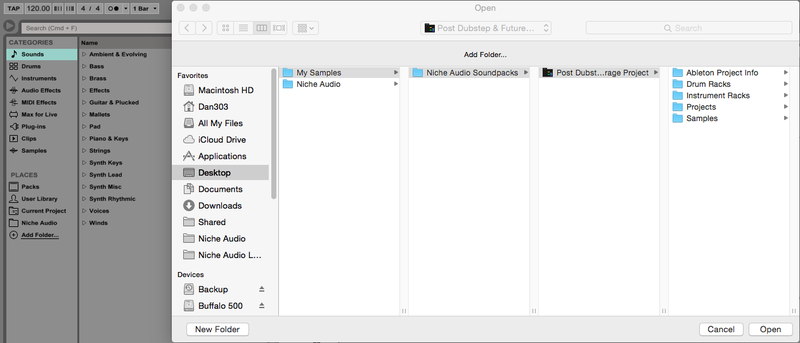
3. Locate the main extracted folder from the computer location that you saved it in (in step 1. of the installation process) > click 'Open' and Live will begin the unpacking process.
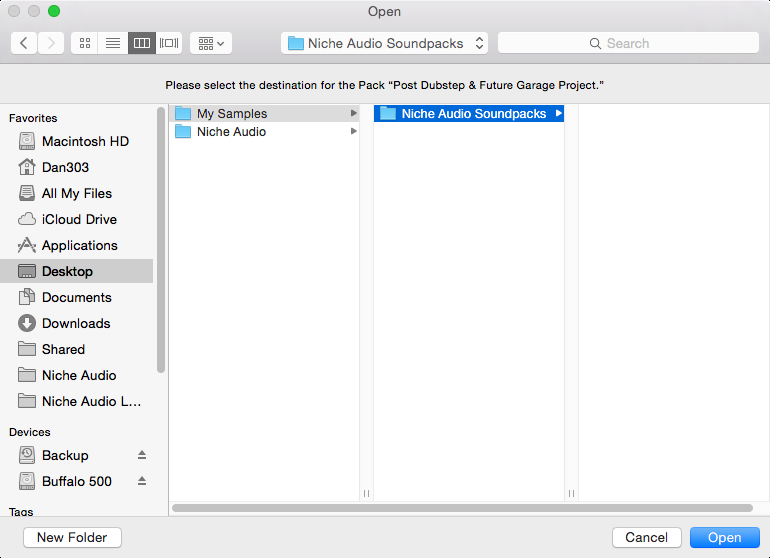
4. Once the unpacking process is finished you will need to tell Ableton Live where the pack is.
5. Within Ableton’s browser, select the ‘Add Folder’ option and then the project folder that you have installed.
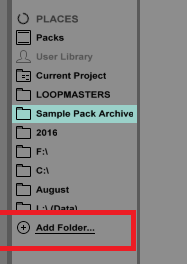
6. Click 'Open' and Ableton will add the pack to the browser for easy access.
7. The Ableton Live Pack is now ready for use within the DAW.


 Log In
