Buy Zen Delay Virtual, get a free gift with purchase:
Zen Delay Virtual
After the phenomena of the Zen Delay hardware unit, and more than a year of intensive development work, the Zen Delay Virtual plugin, aka ZDV, is now out.
For this the Ninja Tune / Erica Synths team teamed up with VCV code wizard Raphael Hoffman to create a powerful effects plugin with extreme possibilities and playability.
ZDV is not simply a digital replica or replacement of the (admittedly universally acclaimed) original hardware, but an addition to it.
Like its metal boxed voodoo tube progenitor, ZDV is about opening up the joy of playing, experimenting, mutating and mashing sounds.
But the approaches and requirements for live use are much different from studio recording. Which is where the ZDV is designed to shine.
Quite apart from the complete automation possibilities afforded by the DAW…
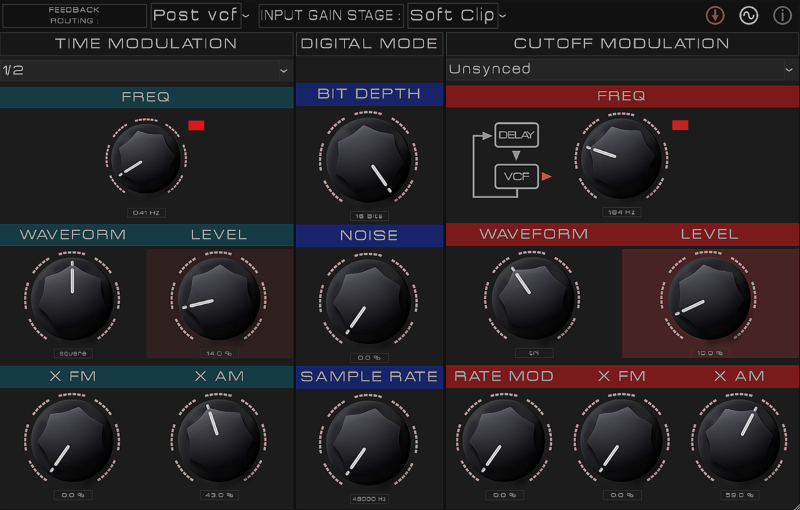
The new LFO page breathes surprising rhythmic animation to life, controlling Filter and Delay, allowing chorus effect, drones and constantly evolving experimentation thanks to the FM and AM controls.
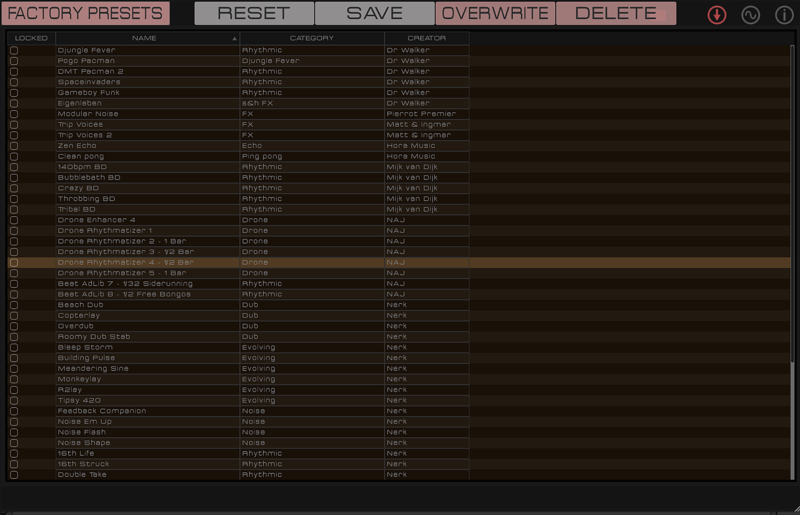
The preset manager helps to save your own effect settings. Comes with a selection of killer presets from the developer's talented team of sound smiths such as Mijk van Dijk, Nerk from TokTok, Dr Walker of Air Liquide, Indian electronic artist Kiss Nuka and others.
The groove timings of the various triplets and dotted delay times were requested by many Zen Delay hardware users and Erica Synths had to say YES let’s swing the Zen.
Unlike the hardware, it’s also possible to change the routing between the delay and filter stages, even inserting the filter within the feedback loop.
The ZDV is a studio secret weapon for all possible instruments: drums, basses, keys, guitars, vocals, FX, Foley ....no matter your choice of instruments or sonic sources, the ZDV will help you refine, redefine and remould your sound in fascinating ways.
And no matter in which sounds and music genres you delight, ZDV is an audio ally of the finest mettle.
Finally, it should be mentioned that for every license sold, one five-year old oak tree is planted by the Liquid Sky artistcollective reforestation project in southern Portugal, cared for until the tree can survive by itself.
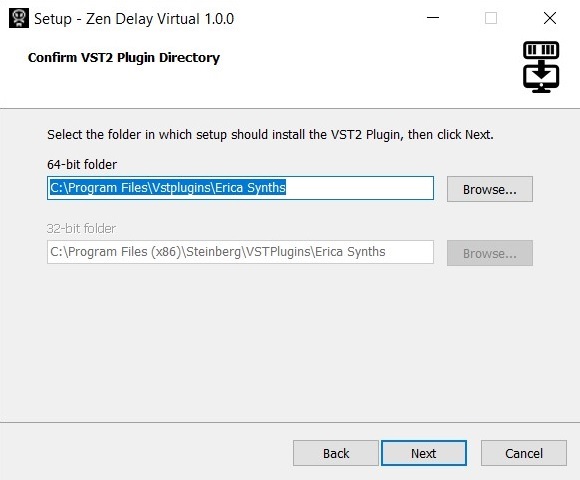
System Requirements
Mac
- mac OS 10.15 and newer
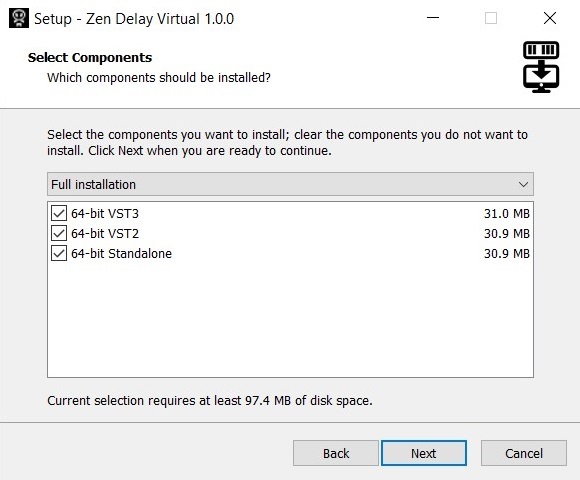
- Available in VST2, VST3, AU, and standalone formats.
Windows
- Windows 10 and higher
- Available in VST2, VST3, and standalone formats.
Step 1 - Getting Started with iLok
First, you will need to activate your new license using the iLok License Manager. Please use the guides below for help how to do this:
If you don't have an iLok account please use this guide:
Getting started with the iLok License Manager
If you already have an iLok account please move ahead to this guide:
Activating a license with the iLok License Manager
-
Step 2 - Download and Install
PC
An Important Note from the Manufacturer for Windows Users: Please ensure that Zen Delay Virtual is being installed into the proper plug-in paths used by your DAW. The default locations set in the installer will work for most users, but the installation locations of plug-ins on Windows is not 100% standardized yet. You may need to browse to the correct locations of where your VST2 and VST3 plug-ins are installed to ensure Zen Delay Virtual is also installed there. Otherwise, Zen Delay Virtual might not be found by your DAW.
1. Download the installer file from within your Plugin Boutique User Account and open it to begin the installation.
2. Select 'I accept the agreement', then click 'Next'.
3. Select the components you wish to install, and click 'Next'.
4. Ensure that the plugin is being installed to the correct VST2 directory, then click 'Next'.
5. Click 'Next'.
6. Your plugin will now install. Click 'Close' once complete.
7. To begin the activation process, simply launch the Zen Delay Virtual standalone app or load Zen Delay Virtual into your DAW. A screen will appear saying that Zen Delay Virtual needs to be activated. Click the “Try” button to start a 7-day trial, or click the “Activate” button in the bottom-right corner of the screen to enter the activation code as found within your Plugin Boutique User Account.
8. After clicking “Activate”, it will then ask you to input the Activation Code that you received upon purchasing Zen Delay Virtual. Copy and paste the activation code from within your Plugin Boutique User Account and paste it into the prompted box. This will then activate your license in your iLok Account.
9. When you then run iLok License Manager, you will have a license standing by in your account, and you simply need to drag it to the location where you want to install the license:
- If you want to install it on your iLok, connect your iLok and then drag the license to the iLok entry in the left sidebar.
- If you want to install the license into your iLok Cloud, drag it to the iLok Cloud entry in the sidebar.
- If you want to install the license directly on the computer, drag it to your computer shown in the left sidebar
Your Plugin Is Now Activated and Ready to Use!
Mac
1. Download the installer file from within your Plugin Boutique User Account and open it to begin the installation.
2. Click 'Continue'.

3. Read the software licence agreement then click 'Continue'.

4. Click 'Agree'.

5. Click 'Install'.

6. Click 'Close'.

7. To begin the activation process, simply launch the Zen Delay Virtual standalone app or load Zen Delay Virtual into your DAW. A screen will appear saying that Zen Delay Virtual needs to be activated. Click the “Try” button to start a 7-day trial, or click the “Activate” button in the bottom-right corner of the screen to enter the activation code as found within your Plugin Boutique User Account.

8. After clicking “Activate”, it will then ask you to input the Activation Code that you received upon purchasing Zen Delay Virtual. Copy and paste the activation code from within your Plugin Boutique User Account and paste it into the prompted box. This will then activate your license in your iLok Account.

9. When you then run iLok License Manager, you will have a license standing by in your account, and you simply need to drag it to the location where you want to install the license:
- If you want to install it on your iLok, connect your iLok and then drag the license to the iLok entry in the left sidebar.
- If you want to install the license into your iLok Cloud, drag it to the iLok Cloud entry in the sidebar.
- If you want to install the license directly on the computer, drag it to your computer shown in the left sidebar
Your Plugin Is Now Activated and Ready to Use!


