(SubBoomBass is used as the example).
Mac
1. Visit Rob Papen and create an account by selecting 'Create Account'.

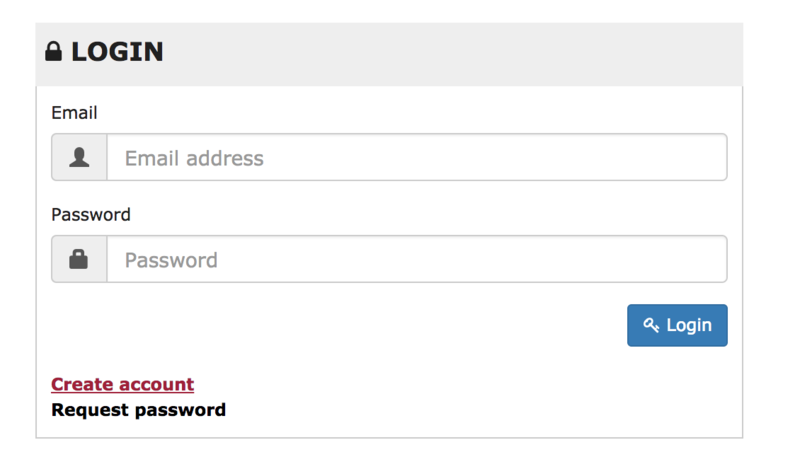
Note: If you already have an account set up with Ron Papen, 'Login' to your account and skip to step 4. of the installation process.

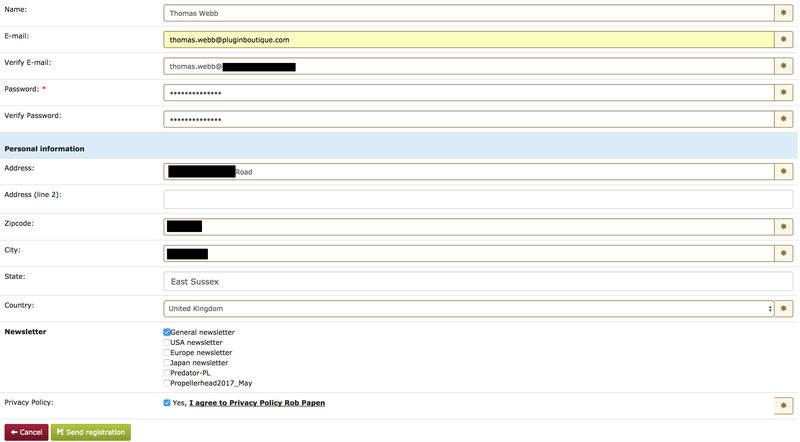
2. Enter your personal details, and once completed check the tick box that reads 'Yes, I agree to Privacy Policy Rob Papen' before clicking 'Send Registration'.
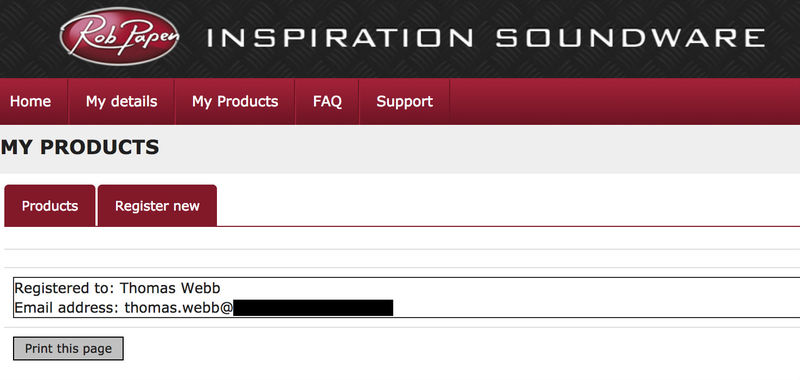
3. The registration of your account has successfully been completed > select 'click here to login' to access your account area.

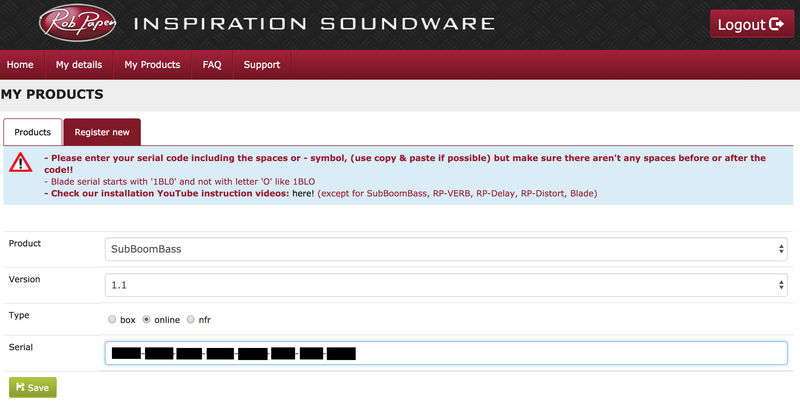
4. Select the 'My Products' tab, which is located at the top-left corner of your account area.


5. Click the 'Register New' option.

6. Select the product that you have purchased, as well as the most recent version number (which in this instance is 'Online'), before manually entering/copying and pasting the 32-digit Serial Number that is provided within your User Account > once completed, click the 'Save' tab to register your software.
Note: Ensure that you select the correct 'Product' and 'Type', as well as checking that there are no spaces/mistakes when entering your Serial Number > if you receive a code error message of any kind, refresh the web page and manually enter the digits (including the '-' hyphens) before re-clicking the 'Save' option.
7. The registration of your software has successfully completed > select the 'Download latest version: SubBoomBass' hyperlink to navigate to the software download area.

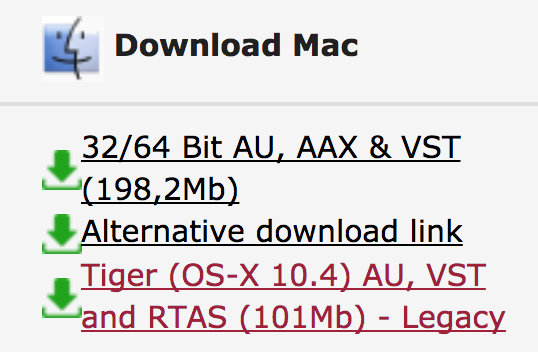
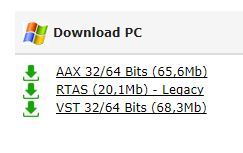
8. Select the relevant format installer download (s) in accordance with your DAW's compability specifications, to inititiate the downloading of your purchased software.
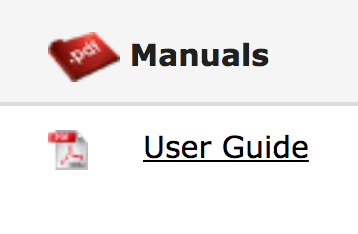
Note: The product user manual is also obtainable from this location.
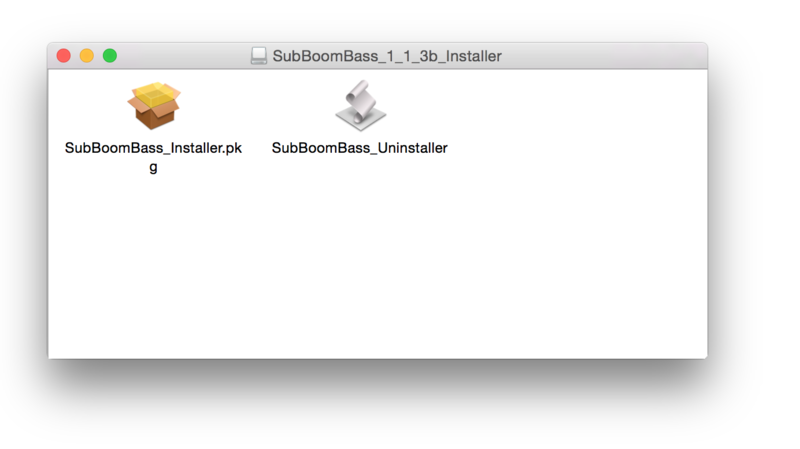
9. Once the software installer file has finished downloading, click the file entitled 'SubBoomBass_Installer.dmg' to launch the application installer application.
10. Double-click the 'SubBoomBass_Installer.pkg' application icon begin the installation process.
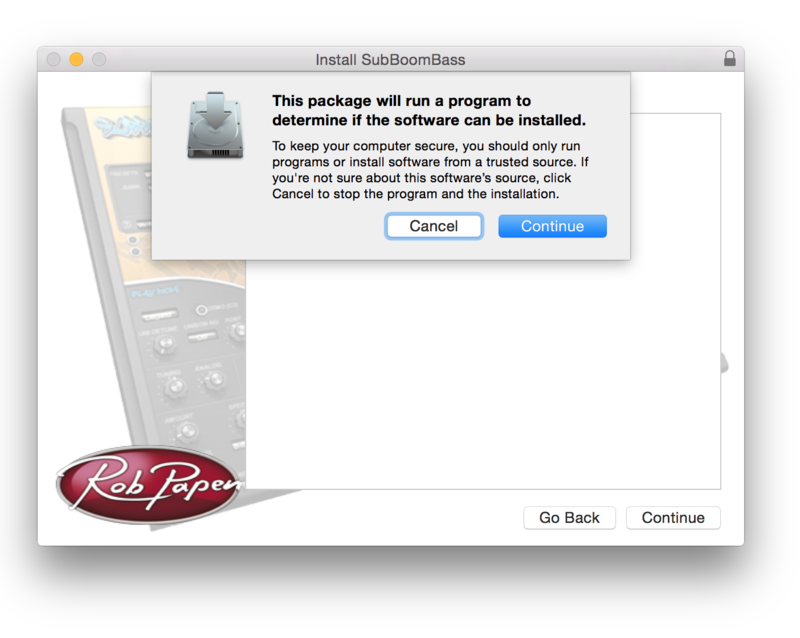
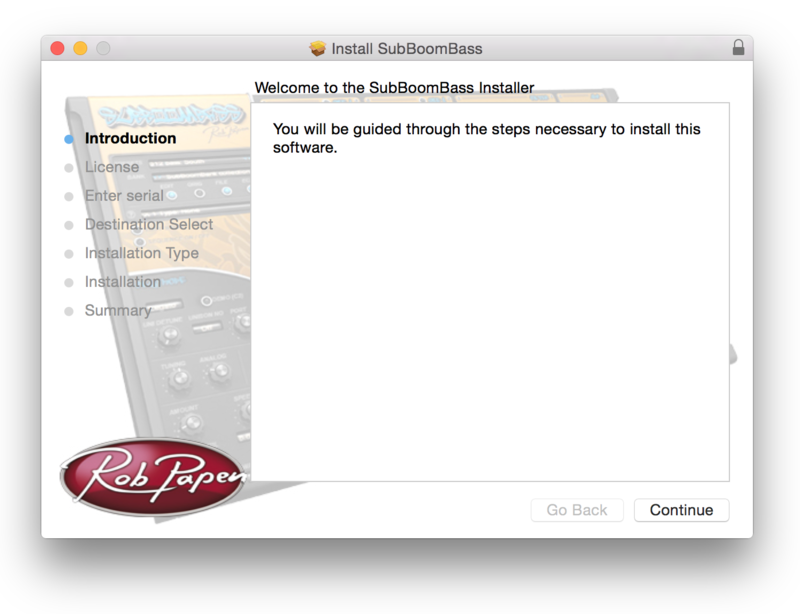
11. Click 'Continue' to verify the installation, if prompted to do so.
12. Click 'Continue' once again.
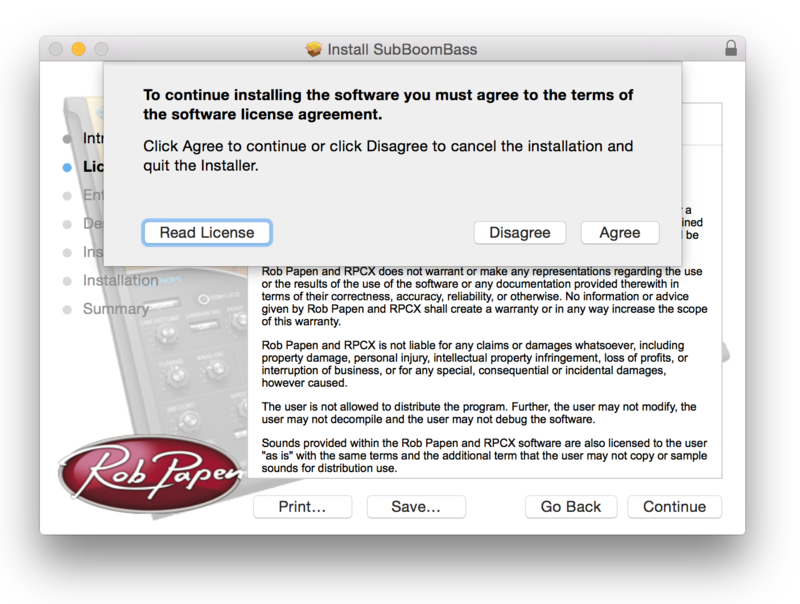
13. Read through the Licence Agreement > click 'Continue' then 'Agree'.
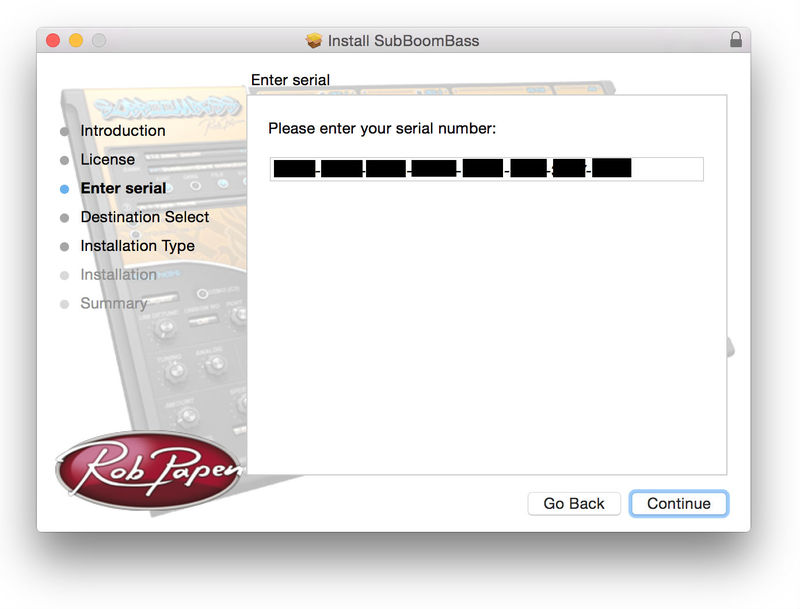
14. Manually enter/copy and paste the original 32-digit Serial Number that you were provided with, before clicking 'Continue' (the Serial Number is located in both your Plugin Boutique and Rob Papen User Accounts).
Note: Ensure that you select the correct 'Product' and 'Type', as well as checkingt that there are no spaces/mistakes when entering your Serial Number > if you receive a code error message of any kind, manually enter the digits (including the '-' hyphens) before re-clicking the 'Continue' option.
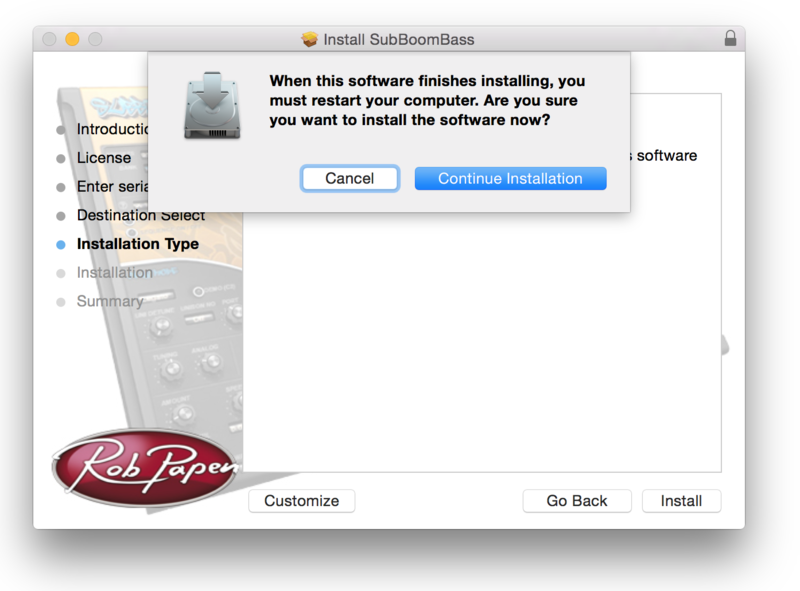
15. Review the installation before clicking 'Install', and then 'Continue Installation'.
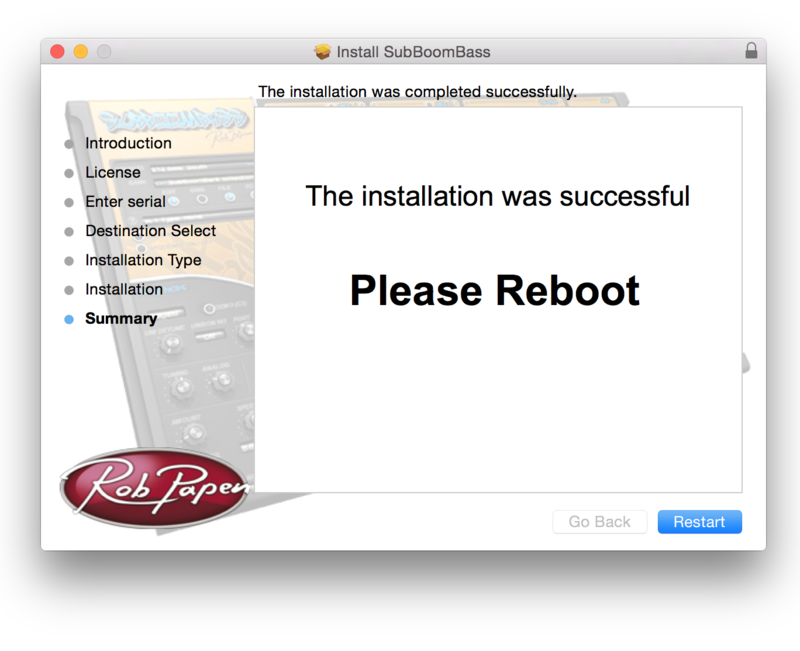
16. The installation of your software has successfully completed > click 'Restart' to reboot your computer.
Note: Ensure that you have saved any important work that may be open within the applications you currently have open, before selecting the 'Restart' option.
17. After your computer has successfully restarted, open your DAW and locate/open your newly installed/activated software VST.
Note: If the software fails to appear, rescan your DAW's Plug-in selection.
The Software is now Activated and Ready for Use Within Your DAW!

Windows
1. Visit Rob Papen and create an account by selecting 'Create Account'.
Note: If you already have an account set up with Ron Papen, 'Login' to your account and skip to step 4. of the installation process.
2. Enter your personal details, and once completed check the tick box that reads 'Yes, I agree to Privacy Policy Rob Papen' before clicking 'Send Registration'.
3. The registration of your account has successfully been completed > select 'click here to login' to access your account area.
4. Select the 'My Products' tab, which is located at the top-left corner of your account area.
5. Click the 'Register New' option.
6. Select the product that you have purchased, as well as the most recent version number (which in this instance is 'Online'), before manually entering/copying and pasting the 32-digit Serial Number that is provided within your User Account > once completed, click the 'Save' tab to register your software.
Note: Ensure that you select the correct 'Product' and 'Type', as well as checking that there are no spaces/mistakes when entering your Serial Number > if you receive a code error message of any kind, refresh the web page and manually enter the digits (including the '-' hyphens) before re-clicking the 'Save' option.
7. The registration of your software has successfully completed > select the 'Download latest version: SubBoomBass' hyperlink to navigate to the software download area.
8. Select the relevant format installer download (s) in accordance with your DAW's compability specifications, to inititiate the downloading of your purchased software.
Note: The product user manual is also obtainable from this location.
9. After the software installer file has finished downloading, double-click the file entitled 'SubBoomBass_Installer' .zip folder to extract the .exe installer file.
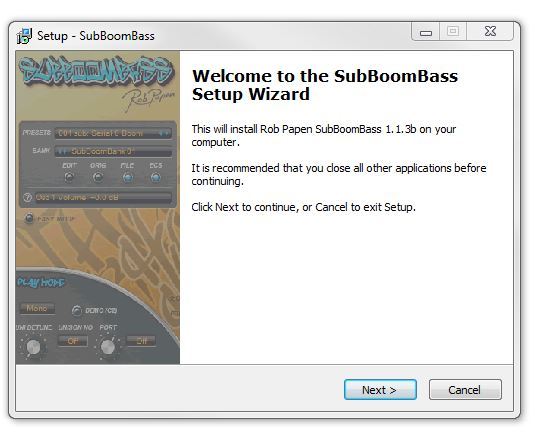
10. Once extracted, double-click the .exe installer file to begin the installation process > click 'Next'.
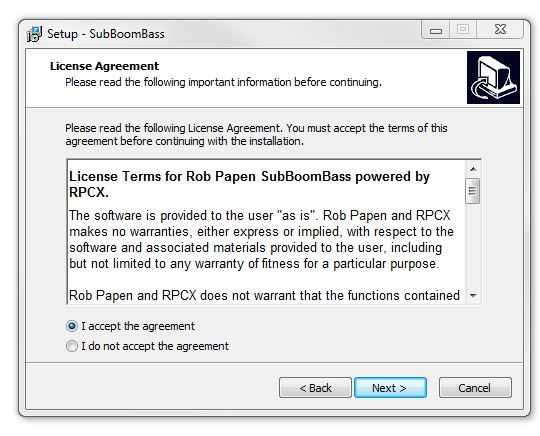
11. Read through the Licence Agreement and select 'I accept the agreement' > click 'Next'.
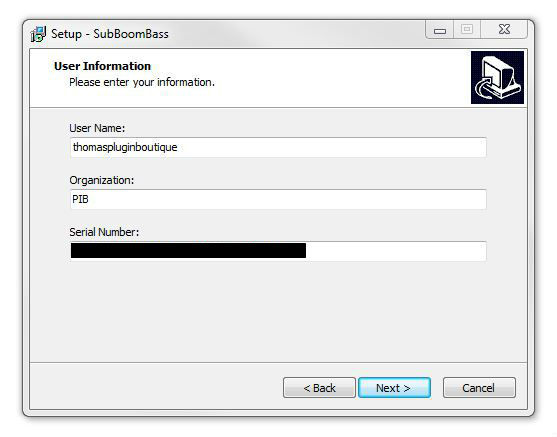
12. Type in your preferred User Name, Organization and manually enter/copy and paste the original Serial Number that you were provided with, before clicking 'Continue' (the Serial Number is located in both your Plugin Boutique and Rob Papen User Accounts).
Note: Ensure that you select the correct 'Product' and 'Type', as well as checking that there are no spaces/mistakes when entering your Serial Number > if you receive a code error message of any kind, manually enter the digits (including the '-' hyphens) before re-clicking the 'Next' option.
13. Select a computer VST Plug-ins folder destination in which to install/save your software to > click 'Next'.

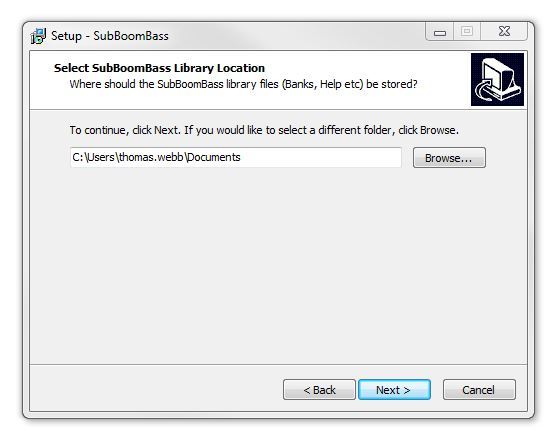
14. Select a computer Library location in which to install/save your software to > click 'Next'.
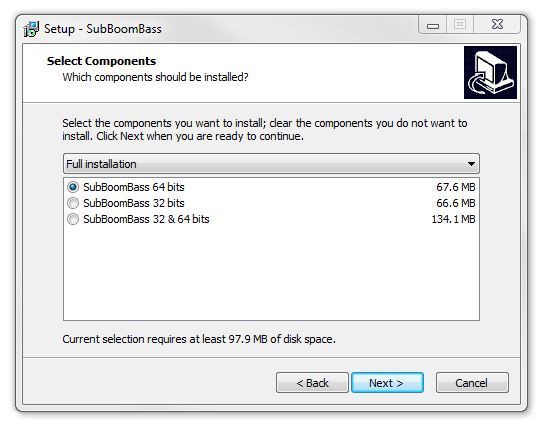
15. Select the software format (s) that you wish to install > click 'Next'.
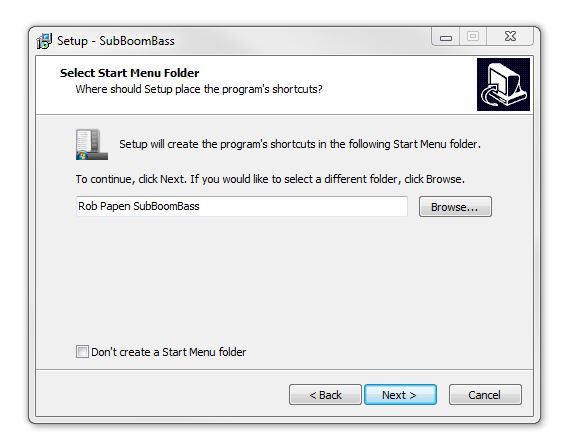
16. Select a Start Menu Folder to create a shortcut to your new software installation > click 'Next'.
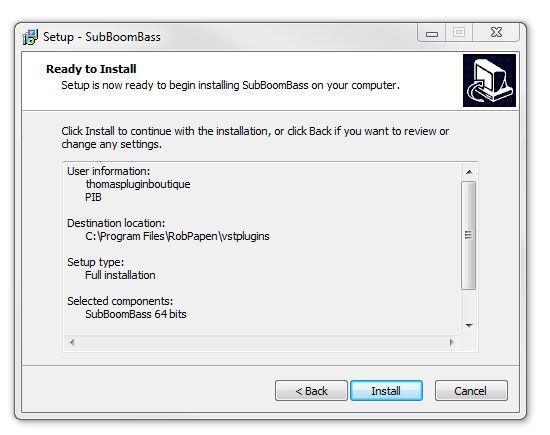
17. Review the installation and click 'Install'.
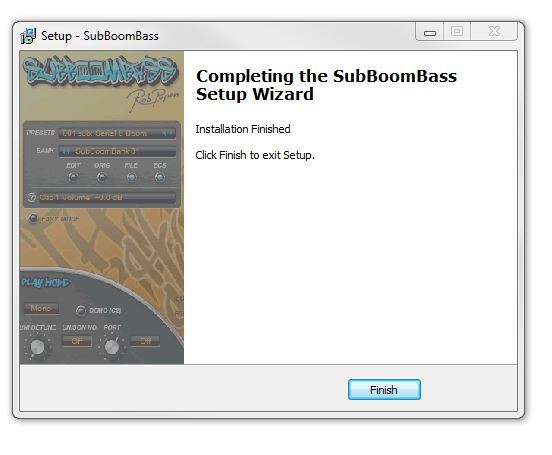
18. The installation of your software has successfully completed > click 'Finish'.
19. After your computer has successfully restarted, open your DAW and locate/open your newly installed/activated software VST.
Note: If the software fails to appear, rescan your DAW's Plug-in selection.
The Software is now Activated and Ready for Use Within Your DAW!


 Log In

