Buy Type X, get a free gift with purchase:
Dynamic Range Expander
Vintage Audio Enhancer
Type X is a faithful emulation of the dbx® Model 1BX, a compact dynamic range expander from the golden age of consumer hi-fi audio. Built to expand dynamics and add expressive contrast, Type X adds life, punch, and presence to any track by dynamically increasing the difference between loud and soft passages.
While the original was designed to enhance playback from compressed sources like tape or broadcast, Type X introduces modern flexibility. It features a sidechain input with high-pass and low-pass filters, allowing precise control over what drives the expansion. Additional parameters for internal attack and release times give you deeper shaping capabilities beyond the fixed response of the original hardware.
A Brief History of the dbx® 1BX
Introduced in 1978, the dbx® 1BX was designed to enhance the listening experience by increasing the dynamic range of audio playback. As a single-band expander, it aimed to make quiet sounds quieter and loud sounds louder, thereby restoring the natural dynamics often lost in recording and broadcasting processes.
With an expansion ratio adjustable up to 1.5:1, the 1BX could deliver up to a 50% improvement in stereo dynamic range across a wide frequency spectrum. This capability made it a valuable tool for audiophiles and professionals seeking to revitalize compressed audio sources like vinyl records, cassette tapes, and FM broadcasts.
The success of the 1BX led to subsequent models, including the 1BX Series II and 1BX Series III, which introduced additional features and refinements. These units remained popular among enthusiasts for their ability to breathe new life into vintage audio recordings.
How does it work?
Type X works by applying wideband dynamic expansion, a process that increases the difference between quiet and loud parts of a signal. Instead of compressing like a traditional compressor, it does the opposite: quiet sounds get quieter, and loud sounds stay loud (or even get slightly louder), making the music feel more dynamic and expressive.
Internally, Type X analyzes the input signal using a true RMS detector, just like the original hardware, to track its average energy over time. When the signal crosses a user-defined transition level, the expander applies gain changes based on the expansion ratio, with adjustable attack and release to shape how quickly it responds.
Type X also includes a filtered sidechain that lets you shape exactly what content triggers the expansion.
You can choose between the main input and an external sidechain signal as the source, then sculpt it with dedicated high-pass and low-pass filters. Use the Gain control to adjust the sidechain level independently, ensuring consistent triggering even with quiet or loud material.
You can also enable source listening to hear exactly what audio is being used by the expander.
Features
- Dynamic Range Expander
- Single Band with Attack and Release
- Sidechain with Filter
- Oversample up to 16x
- Brightness and Contrast Controls
- Resizable Window
- Preset system with randomizer
System Requirements
Windows
- Windows 7 – 11
- 2GHz CPU, 4 GB RAM
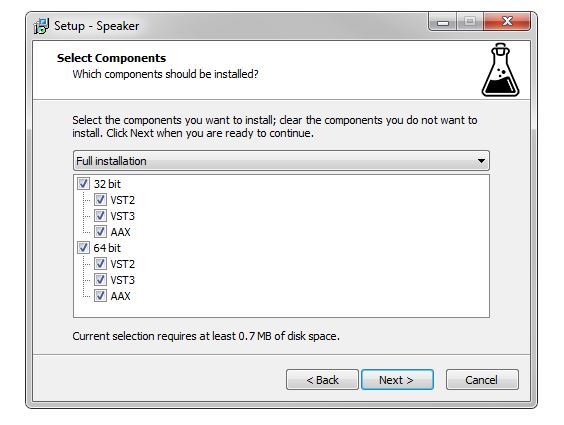
- VST2, VST3, AAX, CLAP, Standalone (64-bit)
Mac
- macOS 10.13 – macOS 15
- 2GHz CPU, 4 GB RAM
- VST2, VST3, AU, AAX, CLAP, Standalone (64-bit)
- Universal 2 Binary
Linux
- Ubuntu 20.04 LTS
- 2GHz CPU, 4 GB RAM
- VST2, VST3, CLAP, Standalone (64-bit)
Note: Speaker is used as the example.
Windows
1. Visit the AudioThing Login/Registration Page and enter your personal details to set up an account > then read the 'Privacy Policy' and tick the box before clicking 'Sign Up'.
Note: If you already have an existing AudioThing account, Login here and skip to step 3 of the installation process.

2. A confirmation email will now be sent to your registered email > click the link within the email to activate your account and Login here.
3. Once logged into your account, visit the Redeem Page and copy and paste the serial number from your User Account into the box provided > then click 'Redeem'.

4. Download your preferred installer as well as the Activation Licence Key.
Note: Click the ‘license.atl’ file, e.g ‘speaker_license.atl’ to download it to your computer > be sure to save this to a memorable computer location so that you can easily locate and upload it when activating your software.

5. Double-click the compressed folder to reveal the installer file.
6. Double-click the extracted .exe file > click ‘Run' to open the installation window.

7. Read through the license agreement and click ‘I accept the agreement’ > click ‘Next’.

8. Select the component (s) that you wish to install > click ‘Next’.

9. Choose and confirm the 64-bit plugin directory in which to save your software to > click ‘Next’.

10. Choose and confirm the 32-bit plugin directory in which to save your software to > click ‘Next’.

11. Review the installation and click ‘Install’.

12. The installation of your software has successfully completed > click ‘Finish’.

Offline Activation
1. Restart your DAW, and rescan your plugin selection to show the new installation (in the event it fails to appear).
2. Locate and open the plugin on an appropriate track. You will be greeted by the window shown below > click 'Offline'.

3. Load or drag and drop the downloaded Key License File into the box to activate your software.

4. The software is now activated and ready for use within your DAW.

Online Activation
1. Restart your DAW, and rescan your plugin selection to show the new installation (in the event it fails to appear).
2. Locate and open the plugin on an appropriate track. You will be greeted by the window shown below > click 'Online'.

3. Enter your registered account email and password details > click 'Log In'.

4. The software is now activated and ready for use within your DAW.

Mac
1. Visit the AudioThing Login/Registration Page and enter your personal details to set up an account > then read the 'Privacy Policy' and tick the box before clicking 'Sign Up'.
Note: If you already have an existing AudioThing account, Login here and skip to step 3 of the installation process.

2. A confirmation email will now be sent to your registered email > click the link within the email to activate your account and Login here.
3. Once logged into your account, visit the Redeem Page and copy and paste the serial number from your User Account into the box provided > then click 'Redeem'.

4. Download your preferred installer as well as the Activation Licence Key.
Note: Click the ‘license.atl’ file, e.g ‘speaker_license.atl’ to download it to your computer > be sure to save this to a memorable computer location so that you can easily locate and upload it when activating your software.

5. Double-click the .dmg file to open the installer window.

6. Double-click the installer icon to begin the installation process > click ‘Continue’.

7. Read the info and click ‘Continue’.

8. Read the Software License Agreement > click ‘Continue’ and then ‘Agree’.

8. Select the component (s) that you wish to install to your computer, and click ‘Continue’.

9. Review the installation and click ‘Install’.

10. The installation of your software has successfully completed > click ‘Close’.

Offline Activation
1. Restart your DAW, and rescan your plugin selection to show the new installation (in the event it fails to appear).
2. Locate and open the plugin on an appropriate track. You will be greeted by the window shown below > click 'Offline'.

3. Load or drag and drop the downloaded Key License File into the box to activate your software.

4. The software is now activated and ready for use within your DAW.

Online Activation
1. Restart your DAW, and rescan your plugin selection to show the new installation (in the event it fails to appear).
2. Locate and open the plugin on an appropriate track. You will be greeted by the window shown below > click 'Online'.

3. Enter your registered account email and password details > click 'Log In'.

4. The software is now activated and ready for use within your DAW.
