


 Log In

Free gifts available with your purchase
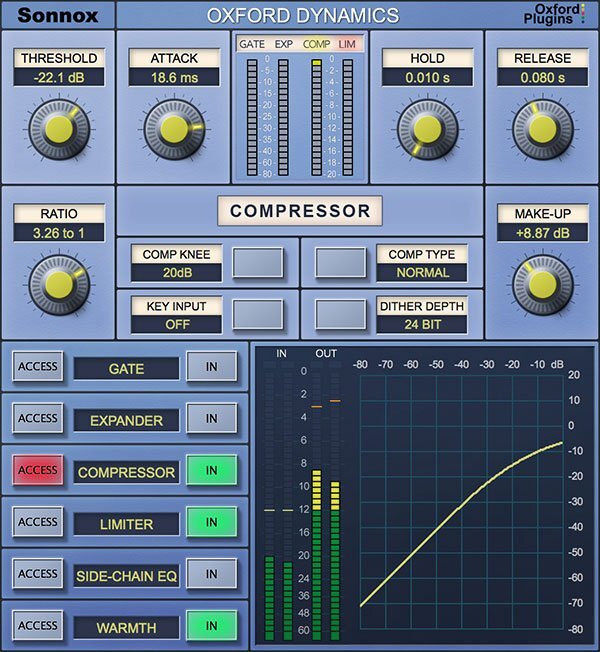
A powerful all-in-one dynamics control plugin
Oxford Dynamics is a powerhouse of dynamic control in a single plugin that features six independent processes for precision dynamic sculpting of your tracks.
- Gate
- Expander
- Compressor
- Limiter
- 2-band side-chain EQ
- Warmth control
From subtle control of a vocal to a pumping side-chained effect; from lightning-fast gating and precision expansion to peak level limiting of single tracks and buses alike. Sonic clarity at all times – with the option of tube-like harmonic saturation when you need it.
Features
- Gate, Expander, Compressor, Limiter & 2-band side-chain EQ
- Warmth for extra presence and tube-like saturation
- 3 different compressor types; Normal, Classic and Linear
- Variable soft knee; 0 dBr to –20 dBr in 5 dB steps
- Ultra-low noise and distortion
- The dynamics section from the acclaimed Sony OXF-R3 console
System Requirements
macOS
- macOS 10.12 or later (Intel / M1 Apple Silicon supported) (64-bit only)
- Plugin Formats - AAX Native, AU, VST3
- Supported Hosts - Pro Tools 11 or above or any desktop application that supports Audio Unit (AU) or VST3 plugins.
Windows
- Windows 10 or later
- Plugin Formats - AAX Native, VST3
- Supported Hosts - Pro Tools 11 or above or any desktop application that supports VST3 plugins.
Activation
The Toolbox range offers 2 activations for each product licence you buy.
Providing you have an iLok account, each activation will allow you to authorise your plugin on one of these devices:
- Machine
- iLok device, iLok2 / iLok3 required with latest drivers OR
- iLok Cloud (Active internet connection required)
Sebastian Arocha-Morton
LA-based film & TV composer & Grammy-nominated songwriter/producer.
"This is an unbelievable channel strip for any genre of music."
Headhunterz
Dutch Hardstyle DJ/Producer.
"My favourite 'go to' compressor is the Oxford. Whenever I switch this on and start taking down the threshold, it already sounds amazing."
Madeon
Electro House/Pop Producer from France.
"The ones that really matter to me are the Oxford Dynamics Compressor, which I've used since day one."
