


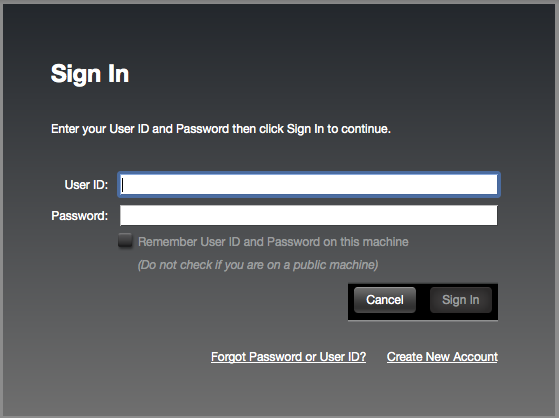
 Log In

Free gifts available with your purchase
Vocal Flow
Vocal Flow is an all-in-one signal processing suite for mixing vocals in music. It contains 7 routable signal processing elements along with input and output controls.
The elements included are:
- Vocal Character - A unique 2-band vocal EQ designed to “follow” the pitch of the vocal notes.
- 32c Channel EQ - A 4-band EQ complete with High & Low Filters. Directly based on the Harrison 32c consoles highly sought after channel EQ.
- De-Esser - A specialized Compressor for removing sibilance in vocals or speech. Based on the X-Tool DSP found in Harrison MPC digital consoles.
- Leveler - A handy Compressor derived from the Harrison Mixbus channel strip DSP.
- Vocal Effects - Chorus, Delay, and Reverb for livening up vocal recordings.
- Master Section - Includes controls for Routing, Polarity, Input and Output Trim.
Module Controls
Each of the 7 processing sections (referred to as Modules) has its own output trim control and can be individually reset, soloed, or bypassed.
- The RESET button resets all of a module’s parameters to their default states (with the exception of RTA controls).
- The SOLO button bypasses all processing outside of the module being soloed. This allows individual modules to be auditioned exclusively without any other processing. Note that soloing a module will maintain the gain structure set by the Output Trims of the other elements.
- The IN button toggles the enablement of each module. If disabled, a module’s processing is bypassed and its effects will not be heard.
The vertical slider to the right of each module controls the module’s Output Gain Trim for adjusting the Gain staging between elements. It has a range of -20dB to +20dB.
Note: Because they are processed in parallel, the Delay and Reverb modules do not have Output Gain Trims like all the other sections. Instead, they have Level faders for blending the effects signals with the main signal path.
Vocal Character
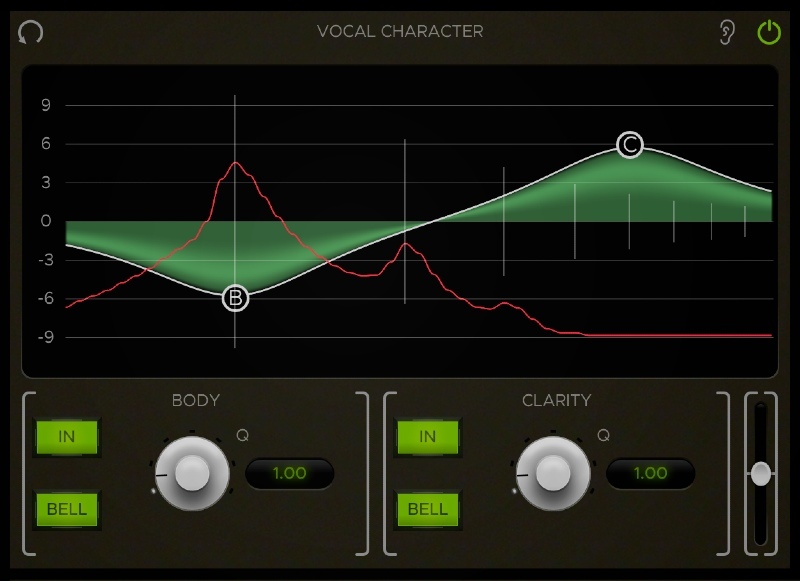
The Vocal Character is a one-of-a-kind vocal EQ that “follows” the pitch of the notes sung in a recorded vocal track and shifts the EQ curve accordingly along the frequency spectrum. This allows you to alter the actual character of vocals by adjusting the body and clarity of each note.
Important Note: The Vocal Character element tracks pitches on a chromatic scale, and it will not work on the spoken voice. You should disable this element when using the VC on spoken voice.
The Vocal Character consists of an EQ graph with 2 band control sections below it, labelled Body and Clarity. The Body section contains controls for the lower band (labelled “B” on the graph) and the Clarity section controls the high band (labelled “C” on the graph).
Both bands have adjustable Frequency, Gain, Shape, and Q parameters, as well as buttons for toggling their enablement individually. The graph is used to control a band’s frequency and gain while the controls for enablement, shape and Q can be found in the control sections below the graph.
De-Esser
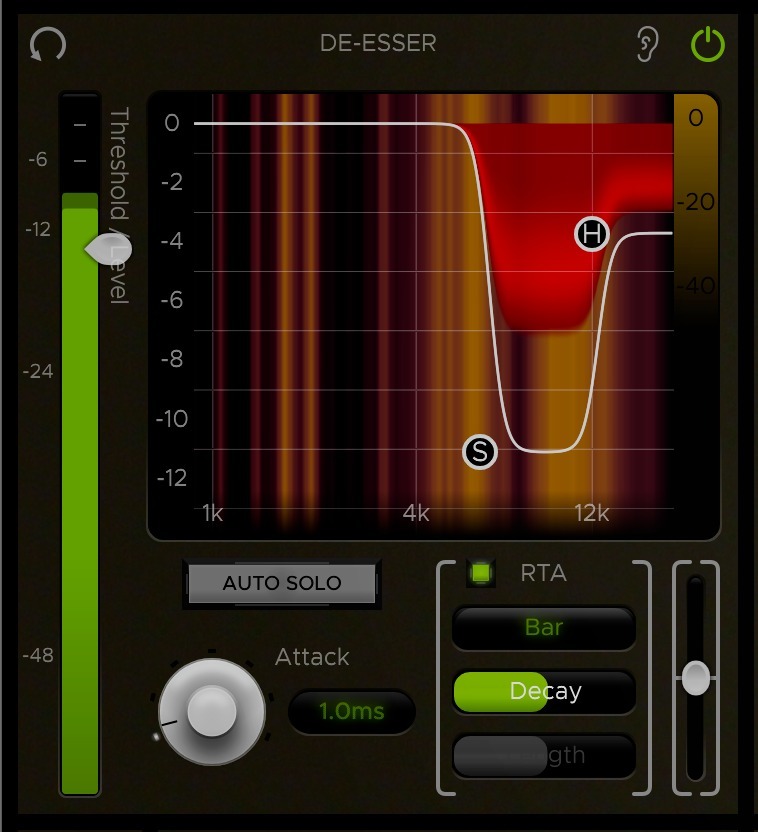
This module contains a simple and intuitive implementation of Harrison’s renowned De-Esser algorithm. It is primarily used to attenuate harsh frequencies caused by sibilance in speech and vocals.
The two circular markers on the graph display, labelled “S” and “H”, are the controls for the Ess and Hi bands (S = Ess, H = Hi). These controls can be dragged horizontally or vertically to set the Bandwidth and Depth of their respective bands.
A band’s horizontal range or Bandwidth determines the range of frequencies subject to attenuation within that band. The low cutoff Frequency for the Ess band has a range of 1 kHz to 8 kHz, while the Hi band control has a range of 2 kHz to 12 kHz for taming any additional frequencies above that.
The vertical Depth of a band sets the maximum Gain reduction in dB that can be applied to the frequencies in its Bandwidth. A lower Depth means greater possible attenuation. Both bands have a maximum Depth value of -12 dB and can go up to 0 dB, where no attenuation occurs.
Clicking and dragging in the open portion of the graph (rather than on a specific band control) allows you to control both bands simultaneously. This is useful for adjusting the Frequency or Depth of the bands without altering the Bandwidth.
Leveler
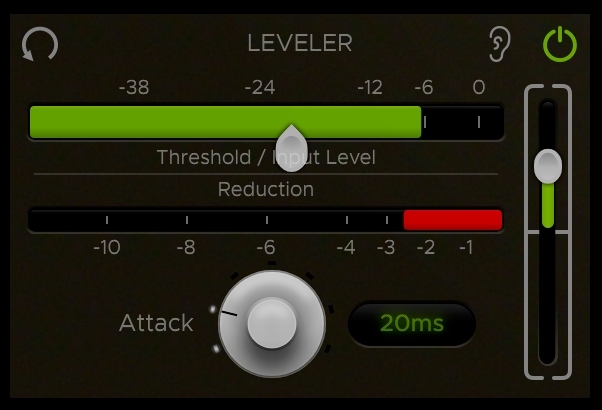
The Leveler is a unique compressor derived from the Harrison Mixbus channel strip. It includes controls for Threshold and Attack while the module’s Output Trim can be used to add make-up gain if needed. Input level and gain reduction meters are also provided to help visualize the operation of the Leveler. The Leveler has a low ratio and a fast release.
The Input Meter displays the level of input signal coming into the Leveler. The slider attached to the meter controls the compressor’s Threshold level.
Directly below the Input Meter is the Reduction Meter, which shows how much gain reduction is being applied to the signal.
The Attack knob sets the Attack time of the compressor, ranging from 4 ms to 100 ms. This parameter can be controlled by adjusting the knob or by typing values directly into the label to the right of it.
You can use the Leveler module’s Output Trim slider on the right to apply make-up gain as needed.
32C Channel EQ

Modelled after the famed Harrison 32C Channel EQ, the Equalizer element offers 4 bands with variable frequency and gain along with 2 versatile filters.
EQ Bands
The 4 EQ bands can be toggled in or out using the EQ IN button just above the LOW band controls.
Each of the 4 bands has variable gain and frequency parameters. Each gain control has a range of -12dB to +12dB. The band frequency ranges are as follows:
- LOW - 40Hz - 600Hz
- LO MID - 200Hz - 3.1kHz
- HI MID - 400Hz - 6kHz
- HIGH - 900Hz - 13kHz
EQ Filters
The High and Low Pass Filters can be toggled in and out using the Filters IN button in the top-left corner above the Filter controls.
Both filters have a 12dB/octave slope. The High-Pass Filter has a frequency range of 20Hz - 3.15kHz and the Low-Pass Filter has a frequency range of 160Hz - 18kHz.
Chorus
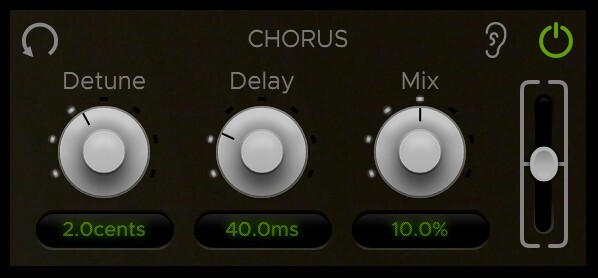
The Chorus module is based on the Harrison XT-MG Micro Glide plugin and can be a useful tool for adding width and depth to a vocal recording.
The Chorus effect adds 2 pitch-shifted voices: one above and one below the input signal.
- Detune controls the amount in which the 2 voices are pitch-shifted up and down from the original signal (measured in cents).
- Delay adjusts the delay offset from the original signal in milliseconds.
- Mix sets the percentage of wet signal that gets blended with the dry signal.
Delay
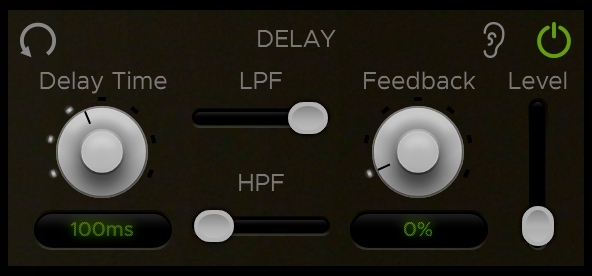
The Delay module is specifically designed for adding slapback delay to vocals.
Unlike the other modules, the Delay and Reverb effects are processed in parallel with the main signal path, so they are set to always return at the end of the signal chain to be blended with the main signal path. This routing is meant to emulate the traditional method of using effects sends/returns on an aux track in a DAW.
Because it’s in parallel, the Delay module does not have a standard Output Trim slider like the other modules. Instead, it has a level control fader with a minimum value of -inf for setting the effect level that gets blended in with the main signal.
In addition to the Output Level, there are 4 controls for shaping the delay on vocals: Delay Time, Feedback, Low-Pass Frequency (LPF), and High-Pass Frequency (HPF).
- Delay Time sets the amount in milliseconds that the wet signal is delayed from the original dry signal. This control is capable of setting short delay times up to 250 ms.
- Feedback sets the percentage of signal that gets fed back into the delay and can be used to set the amount of delay repetitions. Note that setting the Feedback to 100% will cause the delay to enter an endless loop of repetitions that can only be stopped by bringing the Feedback down below 100%.
- LPF and HPF set the cutoff frequencies for the low and high-pass filters which are applied to the delayed signal.
Reverb
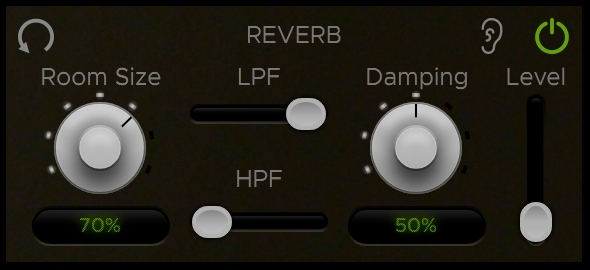
The Reverb module is useful in altering the spatial characteristics of vocals.
Like the Delay, the Reverb is processed in parallel with the main signal path. The position of the REVERB SEND routing item determines the point along the signal chain in which the signal is sent to the Reverb effect, which always returns at the end of the signal chain to be blended with the main signal path.
Because it’s in parallel, the Reverb module does not have a standard Output Trim slider like the other modules. Instead, it has a level control fader with a minimum value of -inf for setting the effect level that gets blended in with the main signal.
In addition to the Output Level, there are 4 controls for shaping the reverb on vocals: Room Size, Damping, Low-Pass Frequency (LPF), and High-Pass Frequency (HPF).
- Room Size controls the size of the simulated space for reverberations and essentially dictates the decay time (larger Room Size = longer decay time).
- Damping controls the damping properties of the surfaces being reflected off of, which affects the presence of high frequencies in the reverb tail. More damping will decrease high-frequency reverberations to create a warmer reverb sound while less damping will increase high-frequency reverberations for a brighter sound.
- LPF and HPF set the cutoff frequencies for the low and high-pass filters which are applied to the reverb signal.
Master Controls (Input, Output & Routing)

The Input, Output, and Routing sections at the bottom of the plugin window contain the plugin’s master controls for routing the order of elements, adjusting input/output trim, and inverting polarity. The master controls are laid out in the order of their signal flow from left to right, which is as follows:
- Master Input Trim
- Polarity Switch
- Element Routing
- Master Output Trim
- Input, Output & Polarity
The very first element in the signal chain is the Master Input Trim slider, which adjusts the gain trim of the input signal before it reaches any of the other elements. Next in line is the Invert Polarity button, used to flip the polarity of the input signal. Following the Polarity switch are the element routing items, which will be detailed further in the next section. The very last element in the signal chain is the Master Output Trim, which adjusts the gain trim of the final output signal after it has been processed by everything.
Additional Features
At the top-right corner of the plugin window are the Momentary Byass and Settings buttons.
- Momentary Bypass - The Momentary Bypass button bypasses the plugin for as long as it's held. This is useful for auditioning A/B comparisons quickly.
- Settings - The Settings button reveals a pop-up menu where the window size and theme can be adjusted. It also contains a link to the plugin manual and version info at the bottom.
System Requirements
- MacOS: 10.9 or newer required
- Windows: Win7 or newer required
- Linux: Please try the demo
Host DAW support:
- ProTools: 10.3.5 or newer required for Windows, 11 or higher required for Mac. Enable the AAX format during installation
- Logic: Enable the AU format during installation
- Cubase: Enable the VST and/or VST3 format during installation
- Most other workstations: Enable the VST format during installation


Reviews Summary
While it aims to provide a helpful overview, it may not capture every perspective or detail. We encourage you to read individual reviews to make an informed decision.
Users highly praise this Harrison channel strip plugin for vocal processing, noting that having multiple options in one place significantly simplifies their workflow and delivers excellent results.
