Log In

Free gifts available with your purchase
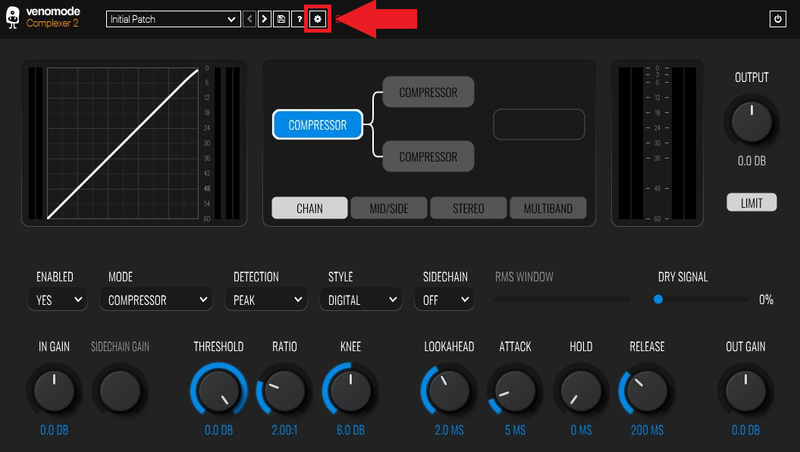
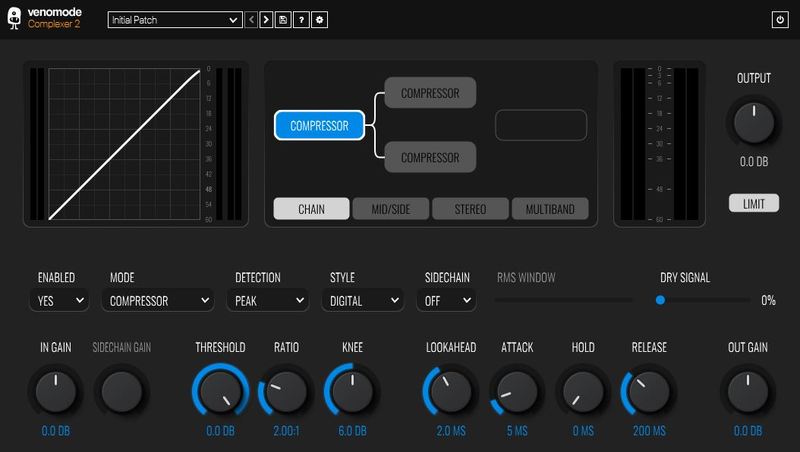
Complexer 2 is a multi-stage dynamics processor, featuring three independently controlled dynamics processors, each with a choice of six different modes.
Features
Three Processors - Six Modes
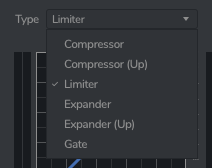
Complexer 2 features three independently controlled dynamics processors, each with a choice of six different modes: Upward and downward compressors, upward and downward expanders, a limiter, and a gate.
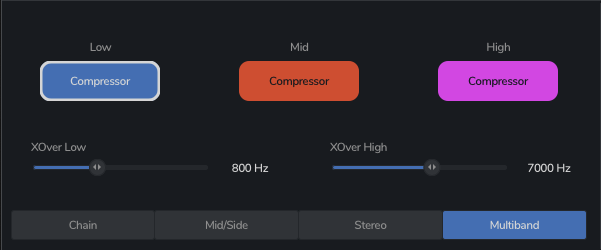
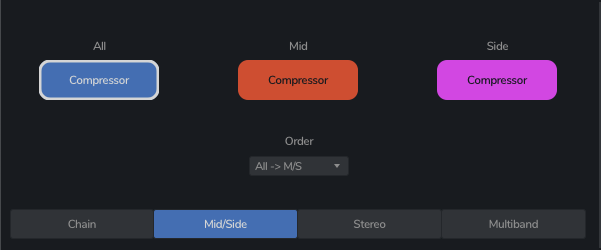
Each of the three stages can be processed in a variety of different configurations, including parallel chaining, stereo and mid/side, and multiband.
Dynamics Chaining
Complexer 2 lets you run the three dynamic processers through a configurable chain. You can have all three in series, or run two in parallel with the third either before or after.

Full Control
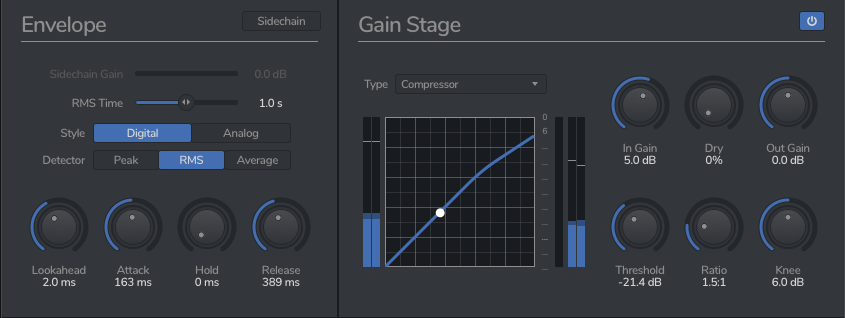
Each of the processors feature a vast amount of control. Along with the familiar attack, hold and release, each processor has an advanced lookahead section to capture peaks ahead of time.
There are also three detection modes: peak, RMS and average. Peak is perfect for limiting, and RMS allows smooth detection - great for compression.
Each processor can also be controlled via an external sidechain.
Multiband
With Complexer 2, you can run each of the processors in their own adjustable frequency band. Not limited to just compression, you can also do multi-band limiting, expanding, and gating, allowing effects ranging from mixing and mastering applications, to creative effects.
Mid/Side and Stereo
There are two seperate modes specifically for stereo dynamics processing - mid/side, and stereo.
In stereo mode, you can process the left and right channels independently, and in mid/side mode, you can apply different dynamics to the mid or side channels of the audio.
System Requirements
Complexer 2 should work in any DAW that can run VST, AU or AAX plugins, on any dual-core system with at least 1GB of RAM.
Windows
- Windows 10 and later (64-bit only)
- VST / VST3 / AAX compatible DAW
Mac
- macOS 10.13 and later (M1 Apple Silicon supported) (64-bit only)
- VST2, VST3, AU & AAX compatible DAW
Ubuntu
- Ubuntu 18.04 and later (64-bit only)
- VST2 & VST3 Compatible DAW
Important note: When accessing this software via a Rent to Own plan or the Beatport Studio membership, it's installed and run through the Beatport Access portal. An internet connection is required every 30 days to validate your license.