


 Log In

Free gifts available with your purchase

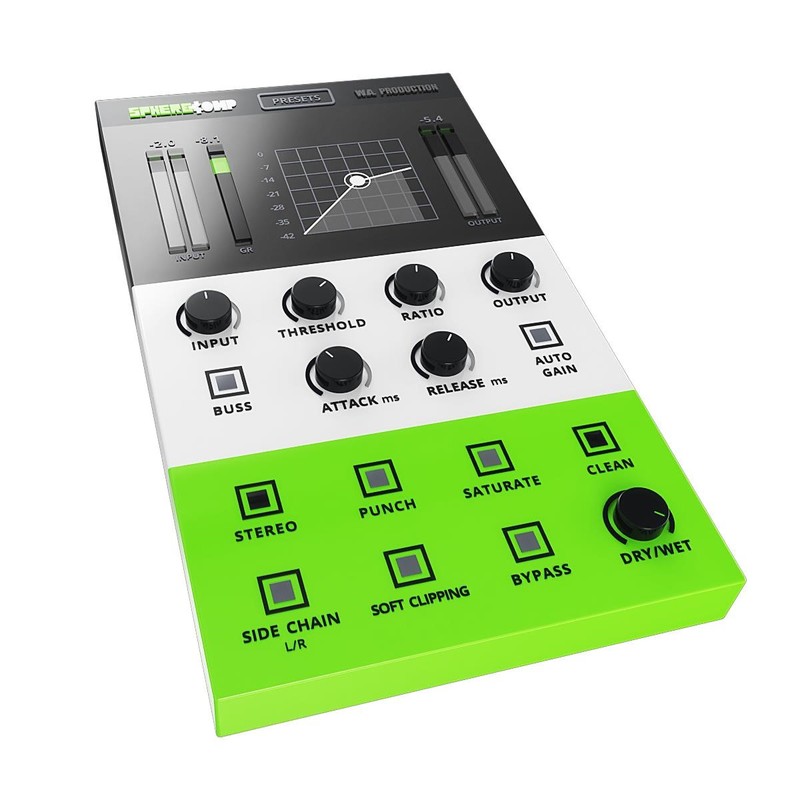
SphereComp - A Dual-Mode Compressor Plugin.
W.A. Production has created the perfect way to approach and achieve proper compression. All producers know compression can either be an award-winning tool if used properly, or it can totally destroy your mix. Audio students are introduced to compression and most are left confused or scared to death of it. SphereComp is capable of catering to the seasoned pro and the beginner. To get the same results you get with SphereComp you would have to spend thousands of dollars in high-end rack gear, invest time getting acquainted, making adjustments over and over until you get the result you want. Not to mention installation and routing your patch bay. Breathe a sigh of relief. Don't dread compression. Embrace it.
What is Dual-Mode?
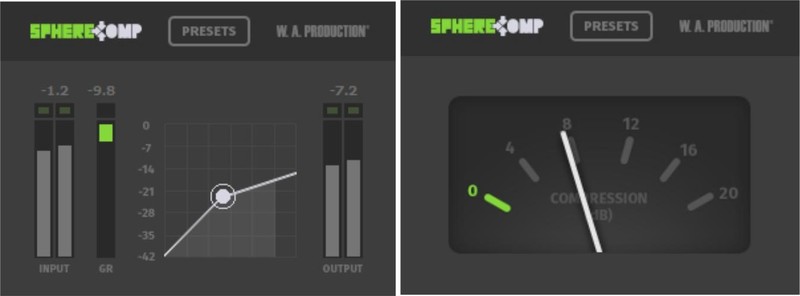
Dual mode allows YOU to switch from peak compression (regular mode) to RMS compression (buss mode).
If you route your drum tracks (or any other group of tracks) into a group track, you are able to compress this group as a whole. Tying or “glueing” the individual elements to perform as one. The Buss mode is designed especially for that, It reacts to the RMS (root mean square) or the average of the signal, creating a smooth and musical compression. Regular mode reacts to the peaks of the signal, with it, you are able to dynamically shape the individual tracks. Keep in mind that some individual tracks will benefit much more from RMS compression and some groups or mixes will benefit more from peak compression, so experiment and see what works best for your track.
Features
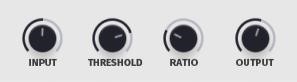
Input – Control the input gain by +/- 15dB.
Threshold – Threshold (dB), when the signal level exceeds the threshold the compressor goes into action.
Ratio – (ratio/1) As an example, a 3:1 ratio means that for every 3dB the input signal exceeds the threshold, only 1dB will be allowed to pass by the compressor.
Output – Control the output gain by +/- 15dB.

Now that you have your set your levels as a basic start, let's adjust the timing and behaviour. When you're done, you can come back and fine-tune everything to make your track seat perfectly in the mix.
Buss – Switch between Regular mode (peak compression) and Buss mode (RMS compression).
Attack – Time in milliseconds that it will take for the compressor to reach its destination gain reduction after the signal has crossed the threshold.
Release – Time in milliseconds that it will take for the compressor to reach 0 gain reduction after the signal returned below the threshold.
Auto Gain – Auto Gain matches the output volume to input volume automatically.

Stereo – Switch between stereo and mono modes.
Punch – Parallel processing to add punch to the signal before the compression stage.
Saturate – Add tube style saturation to the compressed signal.
Clean – Make the compressor sound as clean as possible. If Punch or Saturate is on, it will reduce their effect giving you different timbre options.

Side Chain – Signal from the right channel input goes to the detector and the signal from the left channel input goes to the compressor.
Soft Clipping – Use to round the signal when it approaches 0.0dB and ensures it does not exceed it.
Bypass – Allows you to engage and disengage the compressor.
Dry/Wet – Mixes between the processed signal and the input signal creating a parallel compression effect, which leaves the peaks untouched while boosting the lower part of the signal.
To help you out there are also 45 presets that focus on individual instruments and drum sounds as well as groups, mix buss and mastering presets.
This is yet another way W.A. Production has made it easy for you to learn as you go. See what the pros do and make your own modifications. And as if that wasn't enough to get you excited and ready to master compression, you will find pro tips and tricks inside the manual. That's right, we weren't going to just leave ya hanging to figure it out for yourself. There is a manual to assist you with getting started and getting the most out of Sphere Comp.
Be done with complicated compressors from creators who spent more time on the graphics than the functionality of the plugin. W.A. Production are real producers making real plugins. We know how it is, and we make it how it should be.
System Requirements
- Windows 8 or higher (32 / 64-bit)
- macOS 10.13 and later (64-bit only)
- VST, VST3 & AU
Please Note: AAX format requires Pro Tools 11 or higher.
Important Note for Mac Apple Silicon users: Before purchasing, please review the current compatibility status of this plugin on your system here.
Kyral x Banko
Electronic music duo from Chicago.
"Different timbre buttons such as Saturate, Punch, Clean, and the many preset options make this a great compressor for beginners and advanced users looking for unique compression options."
Mersiv
Denver-based producer.
"Dope plug-in. It definitely will become a key tool in my mixes and masters."
22Bullets
As an Artist/Producer from Thailand, 22Bullets has released music through Spinin' Records, Musical Freedom, Revealed, Warner Music, and Panda Funk.
"I really like the RMS compression mode, it works well on my buss channels!"
