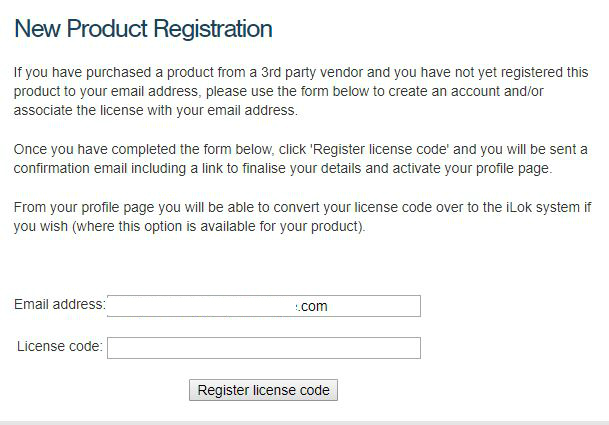
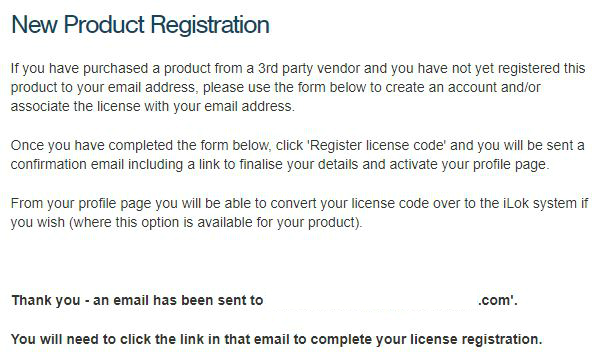
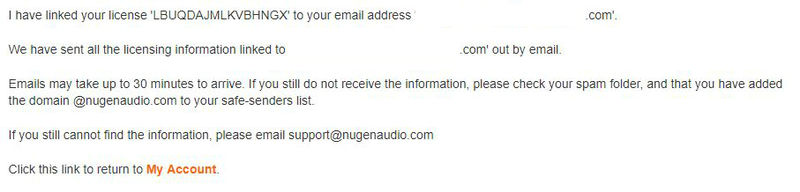
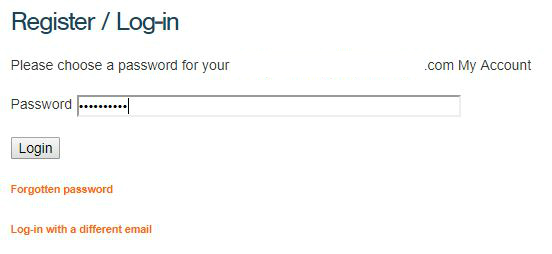
Log In

Free gifts available with your purchase
Seeing Is Believing
Customizable Surround Audio Analysis
Comprehensive analysis for 3D and immersive audio; Halo Vision is a customizable, real-time visual analysis suite. A variety of modules provide audio professionals with a clearer understanding of every aspect of their audio, allowing for precise and confident decision making and troubleshooting, and pinpointing problem areas which might be missed using ears alone.
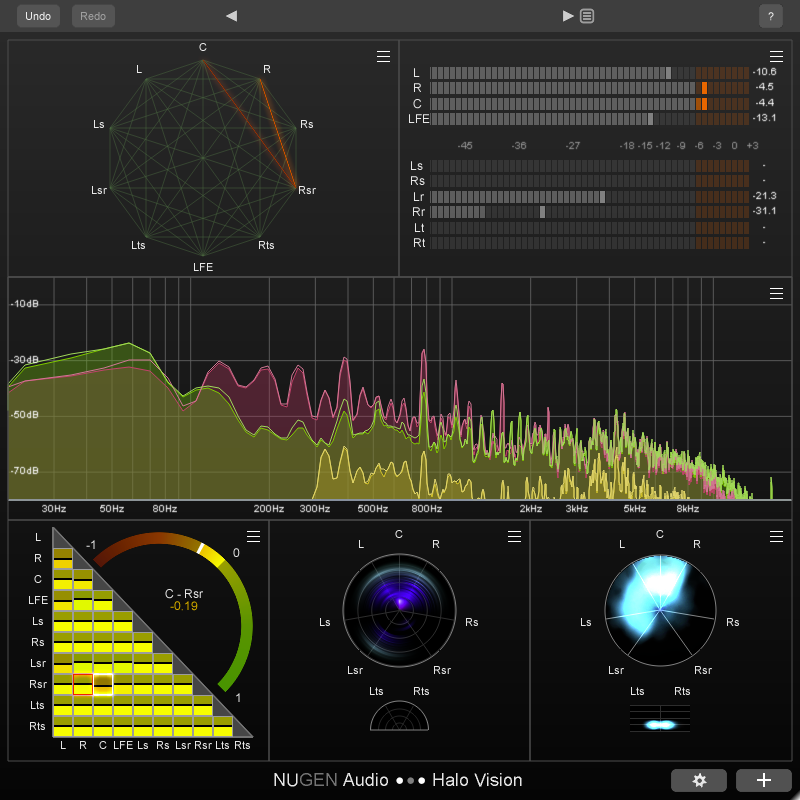
Configurable Displays
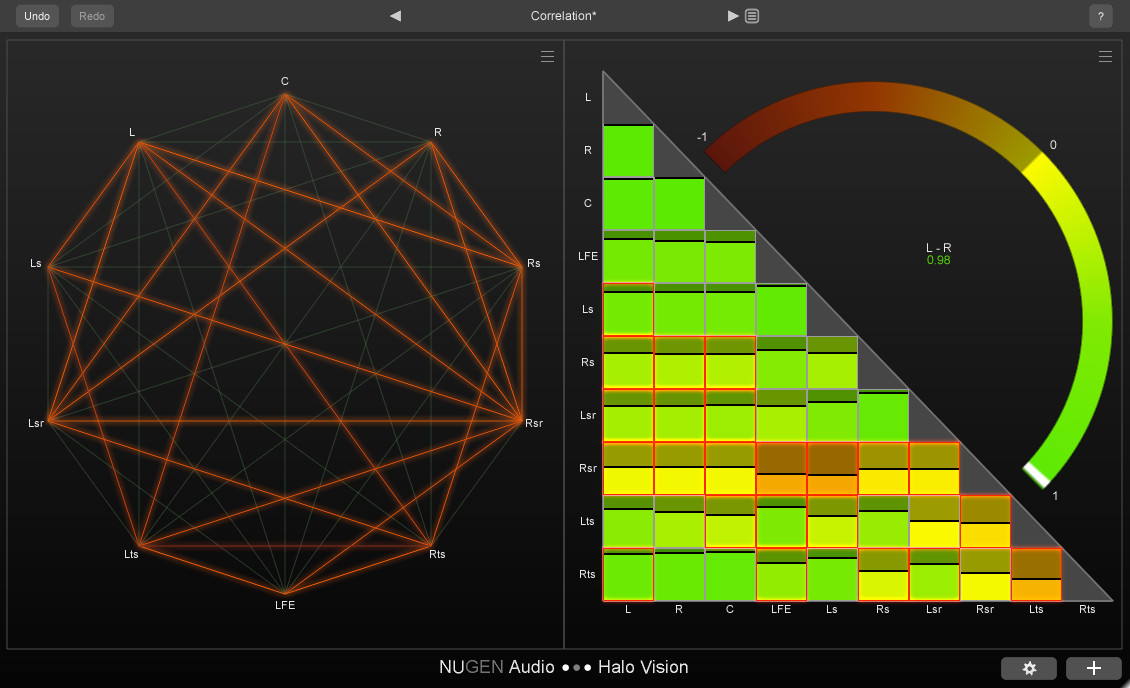
- Correlation Matrix
- Correlation Web
- Frequency Haze
- Location Haze
- Spectrum
- True Peak
- Timecode
Correlation Views
The Correlation Matrix displays colour-coded phase relationships between every channel, with a larger arched meter for more detailed analysis, and anti-correlation alerts at a user-defined threshold.
The Correlation Web shows a network of channels with an interconnecting line between each pair. When the phase relationship between two channels becomes anti-correlated, the corresponding line lights up.
Both of these views use Contextual Correlation by default. Standard calculations used by other correlation meters are normalised in such a way that two signals might appear to be highly anti-correlated, even if one signal is so much louder or quieter than the other that mixing them together will not cause phase cancellation. Contextual Correlation compensates for these level differences, only highlighting correlation issues which are likely to cause a problem.
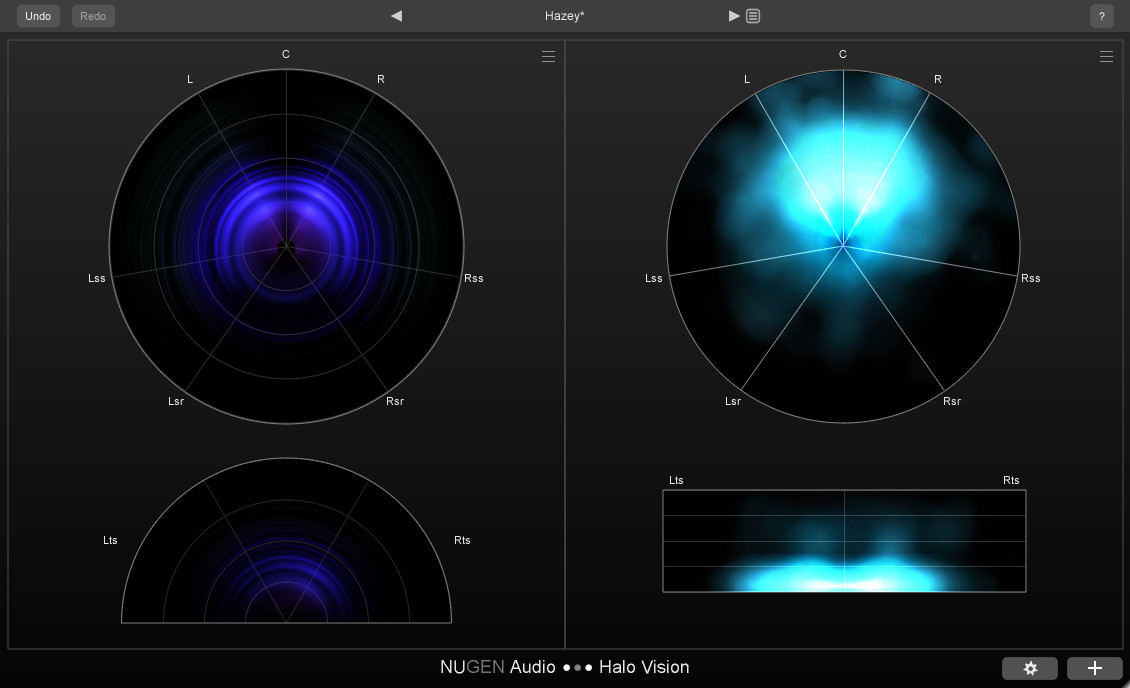
Haze Views
With low frequencies at the centre and high frequencies on the outer edge, the circular Frequency Haze displays frequency content across the surround field, with channel labels in typical speaker positions.
The Location Haze provides a visualization of the perceived location of your audio, showing energy distribution across the surround field, with brighter sections indicating increased “energy”.
Other Views
In ‘Combined’ mode, the Spectrum view displays an FFT level-against-frequency graph for all the channels in one spectrum. In ‘Groups’ mode, channels can be organised into groups of spectrums.
This True Peak view provides a True Peak dB level meter for each channel.
The Timecode view displays a timecode readout based on the current host/DAW playback position.

Effortlessly Speed Up Your Daily Workflow
Halo Vision is the result of Nugen Audio's most in-depth market research to date, the product of a series of interviews with many of their trusted and respected customers in the industry, with the aim of discovering exactly what they want, need and expect from surround and immersive visual audio analysis.
What makes Halo Vision unique is its ability to display a wide range of complex information intuitively, without the need for a crib sheet or tons of on-screen clutter. Nugen Audio have built upon features, ideas and inspiration from other products on the market - as well as other highly-regarded plug-ins of their own, including but not limited to Halo Upmix, Paragon and VisLM - in order to create a concise, streamlined analysis suite.
Typical Applications
- Surround and immersive mix analysis up to 7.1.2
- Checking phase correlation
- Visualising spatial information
- Ensuring mixes translate to different channel layouts
- Mixing in unfamiliar or badly treated rooms
System Requirements
Mac
- OSX 10.7+ (64-bit Only)
- 512 MB RAM
Windows
- Windows Vista or above (64-bit Only)
- 512 MB RAM
Available Formats
- Supports 64-bit AAX, VST3 and AU. Halo Vision requires a surround-compatible plug-in host such as Pro Tools HD.