Buy LowSane, get a free gift with purchase:
Welcome to the world of breaking down the digital world! Yes, in the music production world, people are proud to record on 24bit and 192kHz to provide pristine audio for music lovers.
BUT... people are keen on crushing things as well, which means that LoFi audio quality is not a side effect of cheap children's toys, but has become a creative tool in today's music creation and post-audio productions! Who could have thought of that in the 80s, when everybody screamed for 16bit instead of 8bit?!
Yes, humans are creative, and many years later the ‘LoFi’ sound sculpting became an art of its own.
Well, LowSane adapts to this creative process and adds some additional creative options like the ‘Disrupt Sphere’ to this world of crushing down the digital bits!
It offers in the audio route a Distortion module, Band Pass / Notch Filter, Lo-Fi section, Hi and low Pass Filters, and a Noise Gate. These parameters can be controlled by the ‘Disrupt Sphere’. Additionally, there is an Audio Follower which again can control the “Disrupt Sphere” or any of the other parameters.
Last but not least there is a 2-slot modulation matrix in which you can connect parameters, or use MIDI to control parameters and also the ‘Disrupt Sphere’.
With LowSane you get your bits and pieces together going LoFi!
Features
General info:
-
LoFi FX with additional distortion, Band Pass / Notch Filter, Hi-Pass Filter, Low-Pass Filter, and Noise Gate
-
Disrupt Sphere control for creating FX changes
-
Audio Input Follower, for controlling LowSane's parameters
-
GUI sizes available are 100%, 125%, 150%, and 200%
General controls:
-
Volume control
-
Edit / Original compare function
-
ECS (external MIDI controller setup)
-
Help ? opens the 'User Guide'
-
Control menu (upper right-hand side) with various general setting options
-
Dry/Wet control and Full Wet button
Preset section:
-
Presets are stored as files in clear categorized bank folders
-
'Quick Browser', 'Recently Browsed' and 'Favourite' functions
Audio route:
-
Distortion -> Band Pass / Notch -> Lo Fi -> Hi-Pass Filter -> Low-Pass Filter -> Noise Gate -> Audio Output
Distortion:
-
Amount control
-
On/Off control
Band Pass / Notch Filter:
-
12dB and 24dB Notch Filter with Q control
-
12dB and 24dB Band Pass Filter with Q control
-
Stereo Separate feature, which alters the Left and Right Cutoff Frequency
-
Dry/Wet control
-
Volume Boost control
-
On/Off control
Lo Fi:
-
Sample Rate control
-
Bit Rate control
-
Stereo Separate feature, which alters the Left and Right Sample Rate
-
Dry/Wet control
-
On/Off control
Hi-Pass Filter:
-
12dB Hi Pass Filter
-
Cutoff control
-
Q control
-
On/Off control
Low-Pass Filter:
-
12dB Low Pass Filter
-
Cutoff control
-
Q control
-
On/Off control
Noise Gate:
-
Threshold control
-
Attack time control
-
Hold time control
-
Release time control
-
On/Off control
Audio Follower:
-
Inputs available: Input, Side-input, BandPass/Notch Output, Lo Fi Output, HP LP Filter Output, Noise Gate Output, and the Output
-
Threshold control
-
Smoothing control
-
Destination menu
-
Amount control
-
On/Off button.
Disrupt Sphere
-
The Sphere-Slider holds 8 available controls that can be connected to LowSane parameters
-
The Sphere-Slider can move back to the center in a tempo-based way which we call the ‘Spring’ feature
-
Spring back quantize.
-
‘Lazy Mode’ so that the movement of the Sphere-Slider can be automated in different directions, which allows you to also create creative new types of sounds
-
'Lazy Mode' start triggers: Host (music program start) | Note | Pitch Bend | Mod Wheel | Breath Controller | Foot Pedal | Expression Pedal | MIDI Controllers 16-21 84-90
MIDI & Mod 1&2:
-
‘MIDI & MOD 1 & 2’ control section can be used to influence various LowSane parameters including the ‘Disrupt Sphere-Slider’
-
2 possible sources with amount control.
-
2 possible destinations with an amount control
Back Panel:
-
Computer keyboard up/down
-
MIDI preset program change
-
MIDI bank change select
-
External MIDI control capture mode
-
MIDI Channel control
-
Screen size 100%, 125%, 150%, and 200%
System Requirements
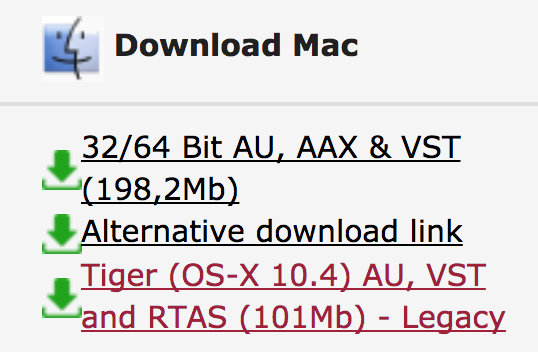
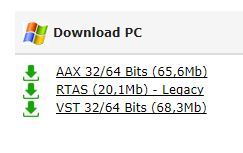
- PC: VST3, VST (32/64bit), and 64 bits AAX for Windows 7 or higher (Note: PC AAX for PT 12 or higher)
- Mac: 64 bits AU, VST3, VST, and AAX, for OS-X 10.13 or higher (M1/M2 ARM processor compatible)
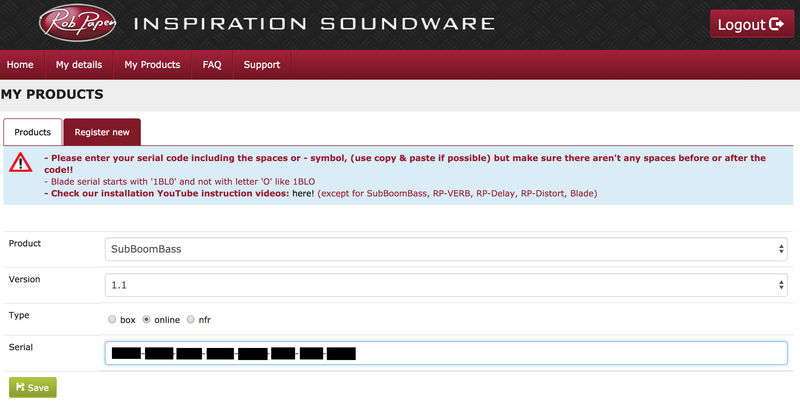
- The activation system is offline, which means that there is no direct connection between the plugin and the robpapen.com homepage.
- The software can be installed on 2 of your own computer systems
(SubBoomBass is used as the example).
Mac
1. Visit Rob Papen and create an account by selecting 'Create Account'.


Note: If you already have an account set up with Ron Papen, 'Login' to your account and skip to step 4. of the installation process.


2. Enter your personal details, and once completed check the tick box that reads 'Yes, I agree to Privacy Policy Rob Papen' before clicking 'Send Registration'.

3. The registration of your account has successfully been completed > select 'click here to login' to access your account area.

4. Select the 'My Products' tab, which is located at the top-left corner of your account area.


5. Click the 'Register New' option.


6. Select the product that you have purchased, as well as the most recent version number (which in this instance is 'Online'), before manually entering/copying and pasting the 32-digit Serial Number that is provided within your User Account > once completed, click the 'Save' tab to register your software.
Note: Ensure that you select the correct 'Product' and 'Type', as well as checking that there are no spaces/mistakes when entering your Serial Number > if you receive a code error message of any kind, refresh the web page and manually enter the digits (including the '-' hyphens) before re-clicking the 'Save' option.

7. The registration of your software has successfully completed > select the 'Download latest version: SubBoomBass' hyperlink to navigate to the software download area.

8. Select the relevant format installer download (s) in accordance with your DAW's compability specifications, to inititiate the downloading of your purchased software.
Note: The product user manual is also obtainable from this location.


9. Once the software installer file has finished downloading, click the file entitled 'SubBoomBass_Installer.dmg' to launch the application installer application.
10. Double-click the 'SubBoomBass_Installer.pkg' application icon begin the installation process.

11. Click 'Continue' to verify the installation, if prompted to do so.

12. Click 'Continue' once again.

13. Read through the Licence Agreement > click 'Continue' then 'Agree'.

14. Manually enter/copy and paste the original 32-digit Serial Number that you were provided with, before clicking 'Continue' (the Serial Number is located in both your Plugin Boutique and Rob Papen User Accounts).
Note: Ensure that you select the correct 'Product' and 'Type', as well as checkingt that there are no spaces/mistakes when entering your Serial Number > if you receive a code error message of any kind, manually enter the digits (including the '-' hyphens) before re-clicking the 'Continue' option.

15. Review the installation before clicking 'Install', and then 'Continue Installation'.

16. The installation of your software has successfully completed > click 'Restart' to reboot your computer.
Note: Ensure that you have saved any important work that may be open within the applications you currently have open, before selecting the 'Restart' option.

17. After your computer has successfully restarted, open your DAW and locate/open your newly installed/activated software VST.
Note: If the software fails to appear, rescan your DAW's Plug-in selection.
The Software is now Activated and Ready for Use Within Your DAW!

Windows
1. Visit Rob Papen and create an account by selecting 'Create Account'.


Note: If you already have an account set up with Ron Papen, 'Login' to your account and skip to step 4. of the installation process.


2. Enter your personal details, and once completed check the tick box that reads 'Yes, I agree to Privacy Policy Rob Papen' before clicking 'Send Registration'.

3. The registration of your account has successfully been completed > select 'click here to login' to access your account area.

4. Select the 'My Products' tab, which is located at the top-left corner of your account area.


5. Click the 'Register New' option.


6. Select the product that you have purchased, as well as the most recent version number (which in this instance is 'Online'), before manually entering/copying and pasting the 32-digit Serial Number that is provided within your User Account > once completed, click the 'Save' tab to register your software.
Note: Ensure that you select the correct 'Product' and 'Type', as well as checking that there are no spaces/mistakes when entering your Serial Number > if you receive a code error message of any kind, refresh the web page and manually enter the digits (including the '-' hyphens) before re-clicking the 'Save' option.

7. The registration of your software has successfully completed > select the 'Download latest version: SubBoomBass' hyperlink to navigate to the software download area.

8. Select the relevant format installer download (s) in accordance with your DAW's compability specifications, to inititiate the downloading of your purchased software.
Note: The product user manual is also obtainable from this location.


9. After the software installer file has finished downloading, double-click the file entitled 'SubBoomBass_Installer' .zip folder to extract the .exe installer file.
10. Once extracted, double-click the .exe installer file to begin the installation process > click 'Next'.

11. Read through the Licence Agreement and select 'I accept the agreement' > click 'Next'.

12. Type in your preferred User Name, Organization and manually enter/copy and paste the original Serial Number that you were provided with, before clicking 'Continue' (the Serial Number is located in both your Plugin Boutique and Rob Papen User Accounts).
Note: Ensure that you select the correct 'Product' and 'Type', as well as checking that there are no spaces/mistakes when entering your Serial Number > if you receive a code error message of any kind, manually enter the digits (including the '-' hyphens) before re-clicking the 'Next' option.

13. Select a computer VST Plug-ins folder destination in which to install/save your software to > click 'Next'.

14. Select a computer Library location in which to install/save your software to > click 'Next'.

15. Select the software format (s) that you wish to install > click 'Next'.

16. Select a Start Menu Folder to create a shortcut to your new software installation > click 'Next'.

17. Review the installation and click 'Install'.

18. The installation of your software has successfully completed > click 'Finish'.

19. After your computer has successfully restarted, open your DAW and locate/open your newly installed/activated software VST.
Note: If the software fails to appear, rescan your DAW's Plug-in selection.
The Software is now Activated and Ready for Use Within Your DAW!

