Log In

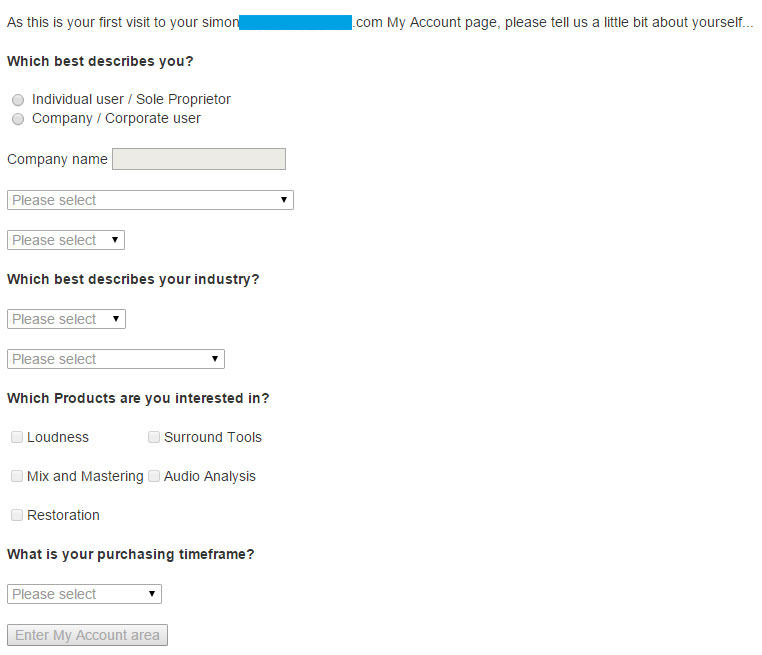
Free gifts available with your purchase
Measure, Understand, Correct. Visualizer gives you Indispensable Audio Analysis for Quality Audio Production, with a Standardised Reference Set of Professional Tools that let you Work Faster, Avoid Mistakes, Repeat Past Success and Leverage the Success of Others.
Powerful, flexible Audio Analysis, giving you immediate access to precisely the information you need, when you need it, through a unique, intelligent window system.
Single Intelligent Window System
Visualizer’s unique intelligent window facility lets you select multiple view combinations, automatically resizing and aligning windows to maximise legibility and cross referencing information across screens. No need to switch between plugins to get the combination of views you want. User configurable presets let you switch instantly between setups and interface sizes to build the workflow that suits you.
Applications
Recording
- Calibration - Lining up
- Setting levels - Broadcast standards
- Mic'ing Up - Phase cancellation
- Stereo field - Problem frequencies
- Studio acoustics - Minimising noise
- Checking signal paths - Problem solving
Mixing
- Low end control - Hidden frequencies
- Notching out - Placing vocals
- Fundamental frequencies - Characteristic frequencies
- Masking - EQing problem frequencies
- Stereo placement - Transferable mix standards
Mastering
- A|B reference material - Sonic fingerprinting
- Stereo spread - EQ distribution
- Phase relationships - Low frequency analysis
- Examining dynamics - Contextural analysis
- Frequency response - Speaker relationships
- Power distribution - Broadcast standards
- Headroom/Level capacity - Phase handling
Comprehensive Audio Analysis
- Multiple level meters (Peak/RMS/K12/K14/K20 etc.)
- FFT Spectrum Analysis
- Stereo Spectrum Analysis
- Spectrogram
- Stereo Spectrogram
- Vector Scope
- Stereoscope
- Stereo Bias meter
- Correlation Meter
- Correlation by frequency
- Stats and Parameters module
Comparison Mode
Comparison mode allows the direct comparison of two sources within a single Visualizer interface, utilising overlay, side-by-side and differential views. Ideal for examining the difference before and after a mastering signal chain or for comparing spectra in preparation for EQ matching or notching out.
Detailed User Configuration
- Resizeable Interface
- Intelligent window optimization
- Optimized control selection
- Frequency zoom and scroll
- dB Zoom and scroll
- Peak hold control
- Colour selection
- FFT window selection
- RMS window adjustment
- Optimized resource use
Intelligent Window System
This unique facility allows the selection of multiple view combinations, resizing and aligning windows to maximize legibility and cross referencing information across screens. There is no need to switch plugin for a different combination, and presets (user configurable) allow instant switching between setups and interface size enabling unparalleled work flow enhancements and intuitive operation.
System Requirements
Available Formats
- AAX, VST, VST3, AU and AudioSuite in both 64-bit and 32-bit versions. RTAS is also available as 32-bit only.
- The Visualizer HDX extension enables support for Avid AAX DSP Hybrid operation.
- Visualizer is also available as a stand alone application for Windows and OSX.
Mac
- OSX 10.6.x, 512 MB RAM
Windows
- XP or above, 512 MB RAM
Martin Walker
Sound on Sound
"I can honestly say that within a day of receiving NuGen Audio's Visualizer I was using it almost exclusively."