Buy Predator-3, get a free gift with purchase:
A Powerhouse Synthesizer That Combines User-Friendliness and Deep Sound Design Features
Important Note: If you purchased Predator-2 between 1st August - 21st October 2021 you can upgrade to version 3 for FREE. To claim your free upgrade, send your order confirmation to info@robpapen.com.
Upgrade Note: This is the full version of Predator-3. An upgrade for owners of Predator 1 or 2 is also available.
Rob Papen Predator-3 is the successor of a legendary synthesizer. Both versions 1 and 2 have inspired many artists and composers throughout the years and it has made an appearance on countless music tracks! As before, it combines a large library of over 6400 quality presets and cutting-edge features to make this your go-to synth for contemporary music production of any kind.
The user interface has been re-designed so that all essential main controls are visible on screen, making it interactive and incredibly easy to use.
With Predator-3 they have integrated many new features into the Arpeggiator, added Multi Envelopes, added an ‘Audio Follower input’ for Side Chain control, and last but not least it has also received the analogue-modelled sound code from B.I.T. which allows an uncompromised audio quality for analog types of sound or hybrid wavetable sounds!
Shipped with a large collection of inspirational Presets, Predator-3 is a unique synthesizer concept that combines user-friendliness and deep sound design features in one amazing product.
Features
Main Features
- Hybrid Synthesizer with Analog Style Sounds as well as Hybrid Wavetable Sounds.
- Over 6500 Presets in various music styles.
- Bank Folders that start with 0 in their name are Predator-2 and Predator-3 Presets.
- Bank Folders that start with 1 in their name are Predator-1 Presets.
- GUI is available in 3 sizes being 100%, 133%, and 200%.
- Animated dials available.
Oscillators
- 3 Oscillators with Sub-Oscillators.
- Subtractive analogue-modelled waveforms.
- Additive spectrum waveforms.
- 8 User spectrum waveforms are available in each Preset.
- Different dynamic waveforms Morphing inside each Oscillator.
- Spread feature, creating a 3 Oscillator detuning within each Oscillator.
- Various audio modulation in Oscillators 2 and 3.
- Diverse routing options into the Filters.
Filters
- Two analogue-modelled Filters with various routing options.
- 38 Filter types.
- Pre-Filter distortion Filter-1.
- Filter Envelope with Attack, Decay, Sustain, Sustain-Fade, and Release.
- Additional High Pass Filter with Resonance (Q).
AMP
- Volume and Velocity control.
- Pan control.
- EQ mixing preset menu.
- 11 Distortion modes.
ARP
- ARP A, B, C, and D with each having up to 16 steps.
- Step features are Tie, Slide, Tune, Vel, Free, Lenght, Offset, Rachet.
- Different play modes for combining the four ARPs.
- Additional Arp modes like 'Chord Mode', Sequencer mode, and 'Modulating Mode.'
- Different Ratcheting modes are available.
- MIDI out available (available depending on the music host).
XY
- Recordable XY pad, included different tempo-sync options.
- 4 X movement destinations and 4 Y movement destinations.
Pitch LFO
- Speed control and Tempo-Sync option.
- Multiple waveforms included the user waves (Oscillator section).
- Speed controls are Velocity, Keyboard, and Random.
- Poly, Mono, and Free Modes.
- Destination and Amount control feature.
Filter LFO
- Speed control and Tempo-Sync option.
- Multiple waveforms included the user waves (Oscillator section).
- Poly, Mono, and Free Modes.
- Amount Filter 1, Amount Filter 2, and Amount control feature.
LFO 1-4
- Speed control and Tempo-Sync option.
- Multiple waveforms included the user waves (Oscillator section).
- Phase control.
- Speed controls are Velocity, Keyboard, and Random.
- Poly, Mono, and Free Modes.
- Destination and Amount control feature.
ENV 1-4
- Envelopes with Attack, Decay, Sustain, Sustain-Fade, and Release.
- Tempo-Sync option.
- Envelope Speed controls are Velocity, Keyboard, and Random.
- Repeat option.
- Destination and Amount control feature.
Multi-ENV 1-2
- Up to 15 stages with curve control.
- Envelope Speed controls are Velocity, Keyboard, and Random.
- Loop feature with start and endpoint.
- Destination and Amount control feature.
Audio Follower
- 11 inputs available included the audio input (side chain).
- Threshold, Boost, Smooth parameters for the input signal.
- Attack, Hold, and Decay Envelope Controls
- 4 Destinations with amount and amount control.
Modulatioon Matrix (MOD)
- 20 Slots with a bypass feature.
- Advanced Mode with Offset, Lower Threshold, and Upper Threshold.
EQ
- PRE-FX EQ and POST-FX EQ.
- 3 Bands with Frequency, Q, and 20dB Gain control.
- 12dB LowPass, and 12dB HighPass Filters.
- Preset menu (see also AMP section).
Special
- Intelligent Preset Variation Generator.
- Preset Morph feature, to Morph two Presets into one new Preset.
Play Mode
- Poly, Mono, Legato, Arp, and Poly MPE Play modes.
- Pitch Bend range control per Presets with range -48 Semi up to +48 semi.
- Chord Memory control per Preset with up to 8 notes, included their panning, and velocity adjustment.
- Advance settings for the Envelopes Attack Shape, Decay/Release Shape, and Analog Drift amount.
FX
- 3 FX in serial mode.
- 34 Top-Notch FX types.
- FX can be Modulated.
Bank Manager
- Preset section with Bank selector section.
- Order by Date Preset listing option.
- Find option.
- Search Category option.
Back Panel
- Various Global settings, also appearing the main GUI Control Menu.
- Global tuning option.
- Tuning Scale options.
System Requirements
Windows
- Windows 7 / 8/ 10 / 11 (32 / 64-bit)
- VST3, VST, AAX
Please Note: AAX format is 64-bit only and requires Pro Tools 12 or higher.
Mac
- macOS 10.12 Sierra - macOS 12 Monterey (M1 Apple Silicon compatible) (64-bit only)
- AU, VST3, VST, and AAX
Additional Requirements
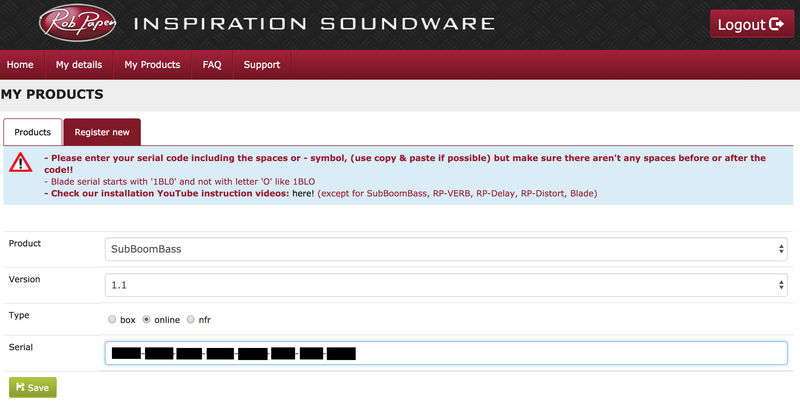
- Serial/license system with activation whilst registering the product.
- The activation system is offline, which means that there is no direct connection between the plugin and the robpapen.com homepage.
- The software can be installed on 2 of your own computer systems.
- Minimal computer display resolution requirement - 1440 x 900 pixels.
- Compatible with the Native Instruments NKS system.
(SubBoomBass is used as the example).
Mac
1. Visit Rob Papen and create an account by selecting 'Create Account'.


Note: If you already have an account set up with Ron Papen, 'Login' to your account and skip to step 4. of the installation process.


2. Enter your personal details, and once completed check the tick box that reads 'Yes, I agree to Privacy Policy Rob Papen' before clicking 'Send Registration'.

3. The registration of your account has successfully been completed > select 'click here to login' to access your account area.

4. Select the 'My Products' tab, which is located at the top-left corner of your account area.


5. Click the 'Register New' option.


6. Select the product that you have purchased, as well as the most recent version number (which in this instance is 'Online'), before manually entering/copying and pasting the 32-digit Serial Number that is provided within your User Account > once completed, click the 'Save' tab to register your software.
Note: Ensure that you select the correct 'Product' and 'Type', as well as checking that there are no spaces/mistakes when entering your Serial Number > if you receive a code error message of any kind, refresh the web page and manually enter the digits (including the '-' hyphens) before re-clicking the 'Save' option.

7. The registration of your software has successfully completed > select the 'Download latest version: SubBoomBass' hyperlink to navigate to the software download area.

8. Select the relevant format installer download (s) in accordance with your DAW's compability specifications, to inititiate the downloading of your purchased software.
Note: The product user manual is also obtainable from this location.


9. Once the software installer file has finished downloading, click the file entitled 'SubBoomBass_Installer.dmg' to launch the application installer application.
10. Double-click the 'SubBoomBass_Installer.pkg' application icon begin the installation process.

11. Click 'Continue' to verify the installation, if prompted to do so.

12. Click 'Continue' once again.

13. Read through the Licence Agreement > click 'Continue' then 'Agree'.

14. Manually enter/copy and paste the original 32-digit Serial Number that you were provided with, before clicking 'Continue' (the Serial Number is located in both your Plugin Boutique and Rob Papen User Accounts).
Note: Ensure that you select the correct 'Product' and 'Type', as well as checkingt that there are no spaces/mistakes when entering your Serial Number > if you receive a code error message of any kind, manually enter the digits (including the '-' hyphens) before re-clicking the 'Continue' option.

15. Review the installation before clicking 'Install', and then 'Continue Installation'.

16. The installation of your software has successfully completed > click 'Restart' to reboot your computer.
Note: Ensure that you have saved any important work that may be open within the applications you currently have open, before selecting the 'Restart' option.

17. After your computer has successfully restarted, open your DAW and locate/open your newly installed/activated software VST.
Note: If the software fails to appear, rescan your DAW's Plug-in selection.
The Software is now Activated and Ready for Use Within Your DAW!

Windows
1. Visit Rob Papen and create an account by selecting 'Create Account'.


Note: If you already have an account set up with Ron Papen, 'Login' to your account and skip to step 4. of the installation process.


2. Enter your personal details, and once completed check the tick box that reads 'Yes, I agree to Privacy Policy Rob Papen' before clicking 'Send Registration'.

3. The registration of your account has successfully been completed > select 'click here to login' to access your account area.

4. Select the 'My Products' tab, which is located at the top-left corner of your account area.


5. Click the 'Register New' option.


6. Select the product that you have purchased, as well as the most recent version number (which in this instance is 'Online'), before manually entering/copying and pasting the 32-digit Serial Number that is provided within your User Account > once completed, click the 'Save' tab to register your software.
Note: Ensure that you select the correct 'Product' and 'Type', as well as checking that there are no spaces/mistakes when entering your Serial Number > if you receive a code error message of any kind, refresh the web page and manually enter the digits (including the '-' hyphens) before re-clicking the 'Save' option.

7. The registration of your software has successfully completed > select the 'Download latest version: SubBoomBass' hyperlink to navigate to the software download area.

8. Select the relevant format installer download (s) in accordance with your DAW's compability specifications, to inititiate the downloading of your purchased software.
Note: The product user manual is also obtainable from this location.


9. After the software installer file has finished downloading, double-click the file entitled 'SubBoomBass_Installer' .zip folder to extract the .exe installer file.
10. Once extracted, double-click the .exe installer file to begin the installation process > click 'Next'.

11. Read through the Licence Agreement and select 'I accept the agreement' > click 'Next'.

12. Type in your preferred User Name, Organization and manually enter/copy and paste the original Serial Number that you were provided with, before clicking 'Continue' (the Serial Number is located in both your Plugin Boutique and Rob Papen User Accounts).
Note: Ensure that you select the correct 'Product' and 'Type', as well as checking that there are no spaces/mistakes when entering your Serial Number > if you receive a code error message of any kind, manually enter the digits (including the '-' hyphens) before re-clicking the 'Next' option.

13. Select a computer VST Plug-ins folder destination in which to install/save your software to > click 'Next'.

14. Select a computer Library location in which to install/save your software to > click 'Next'.

15. Select the software format (s) that you wish to install > click 'Next'.

16. Select a Start Menu Folder to create a shortcut to your new software installation > click 'Next'.

17. Review the installation and click 'Install'.

18. The installation of your software has successfully completed > click 'Finish'.

19. After your computer has successfully restarted, open your DAW and locate/open your newly installed/activated software VST.
Note: If the software fails to appear, rescan your DAW's Plug-in selection.
The Software is now Activated and Ready for Use Within Your DAW!

