


 Log In
8 Simple Mixing Tips for Professional Results

Level up your mixes with VST plugins, tips, samples, and more. Make your music sound better and get closer to the results your favourite artists.
Mixing is a very abstract job. Using your ears, you’re supposed to gauge how multiple elements should work together, and to identify parts of each that can be removed or improved to make the whole thing better when they all stack up together.
But the answers are out there, and once you’ve got to a point where you feel you’ve improved upon the raw material, how do you know you’re finished? Here we’ve created a list of eight things you can do to quickly make your mix sound better. Consider this a checklist to help you rapidly try out new ideas and, we hope, improve your skills.
As with any complicated job, there are tools out there to help you do it properly, and we’ve included plenty of recommendations (and free plugins and samples) along the way!
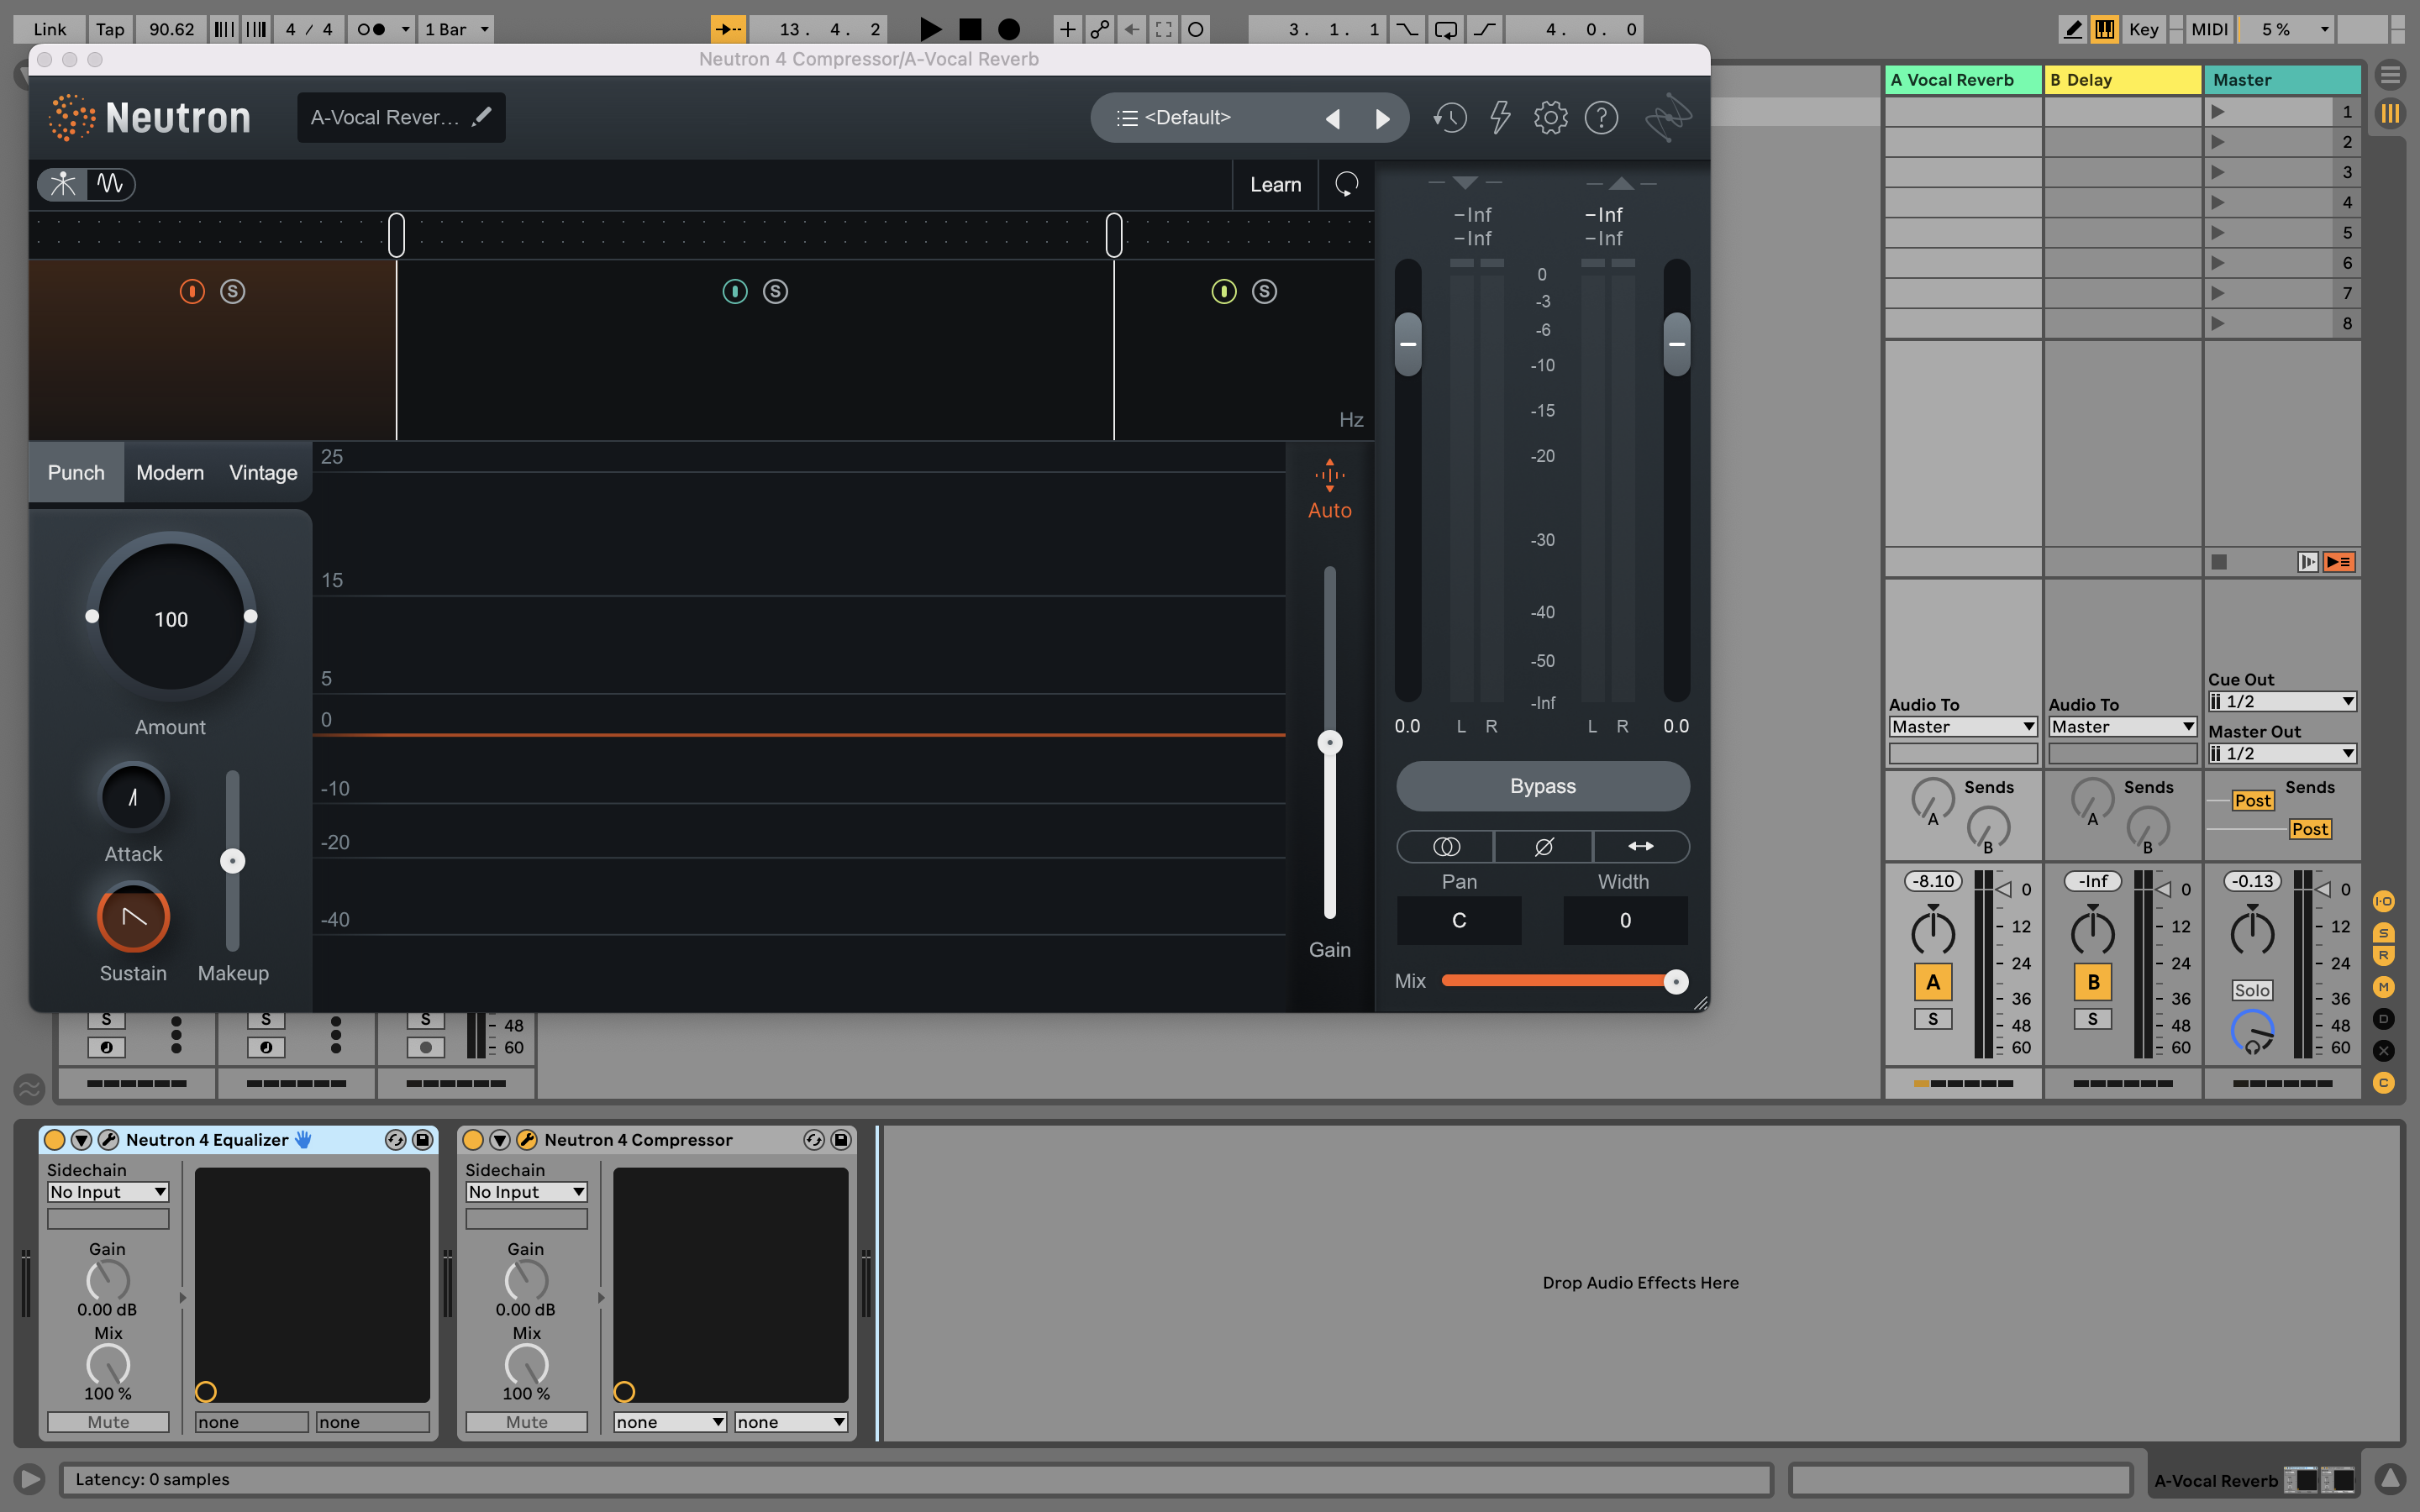
1. Sidechain reverbs and delays
Sidechaining is often reserved for creative effect and mixing kick and bass, but you can use it quite easily while mixing to add clarity to any reverb or delay effects you’ve added.
Let’s say you’ve got a vocal reverb on a return channel. Add a compressor after that reverb, and set its sidechain input as the original vocal.

While that might seem counterintuitive, the vocal will duck only what’s happening in the reverb, and only when the vocal is making a sound.
The result should be that your vocal is clearer without being swamped by reverb, but you still get the distinct reverb signature and sound coming after it. Using this method might mean you can increase the level of the reverb too, creating more atmosphere without drowning the source.
This technique also works with delays, especially when they’re particularly busy.
2. Reference your mix to others’
Getting your mix up to scratch against the competition isn’t easy, but referencing – literally, comparing how your project sounds vs a completed commercial track, often by switching between your output and a recording imported into your DAW – is a great way to help you get there.
Isn’t that cheating? Well, you’re not stealing anyone’s chord progressions or basslines. Referencing is simply reminding yourself – and your tired ears that have heard your tune dozens of times – what you should be shooting for. We can get used to hearing something, and referencing recalibrates your system.
There are various plugins that can help you reference effectively. We’ve got a whole category for Referencing Tools, and some standout options are Mastering The Mix’s Reference 2, Sonnox ListenHub, and Audified MixChecker Pro.
Remember, you’re comparing your levels and tonal balance on your non-mastered tune against a fully mastered tune, so go easy on yourself and don’t be too tempted to push things quite as hard as the reference track.
3. Where compression meets EQ
Sometimes EQing before a compressor sounds better; sometimes compressing before an EQ sounds better. Sometimes they sound just as good as each other, and sometimes there’s no easily audible difference.
But it’s simple to try this: on any channel that features both an EQ and compressor, try swapping their order to see if things are improved.
On a similar tip, since a compressor’s response can vary depending on the levels of certain frequencies, have you tried the Sidechain High-pass control on your compressors? This helps you to remove the effect of low frequencies, which are often louder, on the compressor’s action.
The usual effect of sidechain high-pass is to make the compressor ‘pump’ less, and this is especially true on a group or drum buss, as well as on a whole mix. However, that pump might be contributing exactly what you’re looking for to your track.
4. Check the Stereo
You may have considered whether your mix has a nice amount of width, or a balanced stereo panorama, but have you put a number on it? A stereo analyzer can show how wide your track is, but it will also offer phase correlation metering. This measures the correlation between the left and right channels of a stereo audio signal, and provides a visual representation of the phase relationship between them.
The meter usually displays a correlation value between -1 and 1, where -1 indicates complete phase cancellation between the left and right channels (i.e., a mono signal), and 1 indicates complete correlation (i.e., a stereo signal with identical left and right channels).
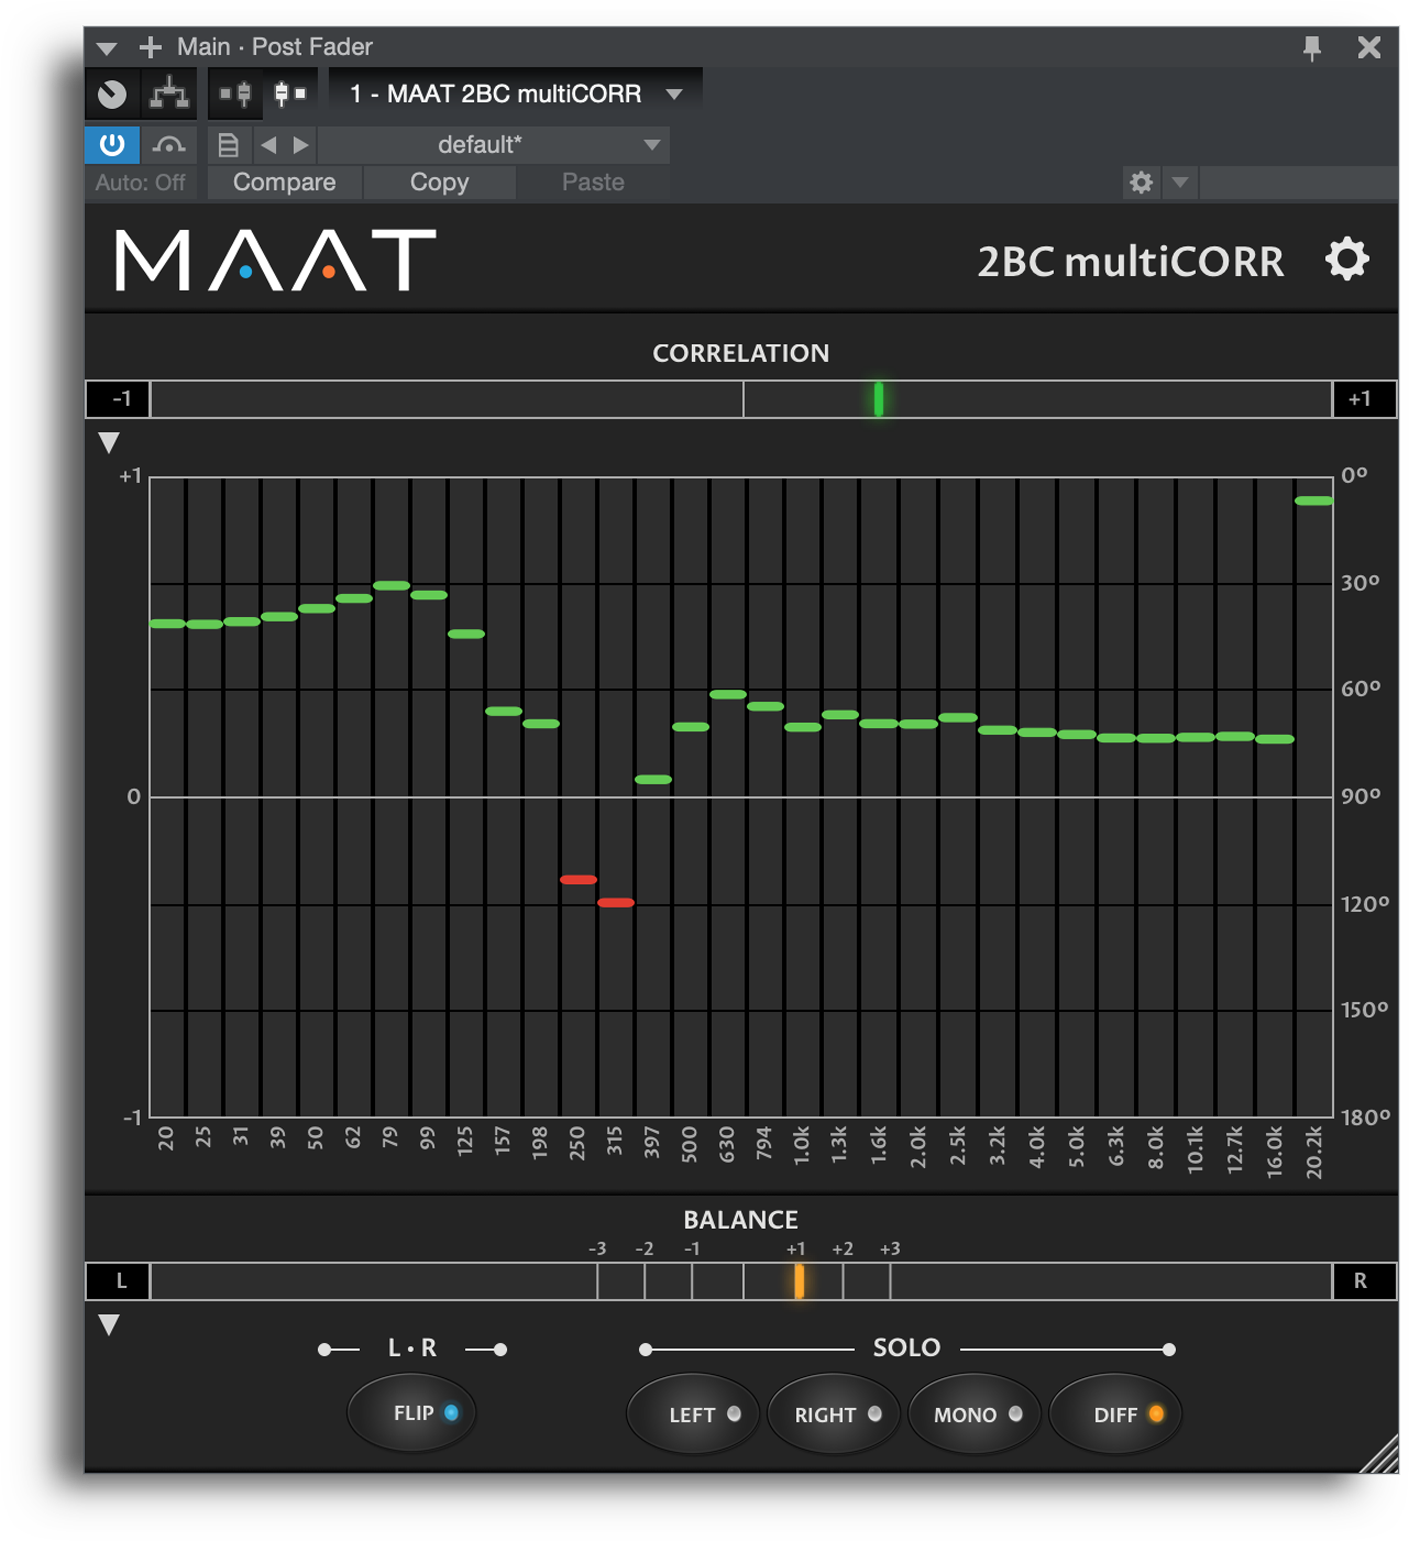
A high correlation value may indicate that the mix is too narrow, while a low value may indicate that the mix is too wide. Adjusting the panning and stereo imaging can help achieve a balanced stereo image.
5. High-pass (or band-pass) reverbs
For cleanliness, high-pass reverbs on a buss or return channel. Like our sidechaining tip (#1), this can help clean the reverb sound up, and uncloud whatever’s being sent to it.
There’s another way to think about this one though. While mixing, your reverb can be thought of as its own channel, and its own element within the mix. This means you can make mixing decisions about it. Often a reverb is used to inject personality and character, rather than being a whole element of its own.
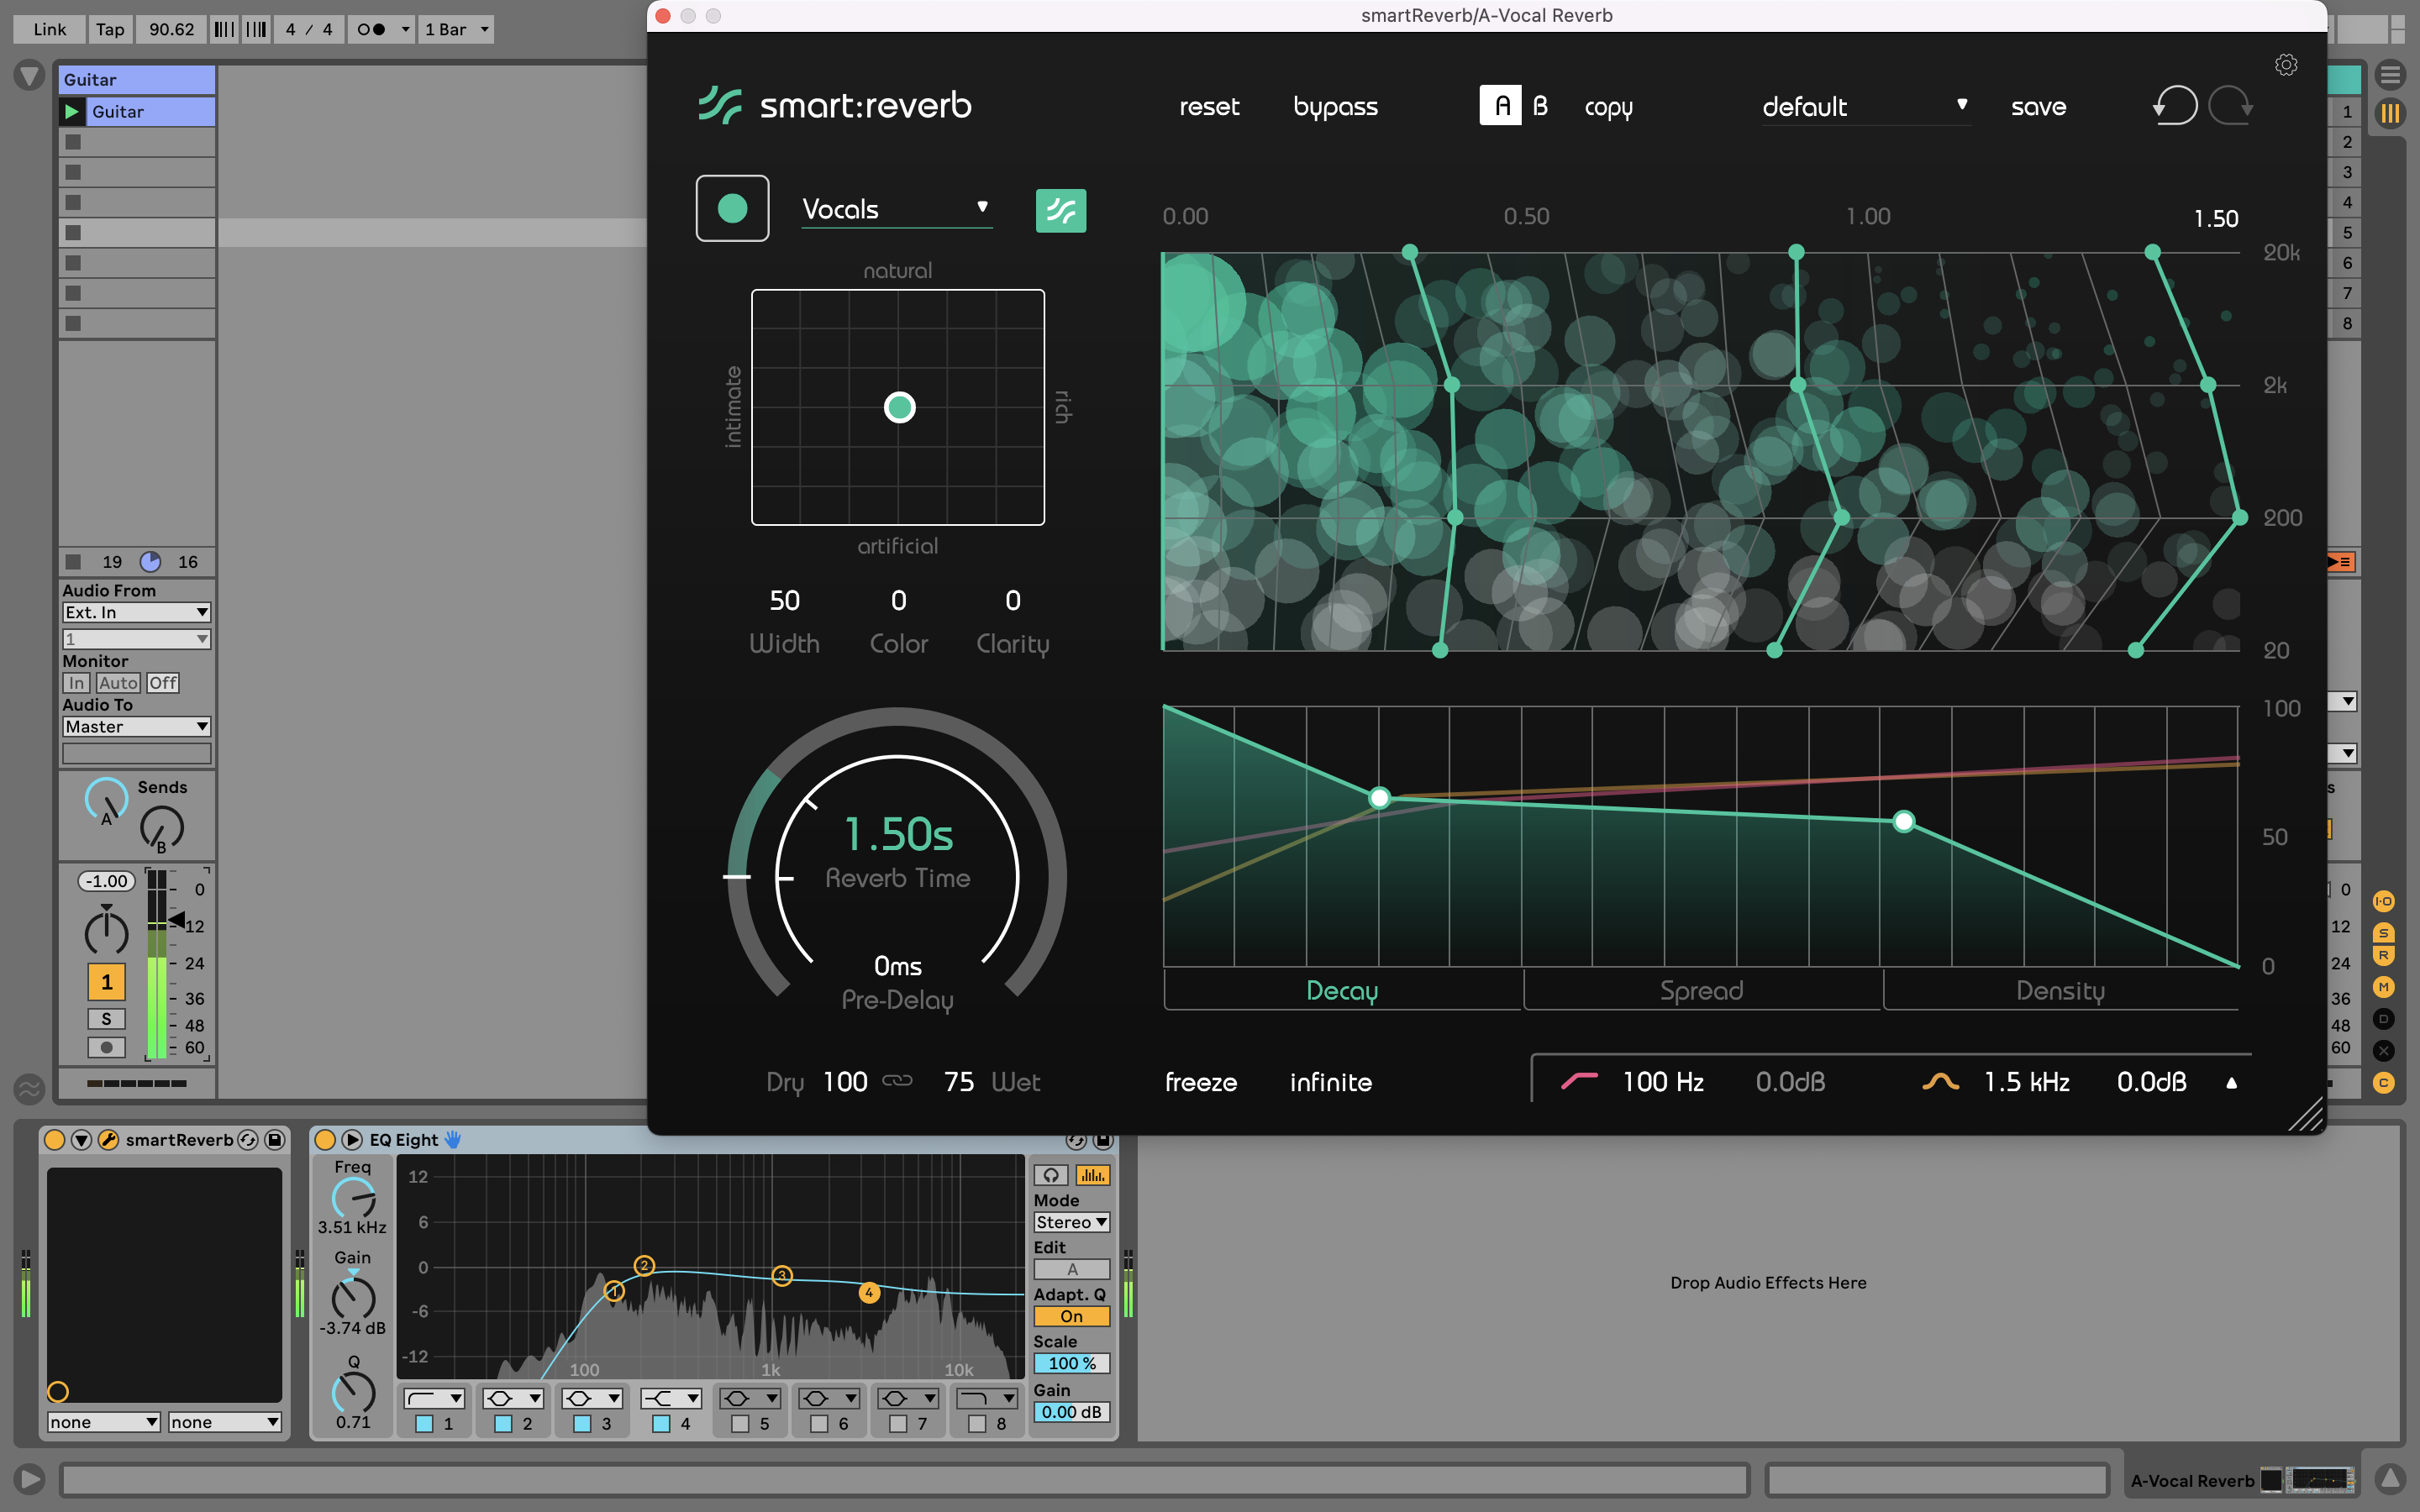
This means that often, especially in a busy mix, a reverb signal can be high-passed, low-passed, and EQed like any other track.
6. Attend to the high end
A lot of producer’s time (and virtual ink) is used on the bass end of a mix, but there’s some serious polish to be introduced when high frequencies are processed. For most people and most projects, this is usually done simply with EQ and filtering, but here are some more considerations.
Using a multiband plugin, try adding modulation effects such as chorus to only your high end. This should be quite subtly applied – keep the Mix level low – but can add a real smooth touch and professional edge to a production.
In the pursuit of a fizzy but polished high end, try tools like MeldaProduction MVibratoMB, getting some flange with Softube’s Fix Flanger and Doubler, or boosting the width of the high end with our own StereoSavage. You can isolate just your high-end for processing with a plugin like Blue Cat Audio’s MB-7 MIxer.
7. Mono the bass
We’re bringing you back down low now, as we tell you to check your bass. We mentioned stereo compatibility and phase issues earlier, and this can particularly affect that end of your music.
Traditional advice is for producers to ensure that their bass – below roughly 120Hz – is all mono. This will aid in mono compatibility in general, but will particularly against phase issues when the mix is summed to mono for playback on a club system or a bluetooth speaker.
This is to say that the bass should be made mono as early on in its signal chain as possible. Once you collapse it to mono yourself, you could introduce the very phase issues you’re hoping to defend against with this advice.
Use your master output’s mono switch to see how your mix would sound in mono, and ensure no elements are lost, and try to hear any phase issues that are created in the low end. If you pick up on a problem, try to identify where it was created before solving it.
8. Fix gaps in the spectrum
‘Tonal balance’ is something of a buzzword, and it basically refers to how ‘smooth’ your mix is across the frequency spectrum. Are there any bulges where there shouldn’t be? Are the bulges you do have in the right place? And is the general trend of the mix in the right direction?
Plugins like sonible true:balance, Mastering The Mix Levels, and iZotope’s Tonal Balance Control 2 (also part of Neutron and Ozone) will provide insight into how your mix stacks up against other tunes in your genre, as well as providing some simple frequency readouts.
With this information, you can check out your mix for gaps anywhere, and fill them. This might help you to decide that a certain mix element needs to be brought down in level, or that there’s something missing somewhere. If it’s the latter, it could even be worth going back to the start and adding a new element or instrument part.

Other articles
Free VST Plugins You Should Actually Get
[Article Last updated: 17 June 2026] – There are a lot of free plugins out there, and you can sometimes feel overwhelmed by the paradox of choice. Thankfully, we've done the hard work, so you don't have to. Here’s a carefully curated list of the best free plugins that pretty much any music producer can benefit from. We even update this list approximately weekly to keep you informed of the new free plugins arriving on the scene. We’ve been especially considerate of plugins with a wide ap
Behind the Curtain with Just Her
From her early days as a vinyl collector, then musician and music technology lecturer to becoming one of the most respected names in melodic house, Claire's journey has been defined by curiosity and an unwavering commitment to authenticity. Whether through her releases on labels the likes of Anjunadeep and Crosstown Rebels, her multidisciplinary Constant Circles project, or her personal performances around the world, Just Her has built a reputation for creating music that resonates as strongly w
Essential Toolkit: What So Not
For the debut of our new Essential Toolkit series, What So Not details the plugins behind “Dancing in the Leaves” from their EP The Quiet That Hurts. The focus stays on speed and restraint. Each tool serves a defined purpose, supporting the idea without heavy processing chains or excess layering. Five plugins shape the session: FabFilter Pro-Q 4 handles spectral EQ on field recordings and unstable sources so the arrangement forms quickly. RC-20 Retro Color adds motion to an 808 line
The Tools Behind LEISURE’s Timeless Album
For LEISURE, Welcome To The Mood marked a clear point in how the group wrote and recorded together, and the conversations around the album focused on process, arrangement choices, and how the six-piece keeps decisions consistent across a long timeline. The record leaned further into live recording, and it expanded the palette through added musicians like strings, brass, piano, and backing vocalists, while keeping the songwriting direct and personal. That context shaped the questions in our
