Buy Oxford Drum Gate Crossgrade From Any Sonnox Product, get a free gift with purchase:
Important note: this is a crossgrade for owners of any other Sonnox product.
Precise and transparent drum gating
Have you become frustrated with the results of unreliable drum gating using traditional tools; chatter, misdetection, choked or lost ghost notes? Are you tired of overly complex and manual workflows?
Then meet the new Oxford Drum Gate; it's swift and logical workflow solves these problems and delivers the fastest, most musical and transparent results available. At the heart of the Drum Gate is intelligent drum-hit detection. First, the Plug-In detects them all with tailor-made transient detection. Then, you simply decide which ones to keep.
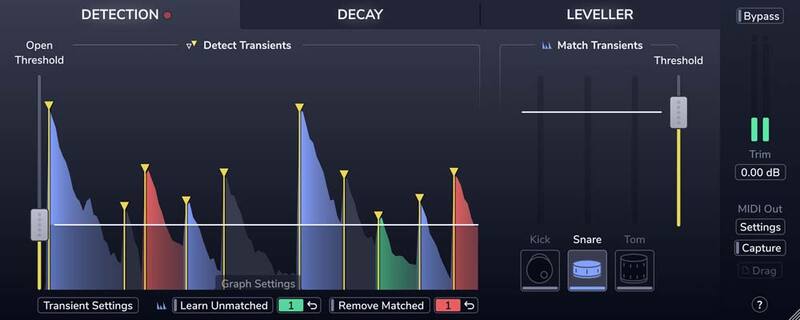
Detection
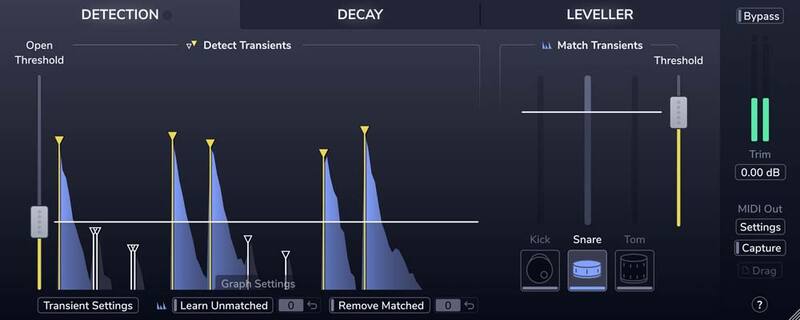
Need to reduce spill on a snare track in a dynamic mix of backbeats, ghost notes, and cross stick hits?
No problem! Just click the Snare button.
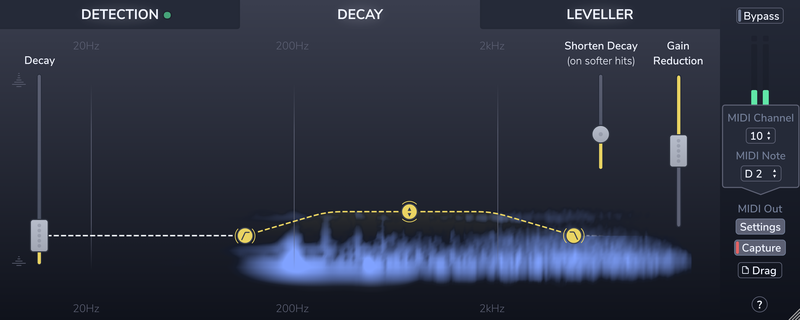
Decay
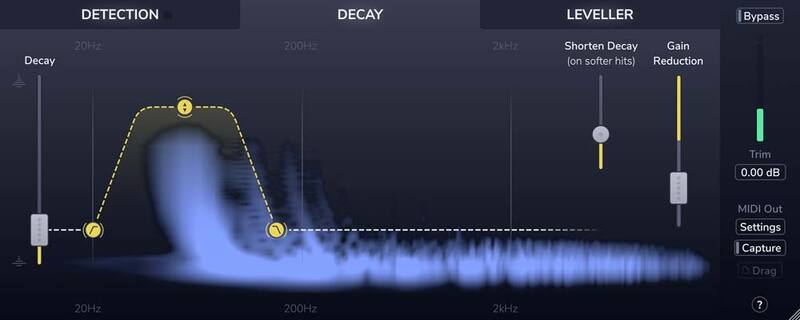
Tired of fighting abrupt and un-musical gating? Do you want to keep the natural ring of toms and remove the spill around them?
Easy! Use Drum Gate's adaptive Decay section to quickly focus on the resonance of each tom, in real-time, according to the velocity of each detected hit.
Leveller
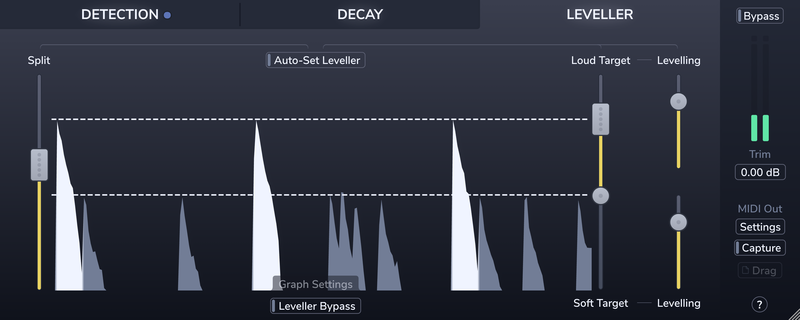
Wish you could improve the consistency of the drummer's performance? Of course, you do!
Conform louder main hits and softer background articulations to two separately controlled target level ranges in the Leveller section.
MIDI
Want to augment/replace individual drums with samples and confidently retain the dynamics from the original performance?
Piece of cake! It's delivered by Drum Gate's hit detection and MIDI triggering functionality.
Features
- Precise transient detection and intelligent drum-type matching to effortlessly separate the hits you want to keep from the spill you don't.
- Create custom drum profiles to isolate unusual drum types or fix the occasional kick, snare, or tom mismatch.
- A decay curve that adapts to the velocity of each drum hit, giving you consistent spill reduction on dynamic performances.
- The Spectral decay editor lets you preserve the resonance, ring, or rattle of each drum hit while quickly clamping down on the spill.
- The leveller's dual-target and amount controls let you improve level consistency without losing the contrast between loud hits and soft ghost notes.
- Real-time MIDI output and MIDI file capture, for accurately triggering drum samples.
macOS
- macOS 10.13 High Sierra or later (Intel / M1 Apple Silicon supported) (64-bit only)
- Plugin Formats - AAX Native, AU, VST3
- Supported Hosts - Pro Tools 11 or above or any desktop application that supports Audio Unit (AU) or VST3 plugins.
Windows
- Windows 10 or later
- Plugin Formats - AAX Native, VST3
- Supported Hosts - Pro Tools 11 or above or any desktop application that supports VST3 plugins.
Activation
The Toolbox range offers 2 activations for each product licence you buy.
Providing you have an iLok account, each activation will allow you to authorise your plugin on one of these devices:
- Machine
- iLok device, iLok2 / iLok3 required with latest drivers OR
- iLok Cloud (Active internet connection required)
Please note: This product supports iLok Cloud Authorisation. An iLok USB Dongle OR an active internet connection is required in order to activate and use this product.
Registration
Note: This product supports both iLok USB and iLok Cloud activation. You will need a free iLok account, and either a physical iLok USB key OR an active internet connection (to start an iLok Cloud Session).
1. Go to the Sonnox registration page or find your product in your Plugin Boutique account and click DOWNLOAD.
2. Read the Software Licence Agreement at the bottom of the page, click 'I Agree'.
3. Find your 14 character activation key, marked as 'Serial Number' in your Plugin Boutique account and copy and paste it on this page and click Submit.
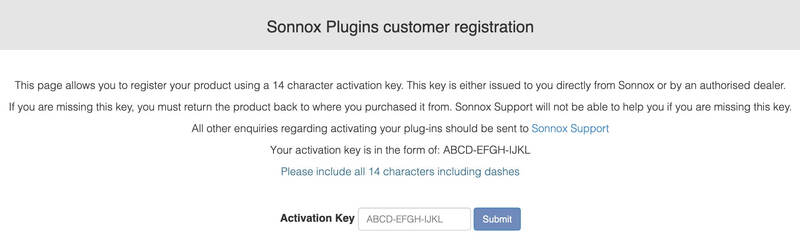
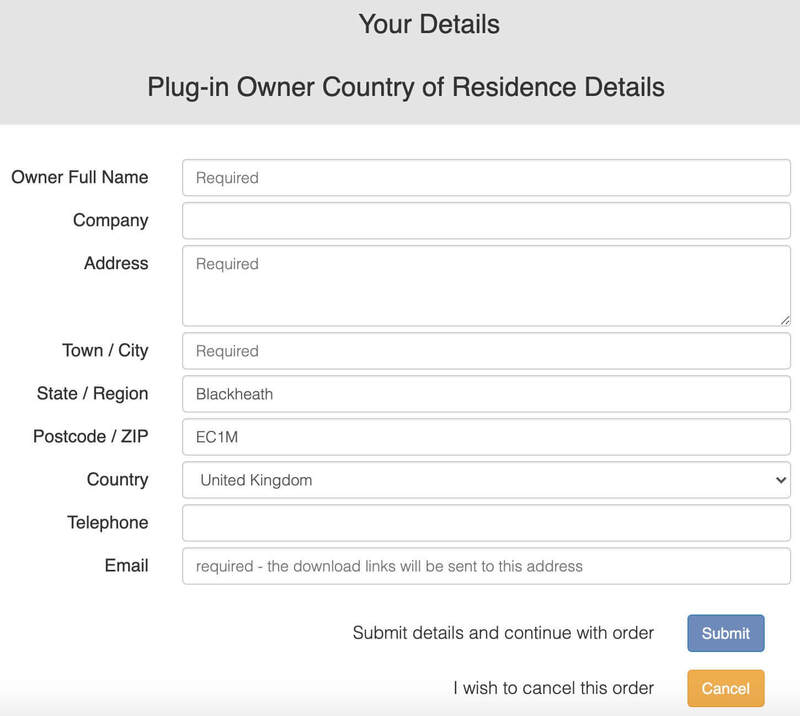
4. Enter your details and click 'Submit'.
5. Your product is now registered.
Note: You will now receive a confirmation email containing your product serial number, licence details and installer links. Please keep this email safe as you may need the serial number to access any future upgrades or to re-download your product installers.
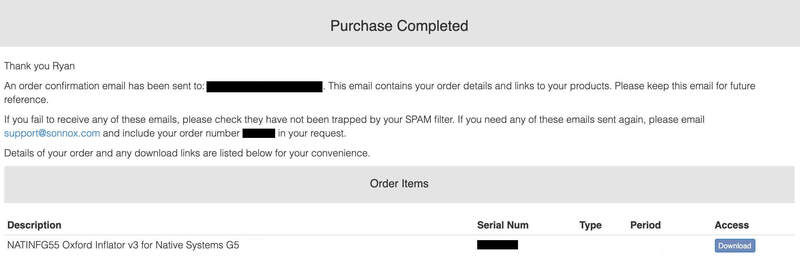
6. Open the Order Confirmation email that you just received from Sonnox and click 'Download' (If you can't find it, check your Spam/Junk folders).
7. Enter your iLok User ID and click 'Verify'.
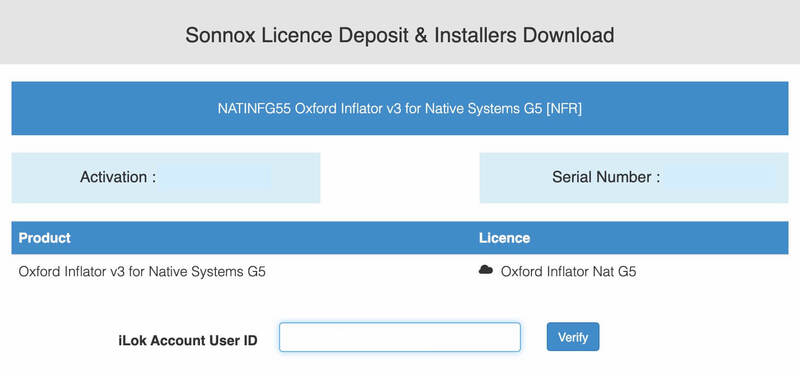
8. Check that the details are all correct and click 'Deposit' to add the serial to your iLok account. Your licence will now be available in your iLok License Manager but you will need to start an iLok Cloud Session in order to validate the activation inside your DAW.

9. Start an iLok Cloud Session to complete the activation. To do this, open the iLok License Manager application, log into your iLok account, and then click File > Open Your Cloud Session.
Alternatively, if you have a physical iLok USB Key, you can simply drag and drop the licence onto your iLok USB within the iLok License Manager.
Mac Installation
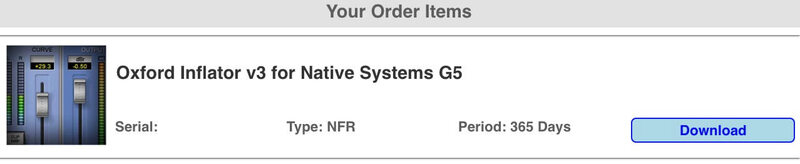
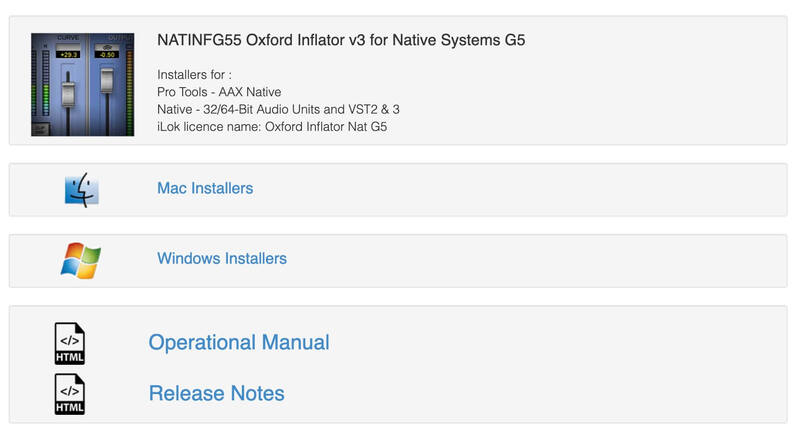
1. Go back to the Order Confirmation email you were sent and click 'Download'.
2. Click 'Mac Installers'.
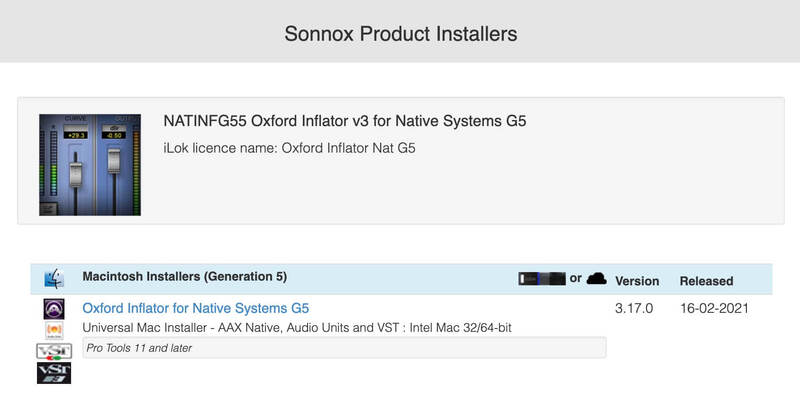
3. Click the name of the product in blue writing to download the installer.
4. Once the installer has downloaded, double-click the file to open it and start the installation > click 'Continue'.
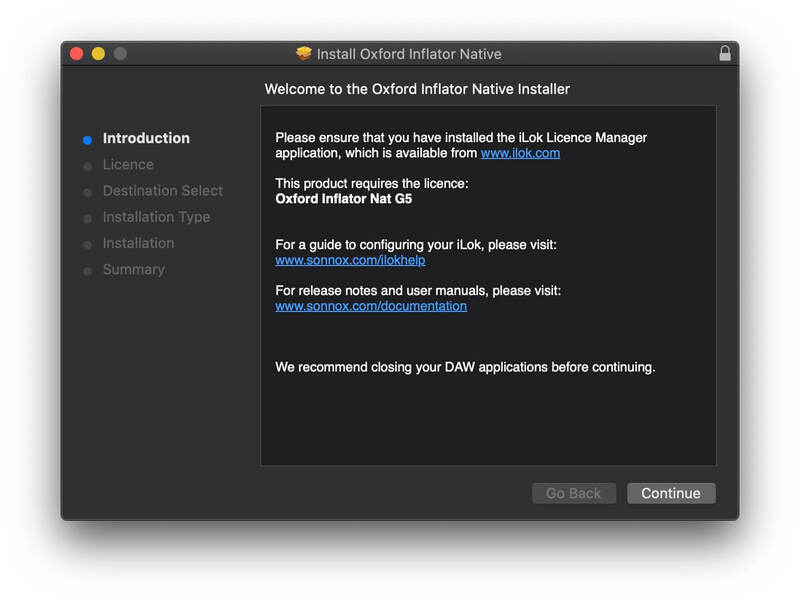
5. Read through the Software Licence Agreement and click 'Continue'.
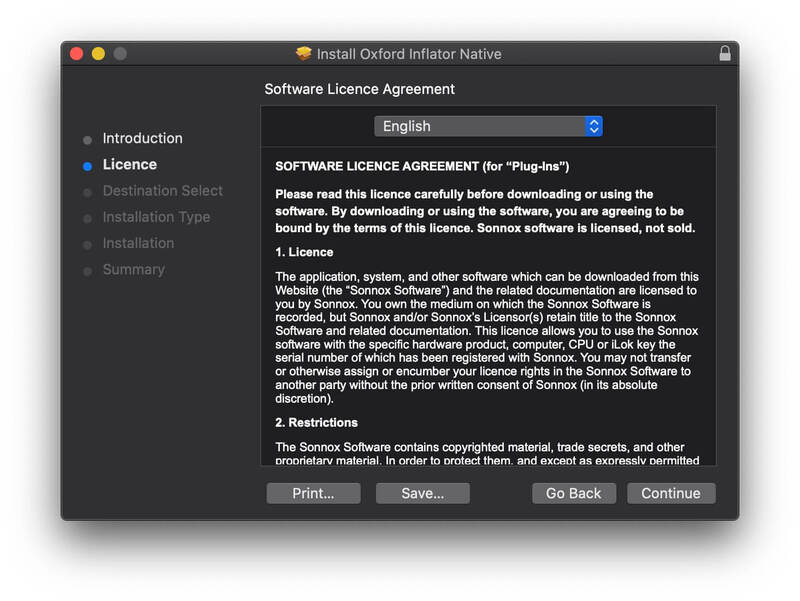
6. Click 'Agree' to continue.
7. Click 'Continue'.

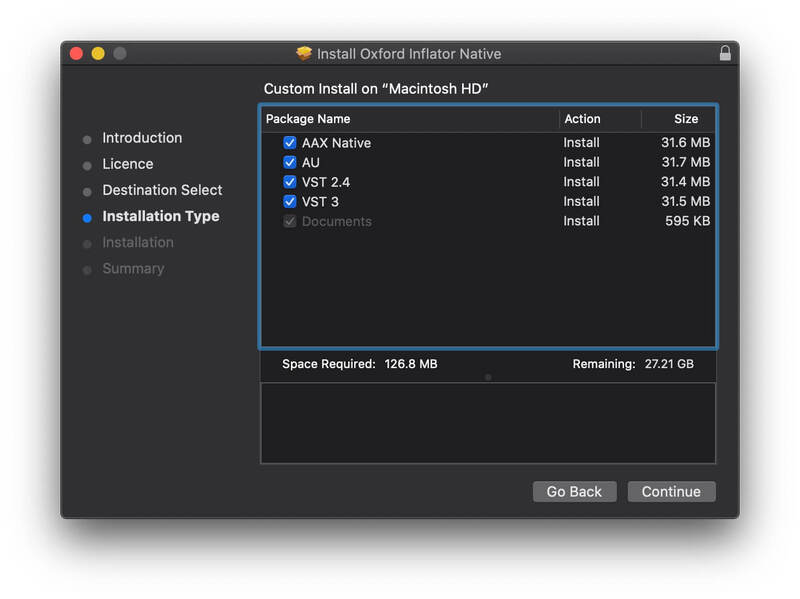
8. Select the formats that you wish to install. (If you are unsure about this, either leave the default selections or check out the Plugin Formats Explained article from our Help Centre).
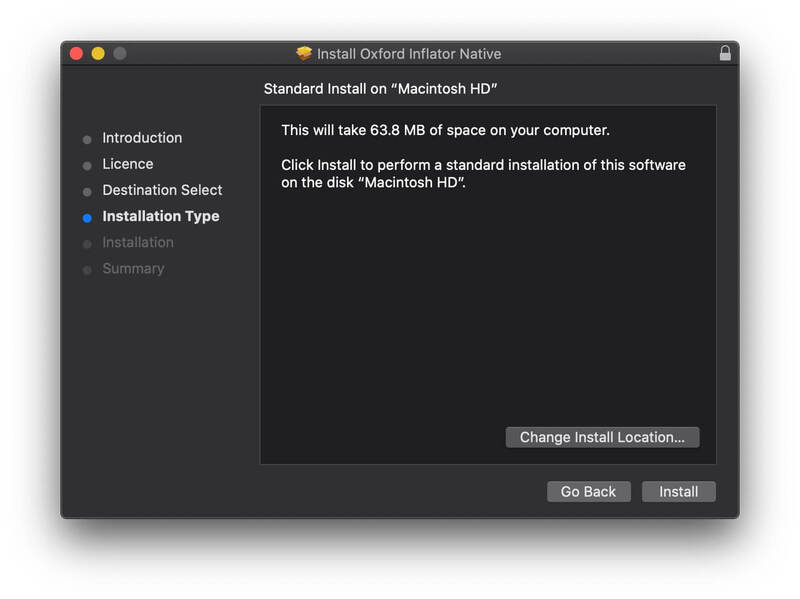
9. Click 'Install' and enter your password to verify the installation.
Your software is now installed and ready to use within your DAW.
Windows Installation
1. Go back to the Order Confirmation email you were sent and click 'Download'.
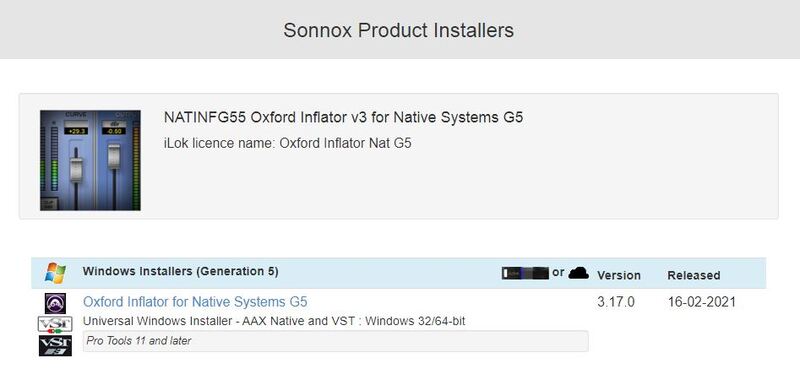
2. Click 'Windows Installers'.
3. Click the name of the product in blue writing to download the installer.
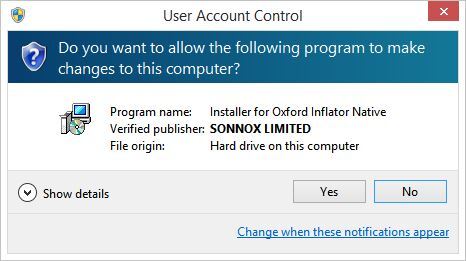
4. Double-click and open the installer file, then click 'Yes'.
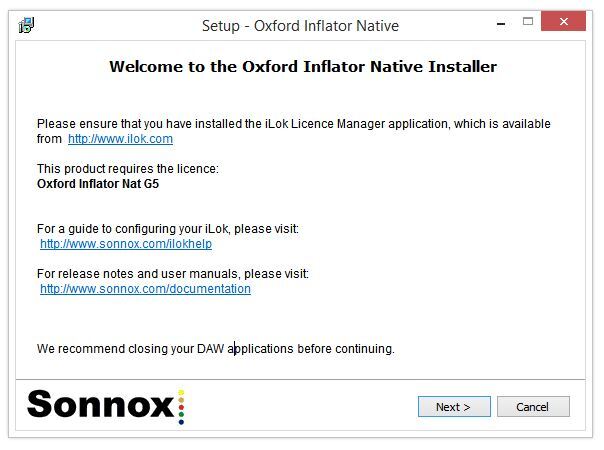
5. Click 'Next'.
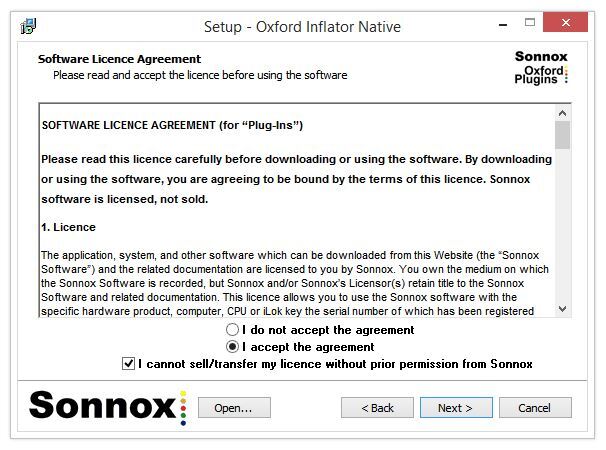
6. Read the Software Licence Agreement > Select 'I accept the agreement' > Click 'I cannot sell/transfer my licence without prior permission from Sonnox' > Click 'Next'.
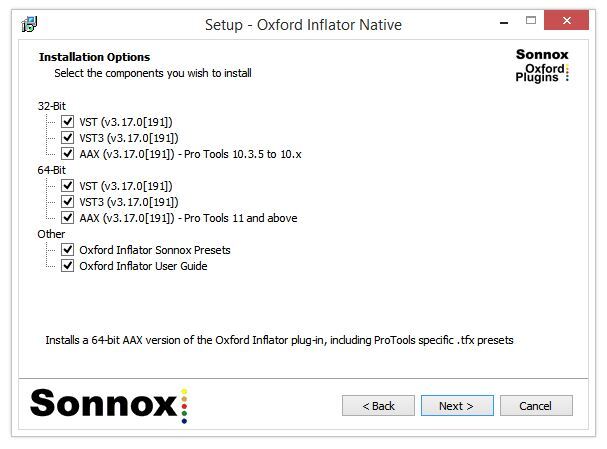
7. Select the formats that you wish to install. (If you are unsure of this, either leave the default selections or check out the Plugin Formats Explained article from our Help Centre).
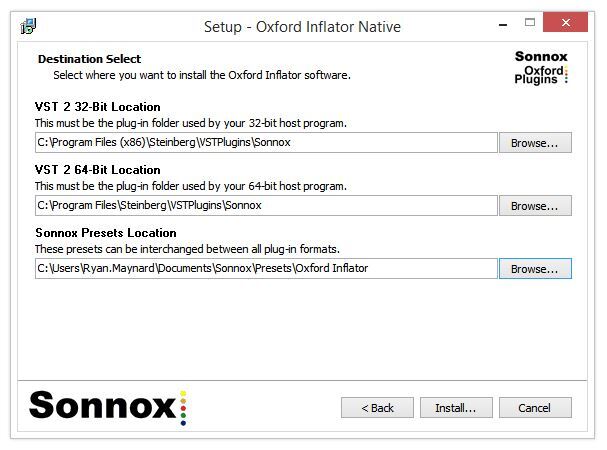
8. Leave the file locations at their defaults (unless you use a custom plugin folder) and click 'Install'.
Your software is now installed and ready to use within your DAW.