


 Log In
How to Install VST Plugins to Your DAW: a Step-by-Step Guide
As modern-day music producers, we rely primarily on virtual tools for our workflow. They’re more accessible and affordable, and save you from taking up physical space in your home – perfect for bedroom producers with minimal resources.
The main type of software you’ll need to produce music virtually is a DAW (Digital Audio Workstation). This is where all the recording, composing, mixing, and mastering will occur. Within the DAW architecture you can use software components called plugins to wield various effects like EQs, compressors, and reverbs; or digital instruments such as synths, and samplers.
The most widespread format of this component software is VST (Virtual Studio Technology) but plugins also come in the form of AAX or AU. These unique plugin formats are strictly for the Pro Tools (AAX) and Logic Pro (AU) DAWs. All other DAWs are compatible with VSTs. In this article, we’ll walk you through how to install VST plugins and integrate them into your DAW, depending on which one you might be using.
Installing VST Plugins for Windows and Mac
The first step of adding a plugin to your DAW is to install it onto your computer, so let’s start there. Depending on whether you’re using a Windows PC or Mac computer, the installation process is slightly different, so follow the steps that apply to you.
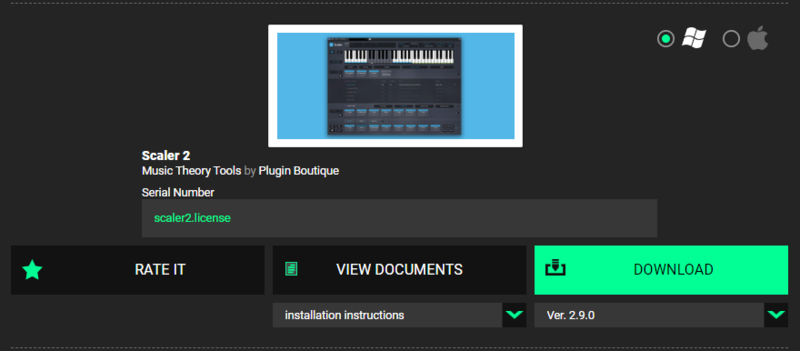
For this tutorial, we’ll be installing the Scaler 2 plugin. Scaler 2 is a music theory plugin that provides you with many assistive tools to help compose in-key chord progressions and melodies. The plugin can be purchased and downloaded from the Plugin Boutique store. Alternatively, you can follow this tutorial with any free plugin you choose.
Installing a VST plugin on Windows
1. Download the Windows-compatible version of the plugin.
2. Open the installer file and follow the steps until Select Components appears. Then, select all VST options, as well as the optional Extra Sounds. You can deselect the AAX option (unless you want to install the plugin for Pro Tools as well). If you know your system type (32-bit or 64-bit), and your plugin installer allows for separate instals for x32 and x64 versions of the plugin, you can also deselect the unnecessary one to save disk space.
For plugins other than Scaler 2, the installer steps could appear in slightly different format and order, however, most installers will contain the same options and should be fairly easy to fill out.
3. Choose your file directories. These are the locations on your HDD where your VST and sound files will be installed. For VSTs, this should default to C:\Program Files\VstPlugIns, however, you might choose to set a custom folder for your VST plugins. You’ll have to direct your DAW to scan your specified file directory later and it can get confusing to have your VSTs installed in numerous locations. Some plugin developers will set different default file directories, so it’s worth checking this step each time you install a new plugin.
If you’re using Ableton Live, the software only allows for one VST file path to be scanned, so you must install all of your VSTs to the same location. VST3s will always be installed to the same mandatory directory and cannot be changed.
4. Finish installation. Follow the final steps of the installer, clicking Install when prompted.

Installing a VST plugin on Mac
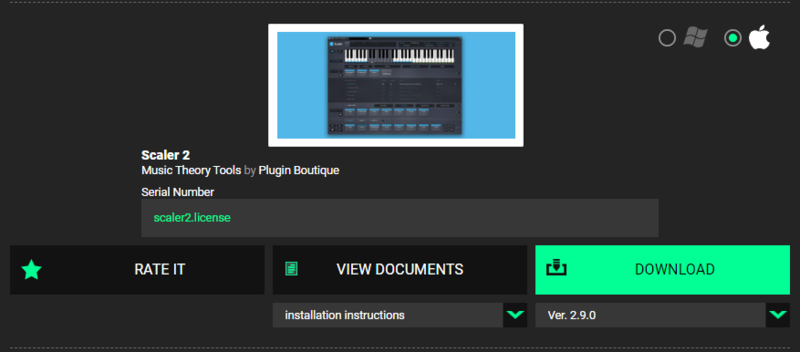
1. Download the Mac-compatible version of the plugin
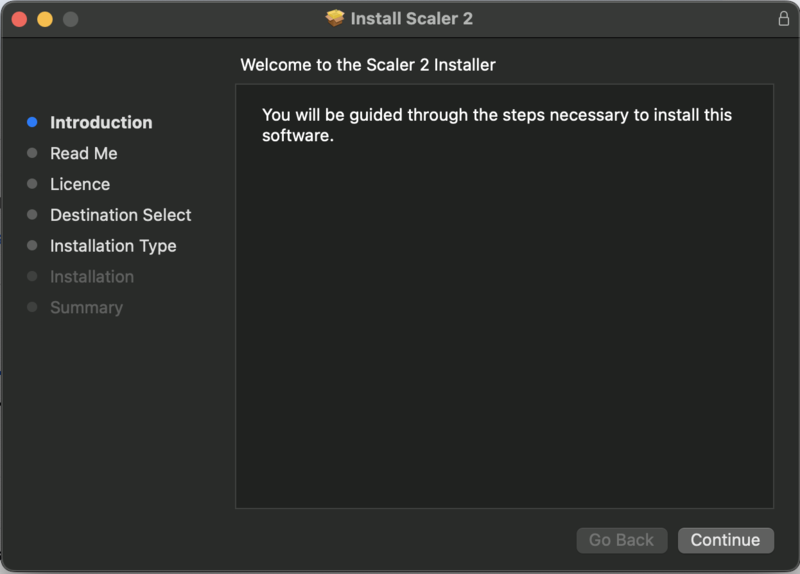
2. Open the downloaded .pkg file and follow the installer instructions. On Mac, your file directory for plugins will always be the same, so you don’t need to worry about setting a custom one. Some later versions of MacOS require you to allow the installer permission to access files in your Documents folder and might fail to install if you don’t open the .pkg file from within your Documents folder. If you receive an error when installing, try to place the .pkg in your Documents and try again.
You should be all finished, and your plugin should be successfully installed. However, some plugin installers on MacOS can provide you with a .dmg file instead of a .pkg, and sometimes you have to manually place your plugin files into their correct directory. If you’re installing a plugin in this format, please follow the additional steps below.
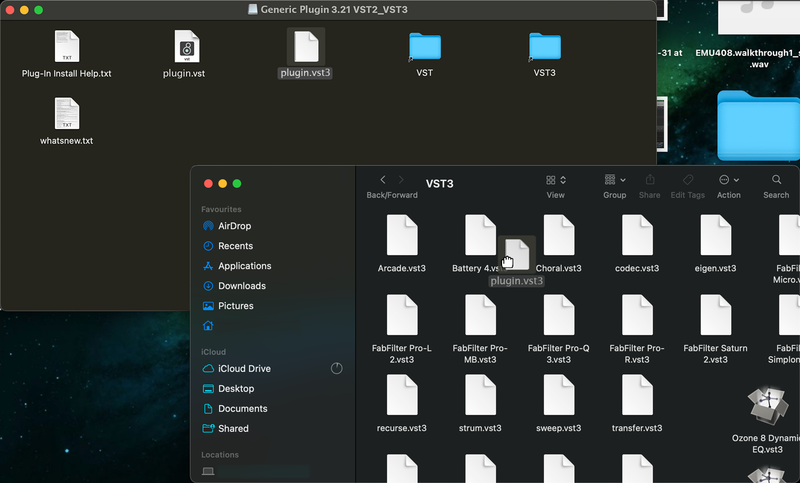
3. Open the downloaded .dmg file, and leave it open for the next step.
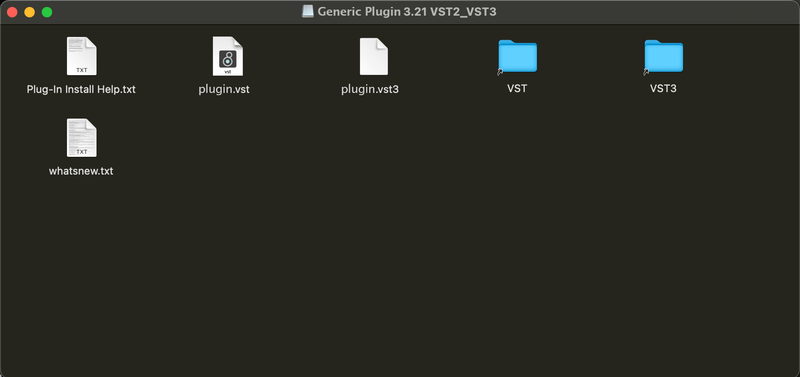
4. Open a new Finder window by ctrl+clicking the Finder in the Dock and selecting New Finder Window. In the new window, go to Macintosh HD>Library>Audio>Plug-Ins. You should now see a folder for VST and VST3 plugins. If you do not already have these folders because you don’t yet have a DAW installed, feel free to create them in the same path as specified above.

5. Drag and drop VST and VST3 files from the opened .dmg folder into your new Finder window’s corresponding folders. For example, open the VST folder within the .dmg folder and drag its contents into the VST folder in your Plug-Ins folder. If you’re using Logic Pro, make sure to drop the .AU and .Component file to their corresponding folders as well. For Pro Tools, use the AAX file.
Please note that different plugins might have slightly different installation processes, however, they shouldn’t divert too much from the ones shown above. Most installers will also contain installation instructions, and as long as you follow the steps, your plugins will be installed successfully.
How To Install VST Plugins to Your DAW
With your plugins safely installed on your computer, your next task is to make sure they are showing up ready for duty in your DAW. All DAWs are different, but most require you to add plugins to the library so that you can access them within the software. Read on to find out how to do this.
How to get newly installed plugins to appear in your DAW
Depending on the DAW you’re using, the method for scanning plugins and adding them to your library will differ slightly, however, most DAWs will have a plugin manager window where you can scan for newly installed plugins and add them to your library.
If you’re on a Windows machine, you’ll also have the option of setting a custom file directory for VST 2, VST3, and AAX files (Windows isn’t compatible with AU plugin files). Be careful though, as some DAWs, like Ableton, only allow for one file directory to be set for each file type, meaning you have to keep all of your plugins in the same directory.
Some DAWs, like Logic Pro, will automatically scan for newly installed plugins each time you restart the software, so if you have your DAW open during the installation process, you’ll either need to restart your software, or manually re-scan for plugins in the plugin manager. Unlike Windows machines, Mac has a preset file directory for all plugin types, making them easier to keep track of and locate.
DAW Plugin Managers
Each DAW will have a plugin manager (or similarly named) sub-section in their settings or preferences tabs. This should be fairly easy to locate and identify from the top-left drop-down menus of your DAW software (the section that usually has File, Edit, Tools, View, etc). Take a look at the example from Ableton Live below.
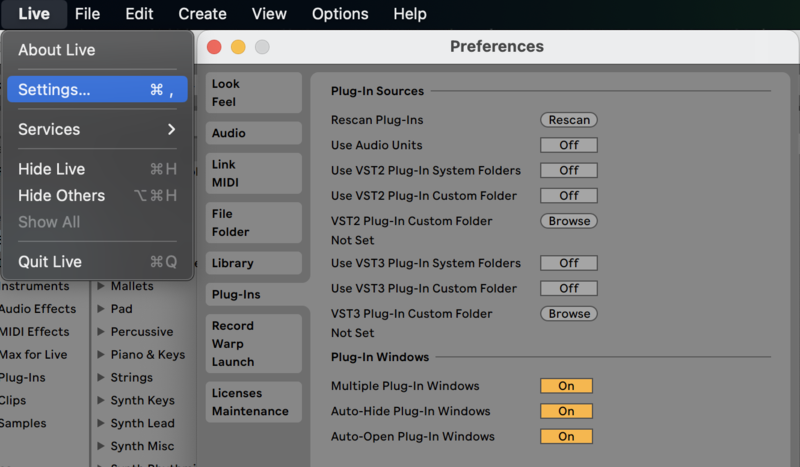
Once inside a DAW’s plugin manager, the display and settings shown will be close to uniform across all DAWs. You’ll find a list of your scanned plugins with some information about each plugin, including file type, plugin name, developer, etc. Depending on your software, you may also be able to add plugins to your favourites from this list and enable/disable them from appearing in your DAW.
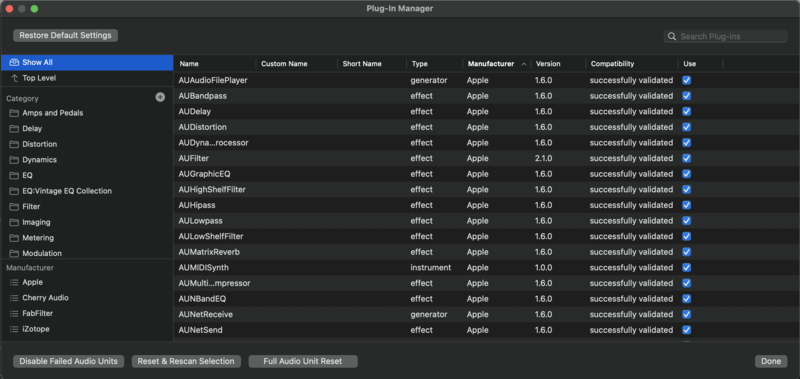
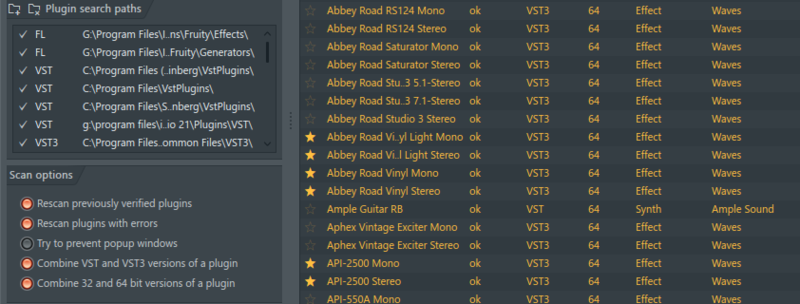
Aside from this, you might find some options for your DAW’s scanning behaviour (e.g. Rescan previously verified plugins, Rescan plugins with errors, etc.), as well as options to add new file paths for your DAW to scan or change an existing file path.
Checking installed plugin compatibility with your DAW
From the screenshots in the previous section, you’ll notice some plugins that appear in the lists are identified as VST, VST3, or AU (Audio Unit) format, with the Ableton Live screenshot having a toggleable option that says “Use Audio Units”. The DAW you’re using and the type of machine (Windows or Mac) will determine which file formats are compatible.
Most DAWs allow for VST/VST3 compatibility, and this is the primary file type used on Windows machines. The only software that doesn’t make use of VST/VST3 plugin files on Windows is Avid Pro Tools, which uses a unique plugin file format (AAX), regardless of whether you’re on Windows or Mac.
Most DAWs available on Mac will allow for both VST and AU file formats, with Logic (being a Mac-only software) using strictly AU-only plugin types. Some DAWs that were originally Windows-only, have now been ported to Mac, and have added AU functionality, however, some of them may still only allow for VST/VST3 file types, so it’s worth checking our list below. If you’re using a DAW that doesn’t appear in our list, you can do a quick Google search to check.
DAWs that use VST/VST3 plugin format
- Ableton Live
- Acid Pro
- Adobe Audition
- Bitwig Studio
- Cakewalk
- Cubase and Nuendo
- Digital Performer
- Finale
- FL Studio
- Luna
- Reaper
- Reason
- Sibelius
- Sound Forge and Vegas Pro
- Studio One
- Tracktion Waveform
DAWs that use Audio Units (Mac only) plugin format
- Ableton Live
- Adobe Audition
- Apple Logic Pro
- Digital Performer
- GarageBand
- Finale
- FL Studio
- Luna
- Reaper
- Sibelius
- Studio One
- Tracktion Waveform
DAWs that use AAX plugin format
- Avid Pro Tools
Common Issues When Installing and Using VST Plugins
In general, VST plugins are easy to use and not overly demanding from a technical standpoint. However, as with all software, VST plugins can throw up their own set of issues, whether it’s during the install process or while being used. Read on to find out how to solve any troublesome quirks of the software.
Installing VST2 and VST3 plugins to separate folders
From reading the article so far, you may have gathered that VST plugins come in two different types: VST2 and VST3. VST3 was introduced by Steinberg in 2008 to increase workflow by upgrading the previous VST 2 standard, allowing for more efficiency across the board, however, due to some integration issues, VST2 plugins are still available, and most plugin developers choose to release their plugins in both formats.
VST2 plugins use the file extension .dll, and are also listed as simply VSTs in most DAWs (this is because VST1 files are no longer integrated into any DAW). VST2s can be installed to, and scanned from, any file directory on Windows machines. VST3 plugins, however, use the file extension VST3, are always recognised as VST3s, and must always be installed in the default file directory.
If a specific plugin installer allows you to set a custom file path for VST3 plugins, DO NOT change it, because your DAW will fail to scan it into your library. The default file path for VST3s on Windows is C:\Program Files\Common Files\VST3 (64-bit), or C:\Program Files (x86)\Common Files\VST3 (32-bit).
Separating 32-bit and 64-bit plugins
When installing a plugin on Windows, you’ll be prompted on whether or not you want to install the 32-bit version or the 64-bit version, and this decision will be based on what type of machine you’re using. If you install the incorrect version of the plugin and it doesn’t match your machine or DAW, it won’t function optimally and may not work at all.
Most modern machines are 64-bit, so this should be your default selection, however, if you’re really unsure, you can always install both versions of the plugin and your DAW will prioritise the correct version when scanning. Apple no longer supports 32-bit applications on their latest OS releases, so you shouldn’t need to worry about this issue if using a Mac.
To find out the bit type of your Windows machine, you can follow the steps below. Please note that these steps are for Windows 11, specifically. Your system type can be found on previous versions of Windows by navigating to the This PC section of the settings and clicking System Details.
1. Go to your Window’s Home menu.
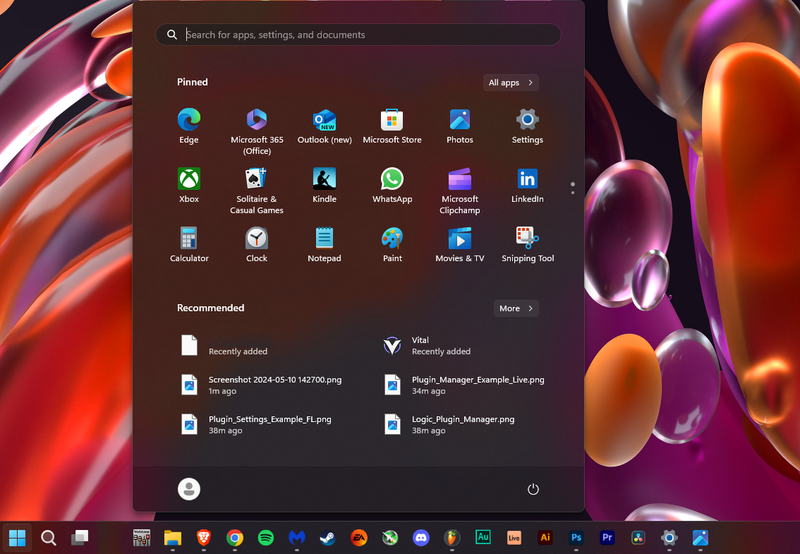
2. Search for “Settings”.
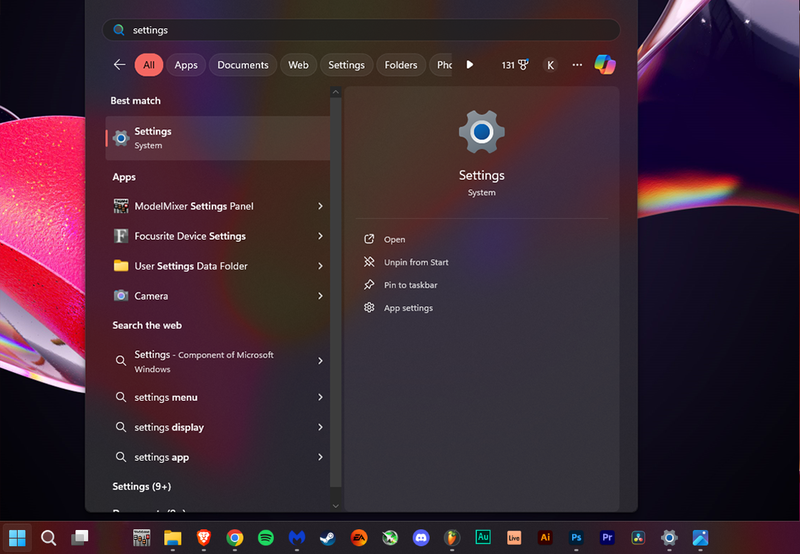
3. Open Settings and click on “System”
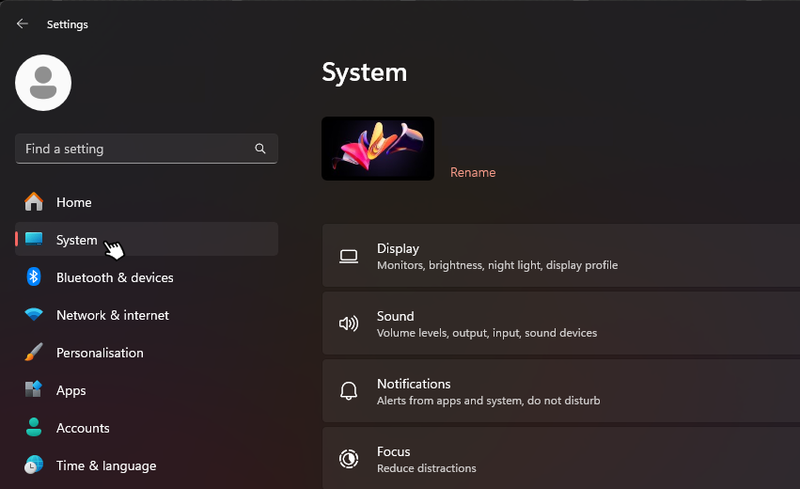
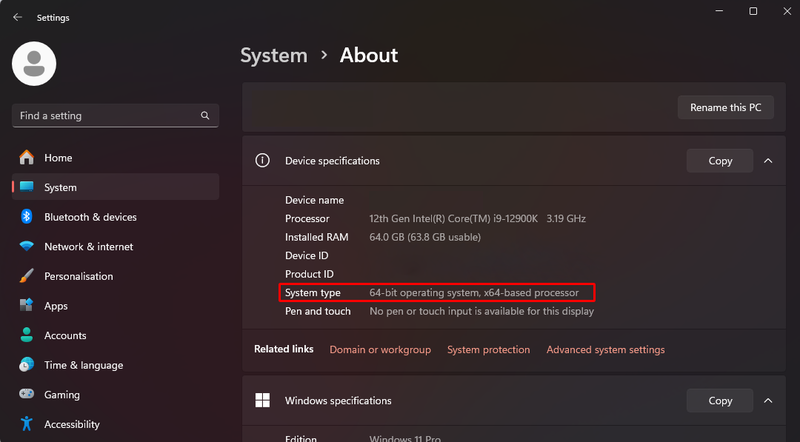
4. Scroll down to the bottom and click “About”

5. You should now see your system details, including the bit type listed under “System type”.
On Windows machines, your HDD will automatically separate 32-bit and 64-bit applications by creating a Program Files (x86) and a Program Files folder on your HDD. Program Files (x86) is the default folder for all 32-bit applications, and the other folder is for 64-bit. When installing plugins, the default directory for 32-bit and 64-bit VSTs will be located in their respective folder, or you can manually change it yourself.
Keeping your file directories organised
Keeping track of your plugin file directories can be a gruelling task, especially if you’ve gone ahead and installed all of your plugins to their default directory, without specifying a custom folder. This is because some plugin developers will set custom default directories–leading you to have numerous folders spread out across your HDD. This can be a nightmare when trying to direct your DAW to scan all locations, or when working with a DAW, like Ableton, that only allows for one file directory per plugin type.
This is why it’s highly recommended that you set a personal file directory for your VST files (as previously mentioned, all VST3s should automatically be installed in the same default directory, so you only need to worry about VST2 files).
To save yourself further stress, we also recommend that you install 64-bit and 32-bit versions of both VST and VST3 plugins to the same folder, especially when working with Ableton. This is because Ableton doesn’t distinguish between the two types, and only allows for one file path per file type (not bit type). Some older plugins might only be available in 32-bit format (this is rare, but still possible). It’s important to remember a 64-bit machine can run both 32-bit and 64-bit applications, but a 32-bit machine can only run 32-bit ones.
Keeping your DAW and plugins updated
The final thing that might cause you issues with plugins and DAW compatibility is not keeping your plugins up to date, or by using cracked software. Developers for both DAWs and plugins are constantly hard at work to ensure their releases are compatible with one another and to give the user the best possible experience, however, this only remains the case if the user maintains their software to the latest updates.
If you’re using a cracked version of a DAW or any plugin, you won’t be able to keep your software up to date, and you’ll run into a multitude of compatibility issues, causing bugs and preventing your old projects from loading correctly. Aside from that, you’ll also be breaking the law and running the risk of getting wrapped up in legal trouble. Remember, piracy is a crime and you should always opt to support the developers providing us with these technologies.
Browse Our Range of VST Plugins
Now that you’ve gained a complete overview of VST plugins and how to install them correctly, why not hit the market and pick up some top-tier plugins to expand your library? At Plugin Boutique, we have one of the largest ranges of plugins available online, from some of the industry-leading developers across the globe.
Whether you’re looking for some software instruments, like synths, or samplers, or you’re looking for some effects plugins, like EQs, compressors, delays, and reverbs, we’ve got you covered. You might even find a bundle that takes your fancy at a discounted price. Whatever it is that you’re after, being serious about music production you’re going to need to familiarise yourself with the industry-standard, professional tools available to you at some point. So why not do some research, watch a few online tutorials and reviews, and get started today?
Other articles
Saffron’s Emerging Artist Development Programme Returns to Combat Music Tech Gender Gap
Backed by the PRS Foundation, the initiative offers a £1,000 grant, a 5-day studio retreat, and expert mentoring for Black women and gender-diverse creators in the South West of England. Bristol-based organisation Saffron has announced the return of their Emerging Artist Development Programme. Aimed at dismantling deep-rooted systemic barriers in music technology, the scheme is open to Black women and gender-diverse musical creators based in South West England. With reports showing that le
The Best Music Software Deals This Week [Live List]
As the music production landscape evolves week by week, so does the opportunity to save on powerful creative tools. New plugin releases, flash sales on VSTs and limited-time deals on music software can appear from any angle, making it harder than ever to keep track of what’s worth your attention. Whether you're looking for the latest bundles on offer, or even deals on exciting virtual instruments, it's as important as ever to stay up to date on what we have to offer. That’s where our live g
How Queer Ballroom Influenced House Music – A Collaborative Event
In a one-of-a-kind event in LA, we rejoiced in the name of house music and its queer origins by taking part in a community vogue ball (presented by Banjee Ball Foundation) after our Roland 909 product demo and giveaway, which followed our initial conference-style panel. It sure was an evening to be remembered with smiles and delight shared all around. Yet, we’re here to dissect the panel discussion, to dig into the real substance of what was discussed. We’ll be covering the main discussion po
Helping You Make It: Seven UK Organisations Creating Change Through Music
Make Music Day celebrates everyone who creates. Meet seven UK organisations helping people find the tools and communities they need to make music and be heard. Music is a universal connector. It’s always there, comforting us through our headphones or uniting a thousand of us on a dark club floor. It rushes in to fill the spaces between us and reminds us of why we are here. But before any of that, it needs to be made. That might mean opening a blank session, recording an idea before it disappe
