Buy CineHarps, get a free gift with purchase:
Orchestral Harps Sample Library
A MusicTech 10/10 awarded orchestral harp sample library. CineHarps, the top-rated harp VST, is a collection of deeply sampled orchestral harps that's easy to use and is loaded with techniques and features that will make this a classic in any composer’s template.
This harp sample library was recorded with a wide variety of perspectives at the legendary MGM Scoring Stage at Sony Pictures Studios in Los Angeles, and will quickly become a favorite harp VST plugin in your orchestral composition template.
Recorded in three distinct positions on the scoring stage, CineHarps includes multiple articulations and timbres - plucked patches, precise glissandi, and incredibly robust effects. Whether a composition calls for classical harp techniques or a hybrid sound design approach, CineHarps offers composers the richest harp sounds available.
As with all CineSymphony libraries, CineHarps library does not require you to purchase any additional sample playback software, and is licensed to work with the Native Instrument’s free Kontakt Player. All you need is a sequencer like Logic, Cubase, Digital Performer, LIVE, Pro Tools, Cakewalk, or even Apple GarageBand and you’ll be up and running.
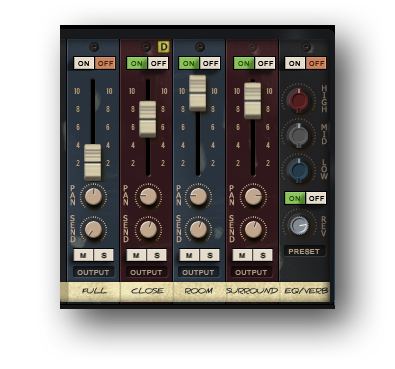
The Perspective Fader
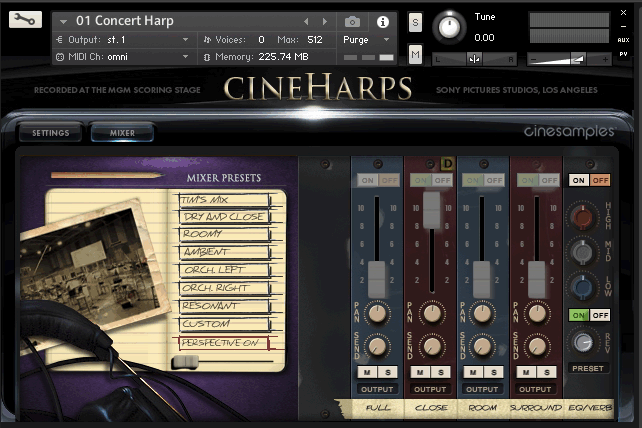
CineHarps includes the addition of a new Perspective Mode. When Perspective Mode is turned on, a slider appears that performs a smooth crossfade between the Close, Room, and Surround microphone perspectives. This slider is automatically mapped to the mod wheel, giving you the ability to instantly control the relative depth of the instrument.
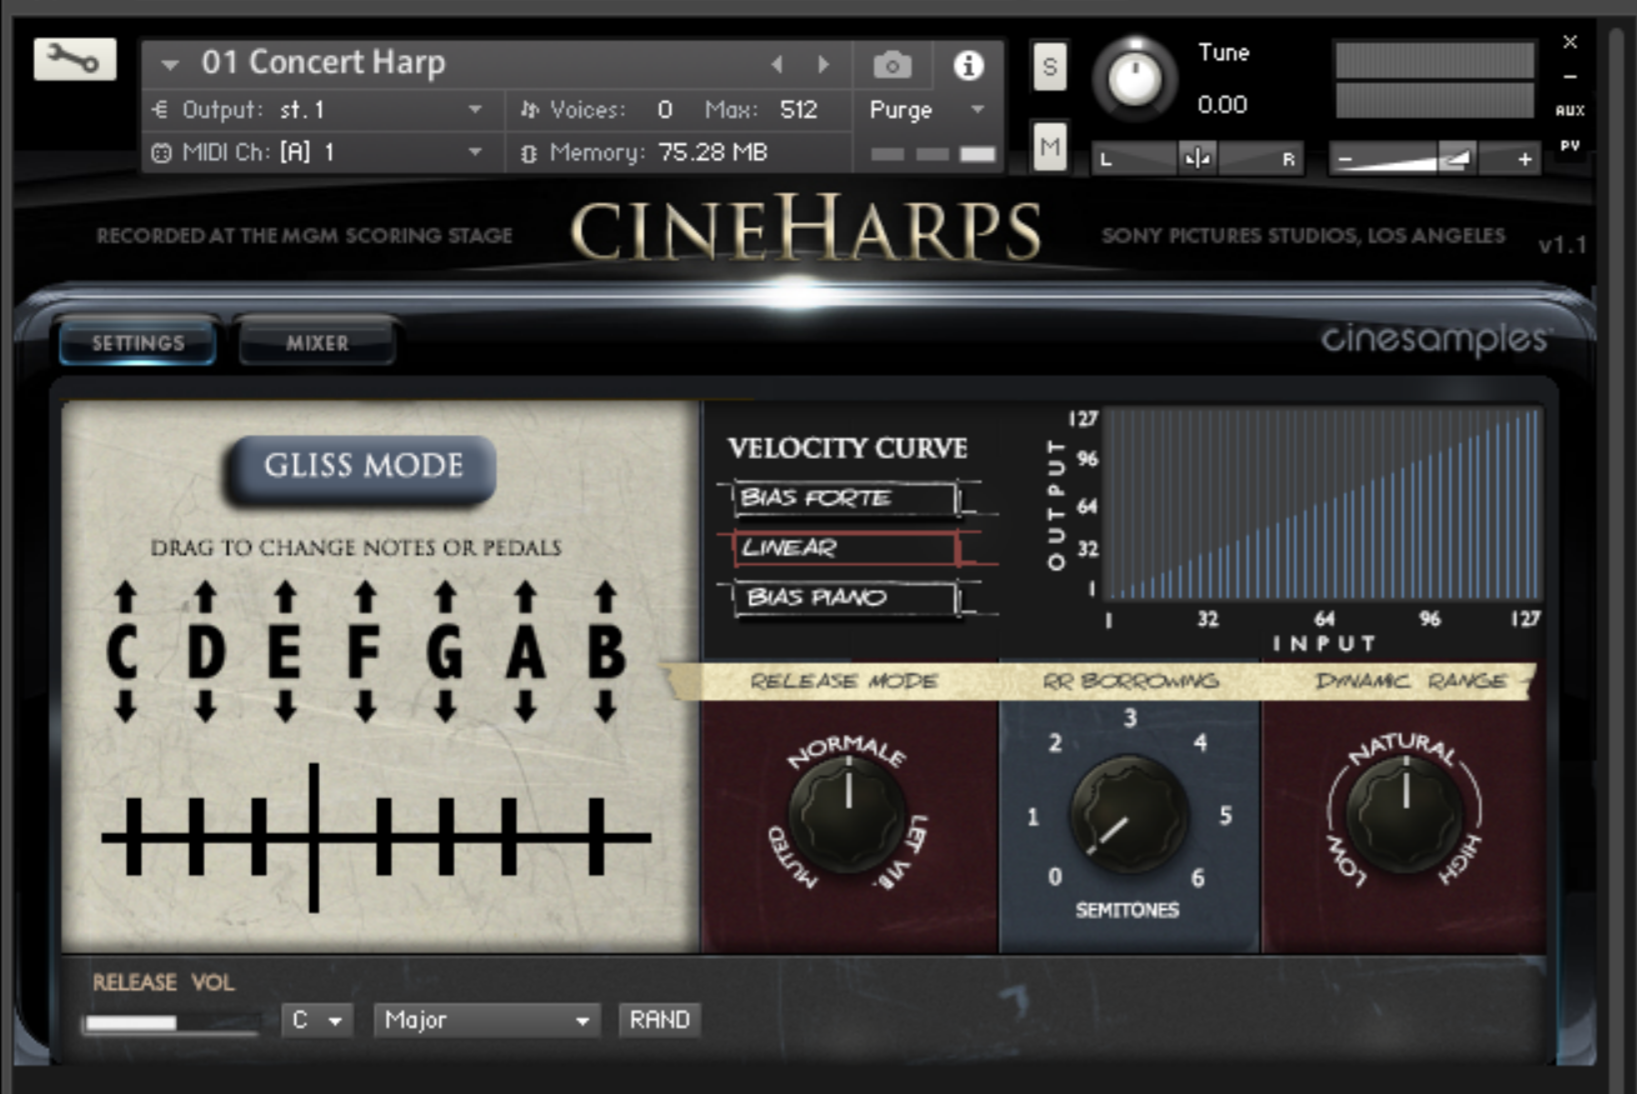
Gliss Mode

Gliss Mode transposes all of the white keys according to the selected notes and pedal diagram. This allows for easy playing of glissandi on the white keys. When the Gliss Mode button is active, note attacks in faster phrases are gently softened. The faster you play, the softer the attack.
Tip/Trick: Turning on Gliss Mode and leaving the pedals set to C major allows you to play chromatically, but still softens the onset of each note in faster phrases, which can result in more realistic trills, bisbigliandi and other types of playing.
Close Delay Button
Above the Close microphone perspective is small yellow button marked with a “D”. Activating this button delays the sound of the Close perspective by approximately 15ms, which time aligns the Close with the Room and Surround Perspectives, resulting in a tighter sound. Turning off the Close Delay gives the instrument more depth and definition, which can be useful for featuring it in the mix.
Velocity Curve
The Velocity Curve control can be used to dial in exactly the dynamic you are looking for. Bias Forte makes it easier to play louder dynamics, and Bias Piano makes it easier to play soft dynamics. Linear allows the velocities to pass through unaffected. The Velocity Curve control can also be used to compensate for a MIDI keyboard with an undesirably hard or soft action. You can custom-draw a velocity curve by clicking and dragging with the mouse.

Release Mode
The Release Mode knob changes the way releases are played. “Muted” simulates the harpist immediately dampening the string at the note release, and “Let Vib.” allows the string to ring out for its full duration ignoring any note releases. “Normale” provides a moderate decay to the release. This control along with the Release Volume control can be used to dial in the exact type of release behavior you are looking for.

Round Robin Borrowing

The RR Borrowing knob employes surrounding notes as additional round robins. A value of 6 results in up to +/- a tritone of borrowing providing up to an additional 12 round robins per note. A value of zero only plays two round robins per dynamic level. Higher values result in more round robins and more tonal variation.
Dynamic Range

The Dynamic Range knob can increase or decrease the overall dynamic range of the instrument. With the knob turned all the way up, low dynamics are almost completely inaudible and higher dynamics are very loud. With the knob turned all the way down the instrument plays all of the recorded dynamic layers, but at the same perceived volume.
Kontakt and NKS Integration
CineHarps v1.1 is scripted for Native Instruments' Native Kontrol Standard (NKS) format. That is the only difference from CineHarps v1.0.
System Requirements
- Requires Kontakt 6.6.1 and above (Works with both the free Kontakt Player and the paid, full version of Kontakt)
- Requires a minimum of 25GB free hard drive space during installation. Library size is approx. 12GB after installation
- Minimum 4GB RAM Recommended
Kontakt 6.6.1 Minimum System Requirements
- Mac OS X 10.10, 10.11 or macOS 10.12 (latest update), Intel Core 2 Duo
- Windows 7, Windows 8, or Windows 10 (latest Service Pack, 32/64-bit) Intel Core 2 Duo or AMD Athlon 64 X2
Kontakt 6.6.1 Supported Interfaces
- Mac OS X (64-bit only): Stand-alone, VST, AU, AAX
- Windows (32/64-bit): Stand-alone, VST, AAX
This instrument requires the FREE or FULL version of Kontakt 6.6.1+
![]()
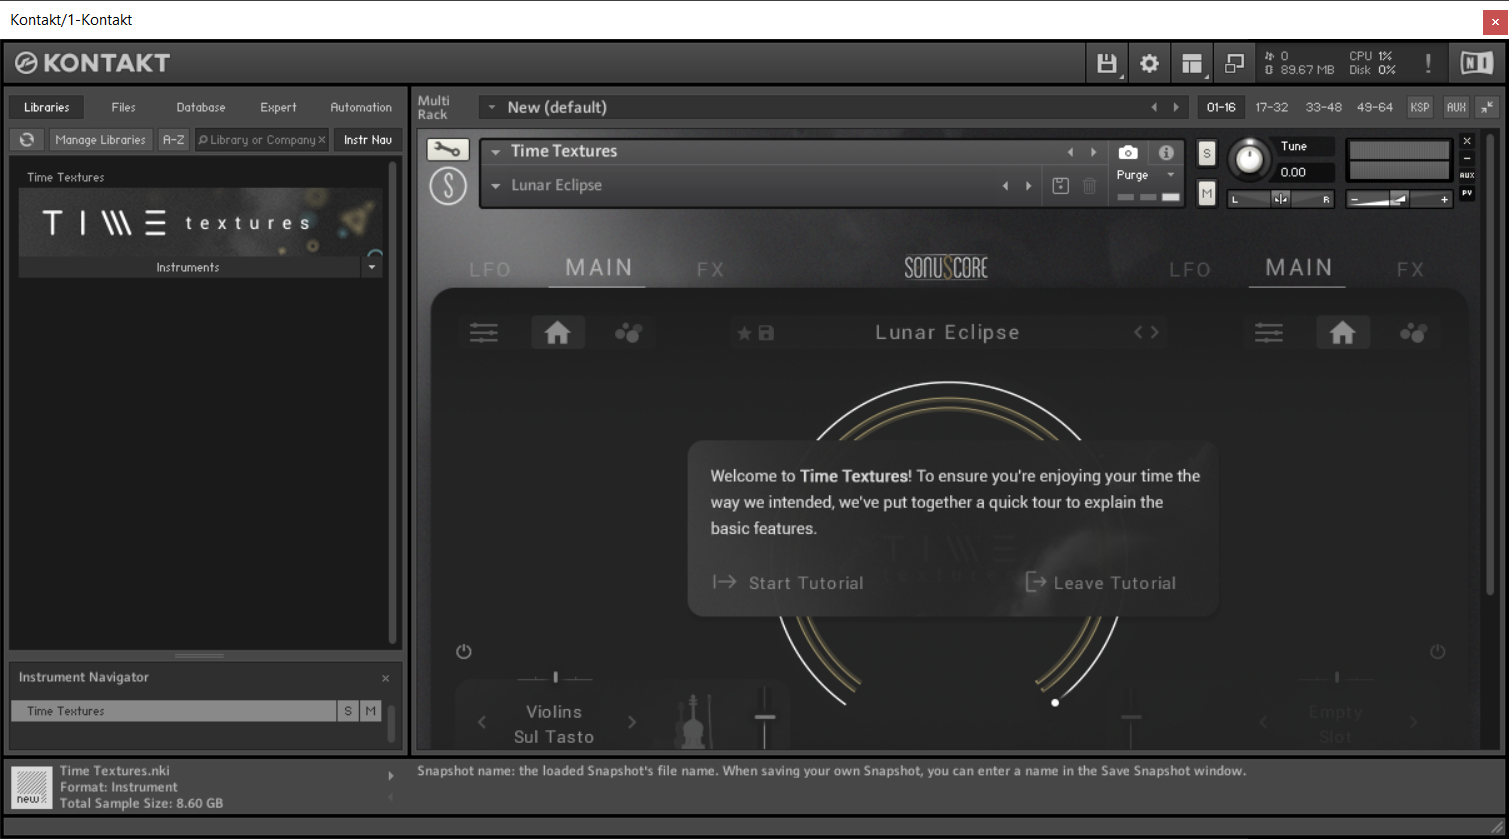
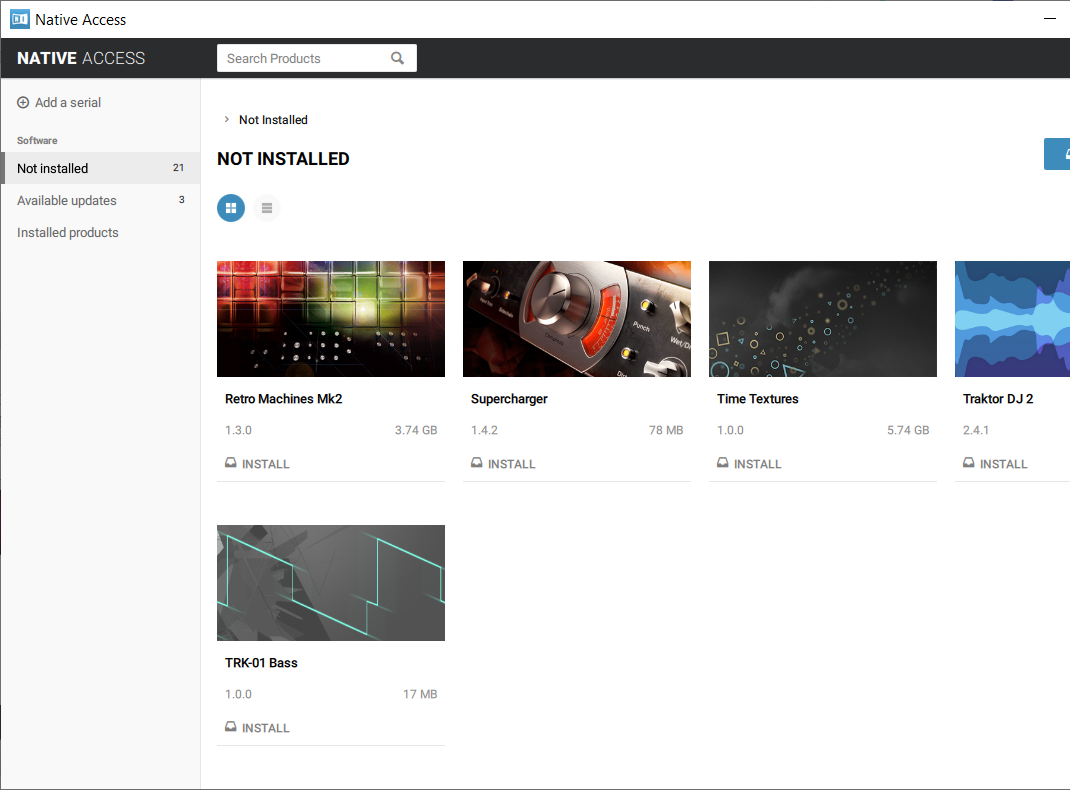
Important note: Sonuscore Time Textures is used as an example as the process is identical for this product.
Mac
1. Download the .dmg installer file from your Plugin Boutique account.
2. Double-click the .dmg file to install Native Access.
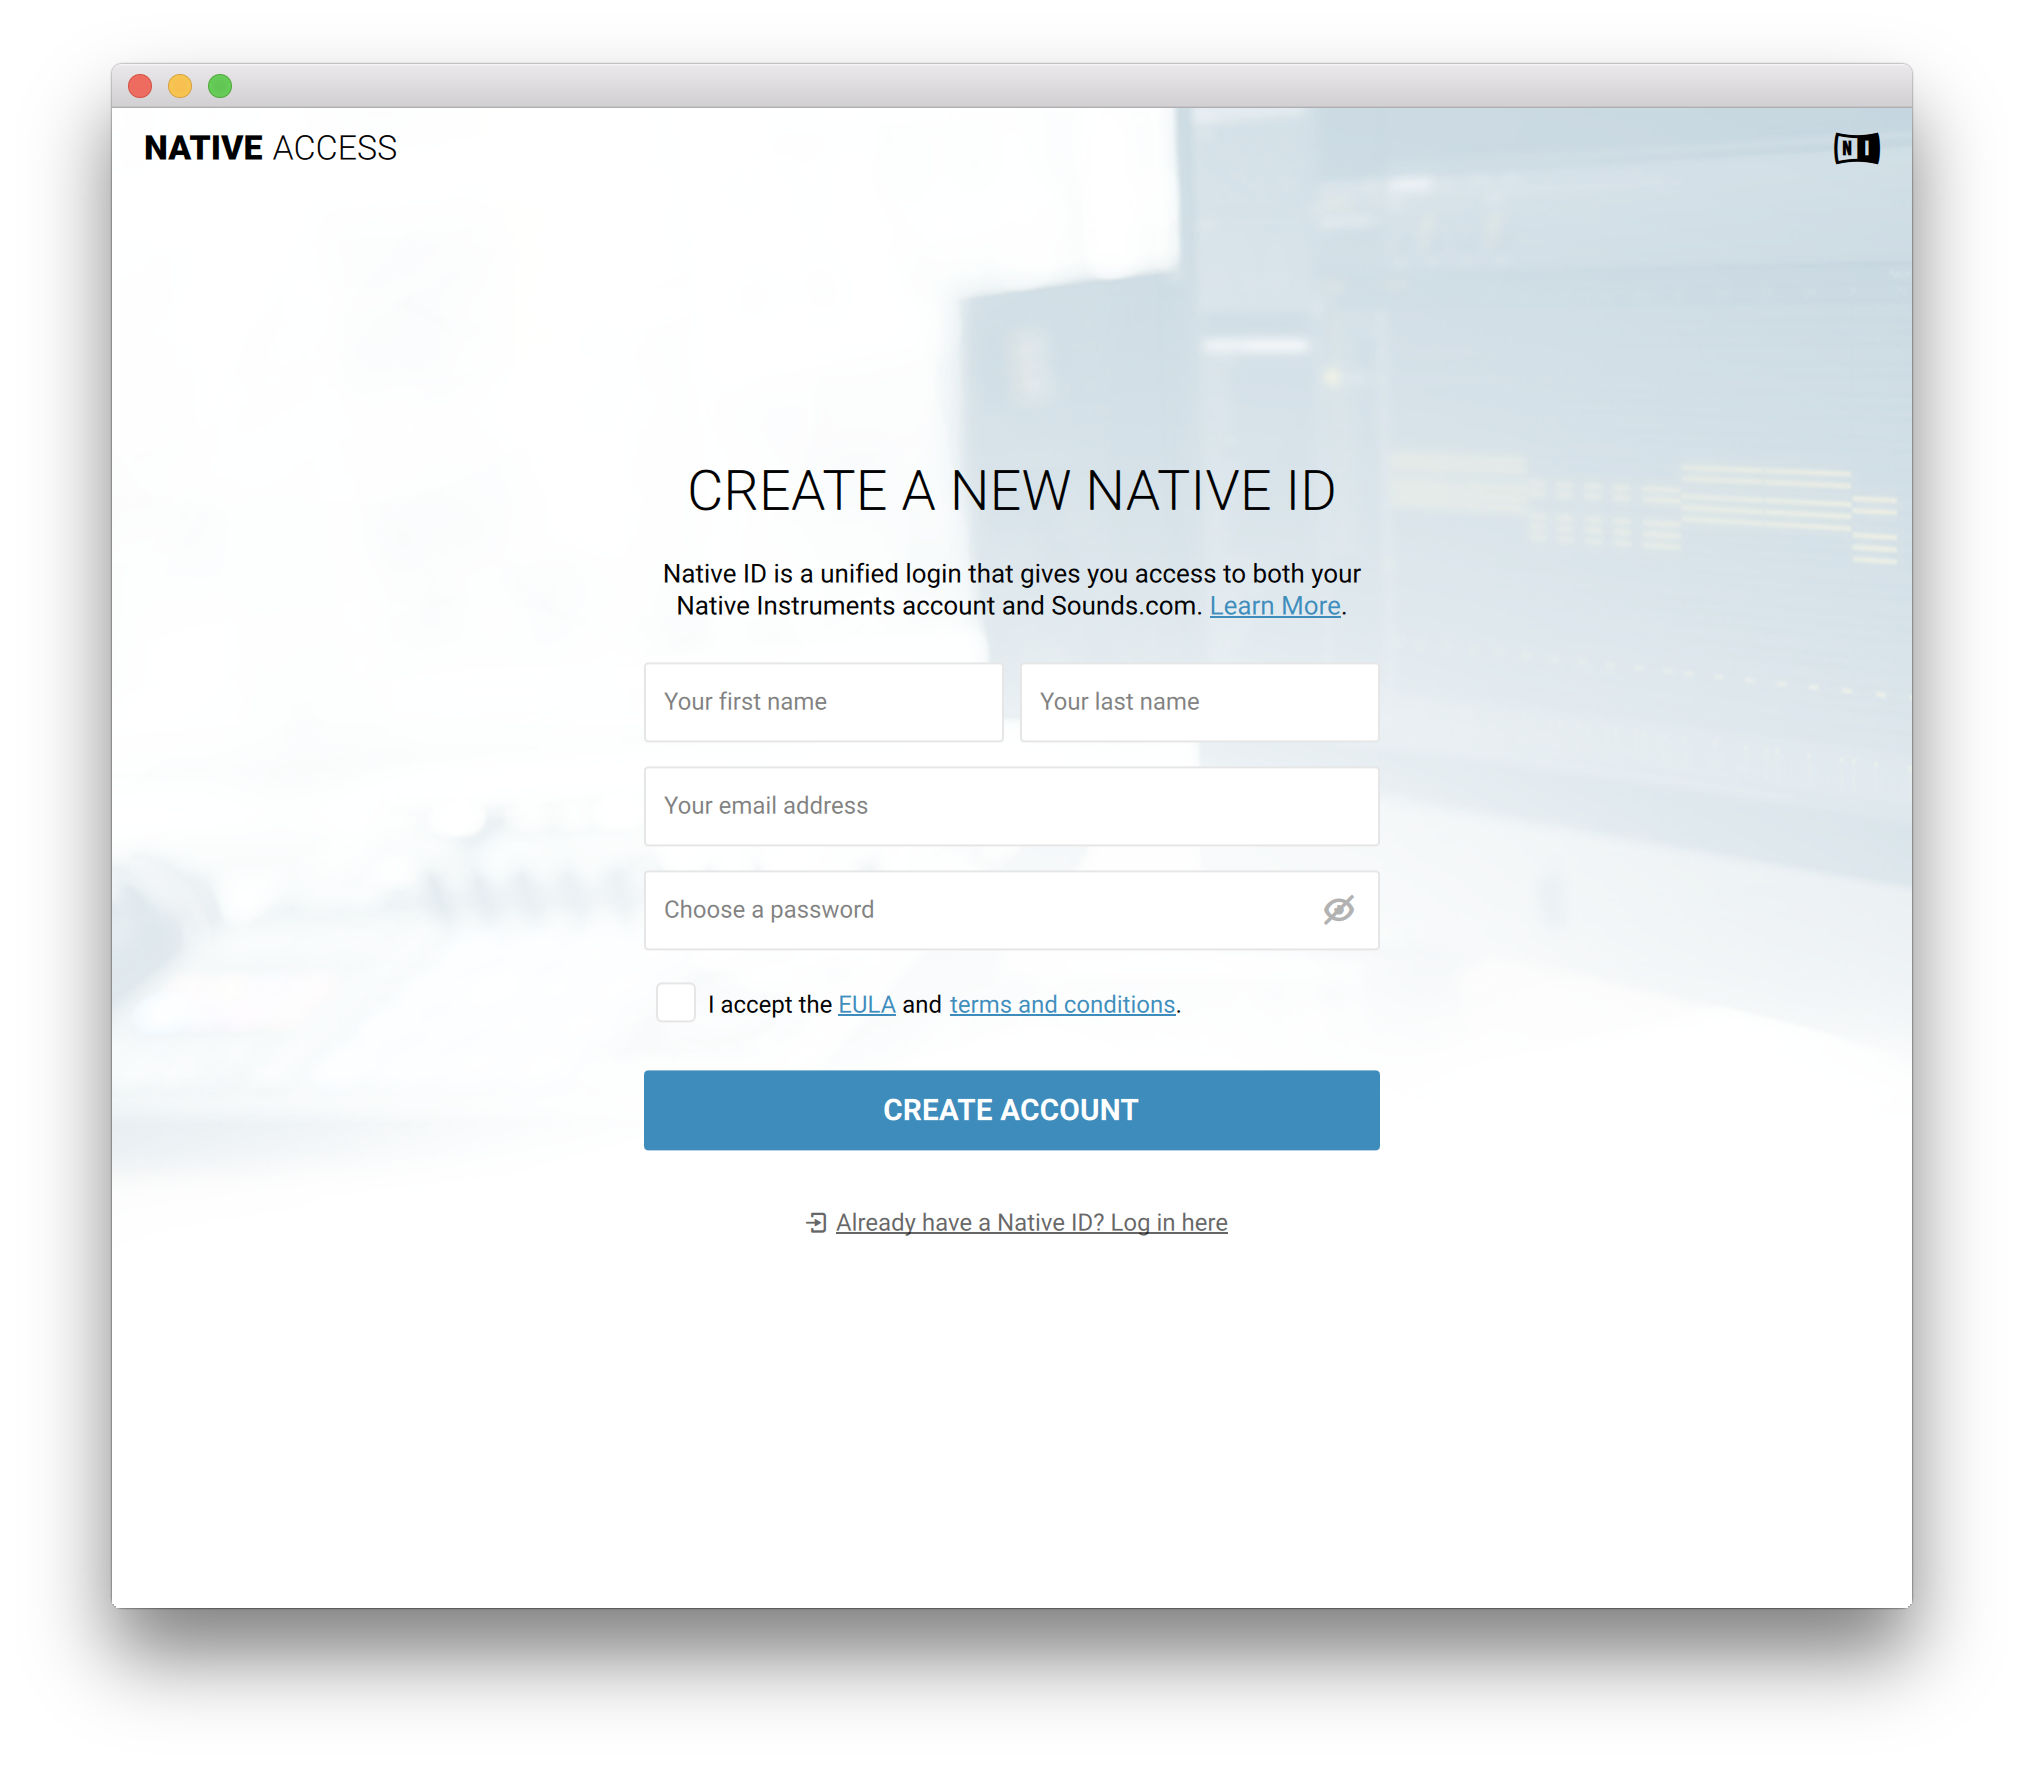
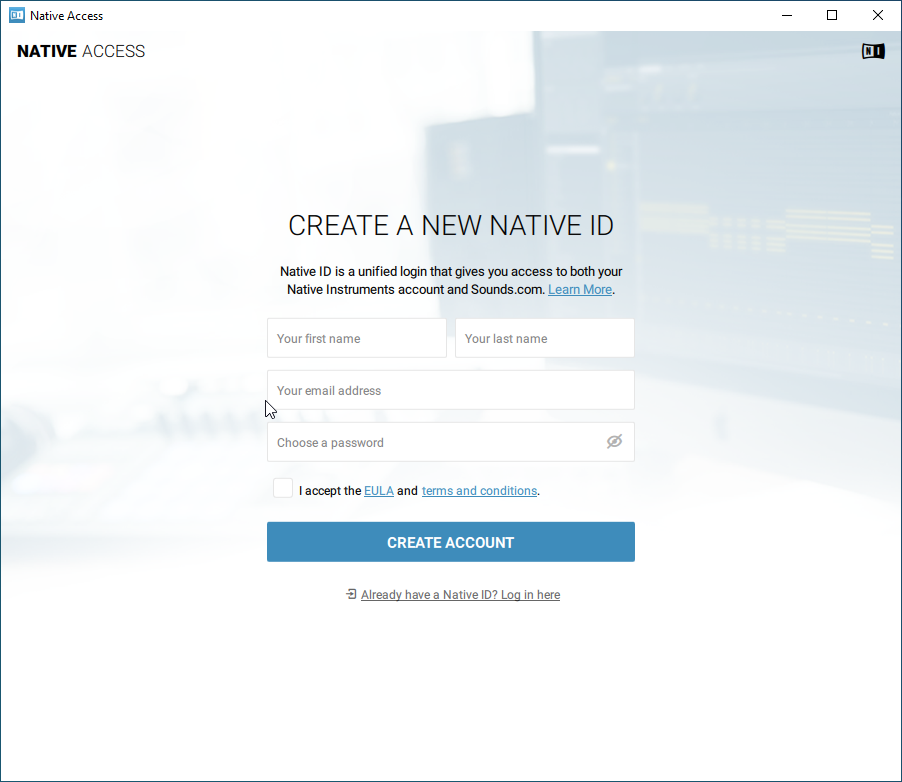
3. Open Native Access > Create a new Native ID if you do not have one already. If you do, skip ahead to step 5.
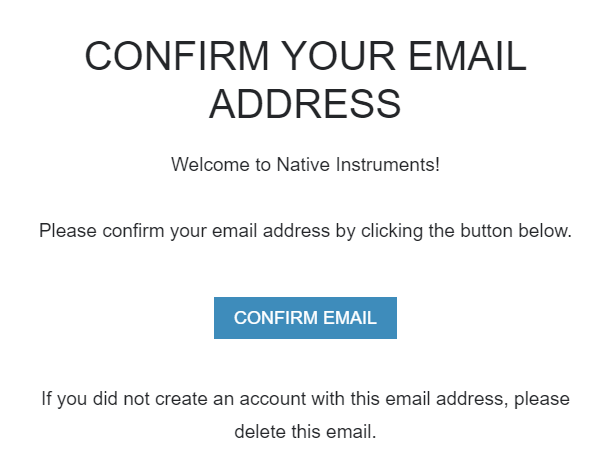
4. You will then receive an email with a confirmation link > Open the email and click 'CONFIRM EMAIL'.
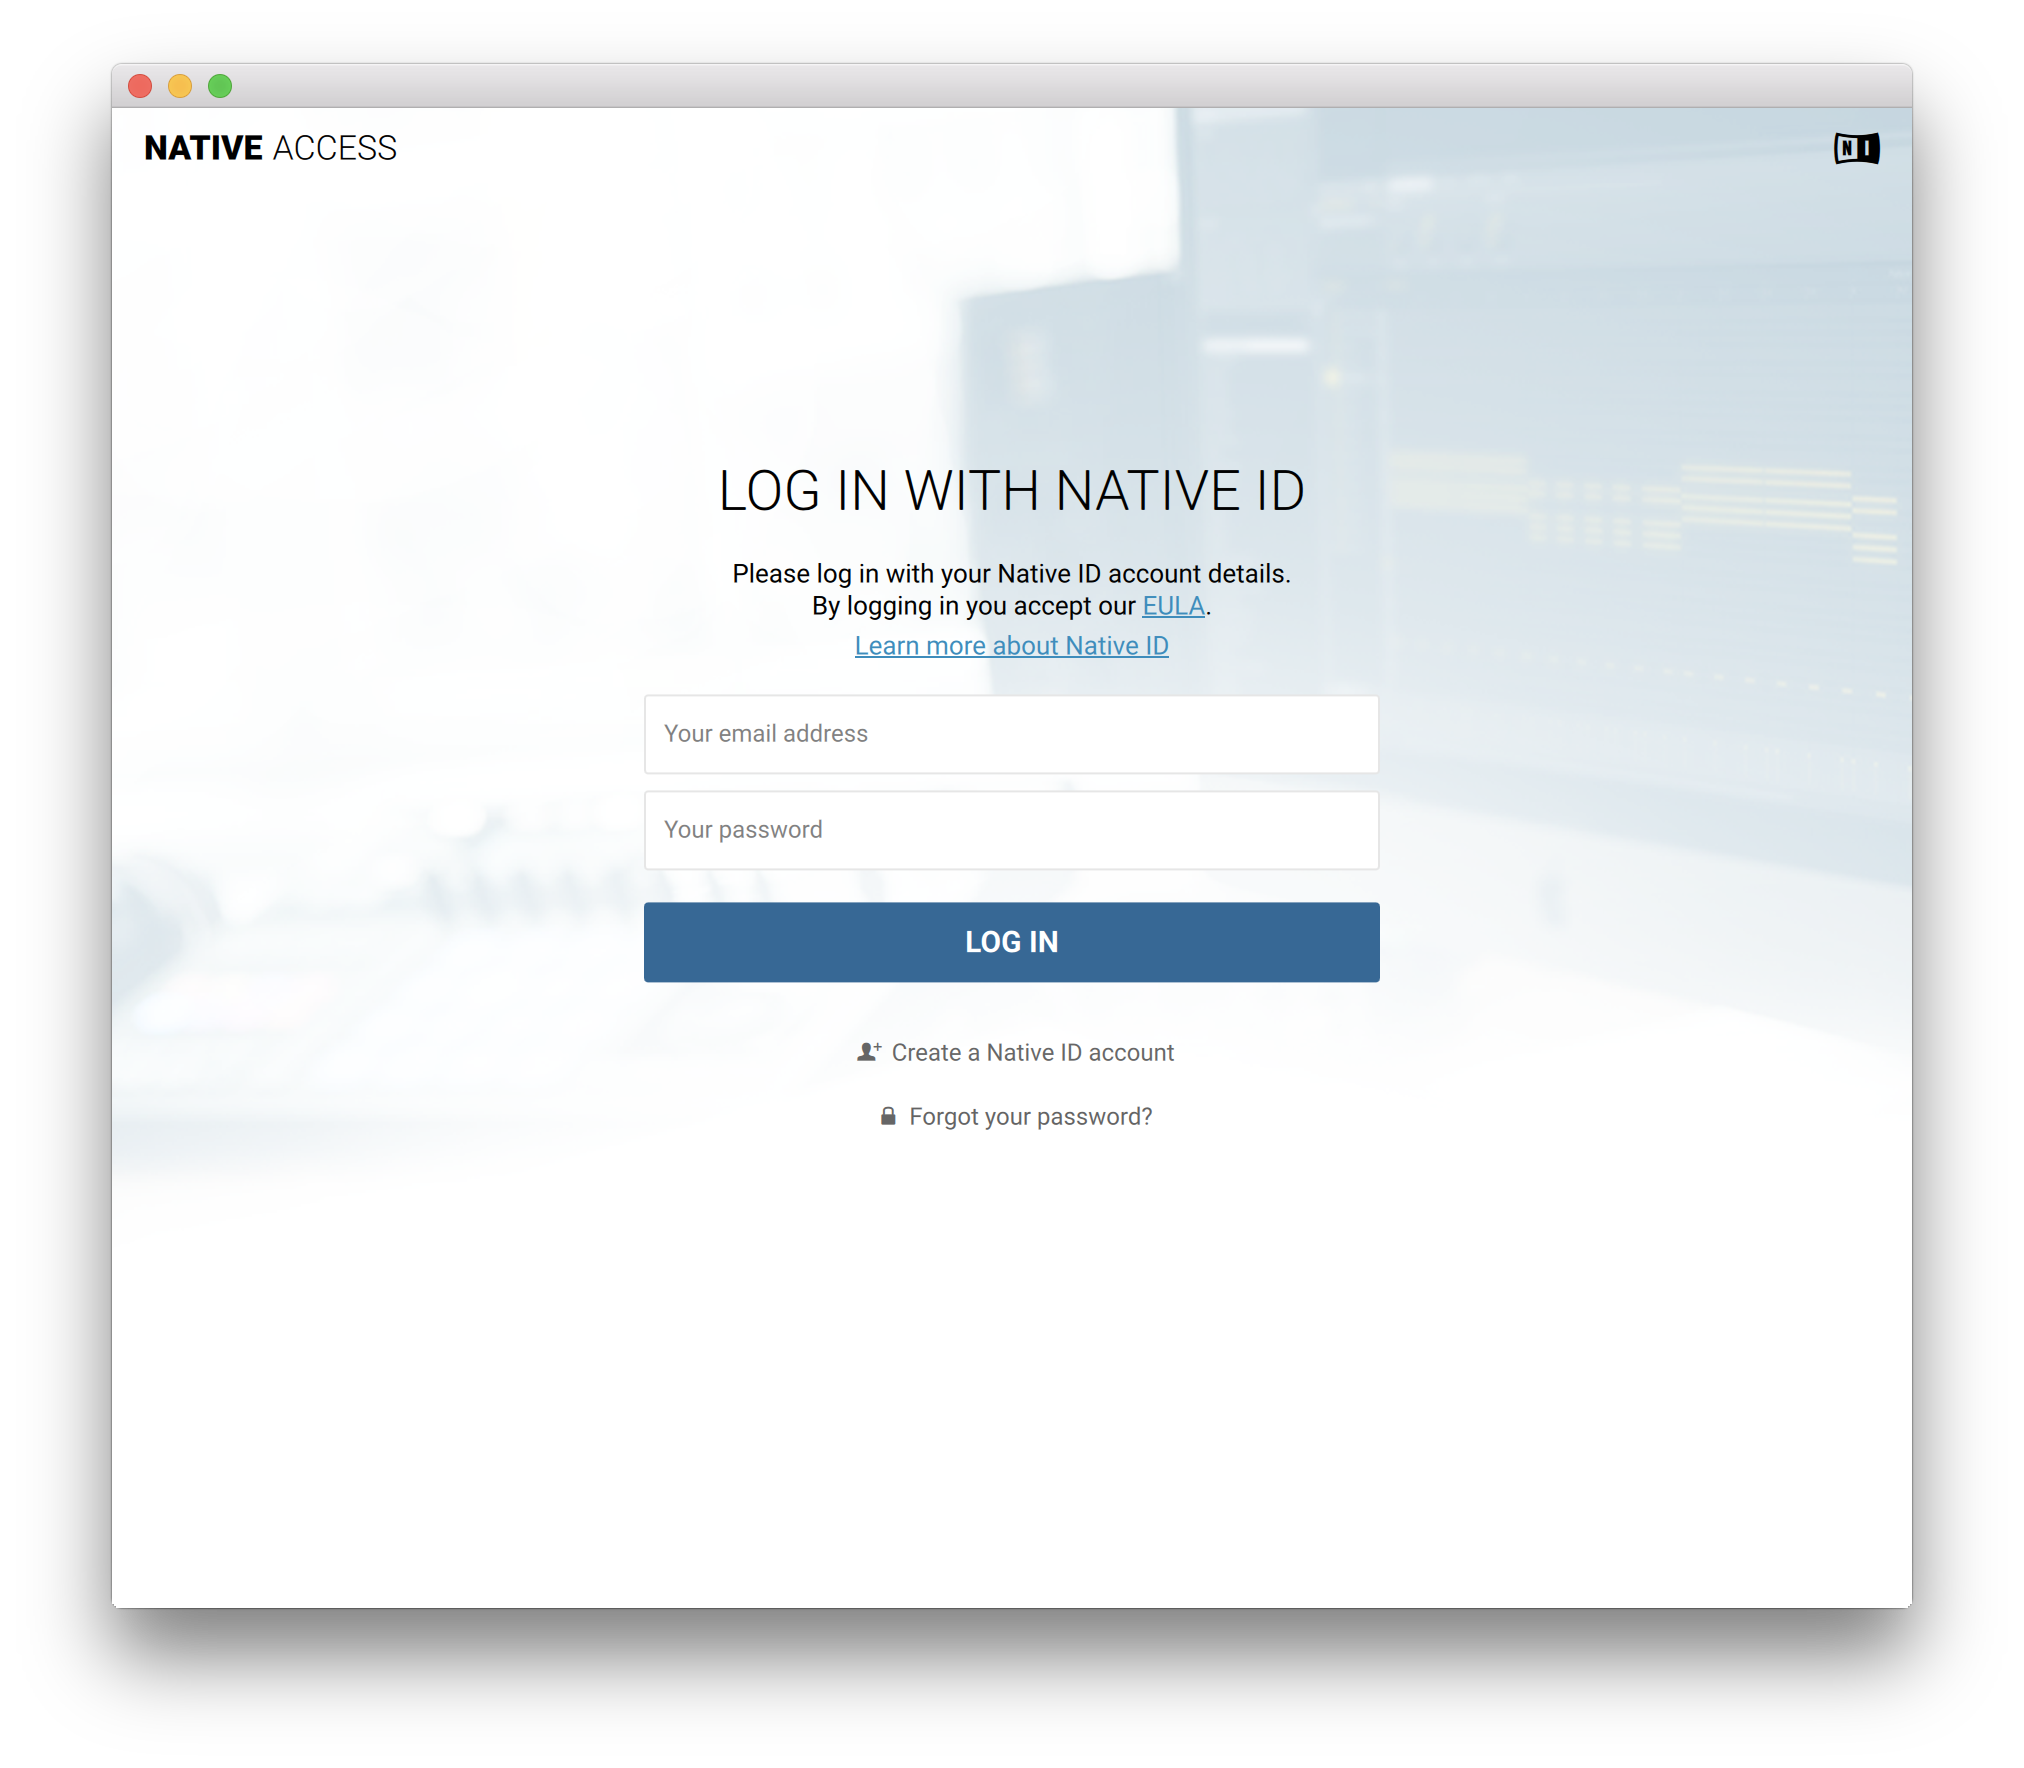
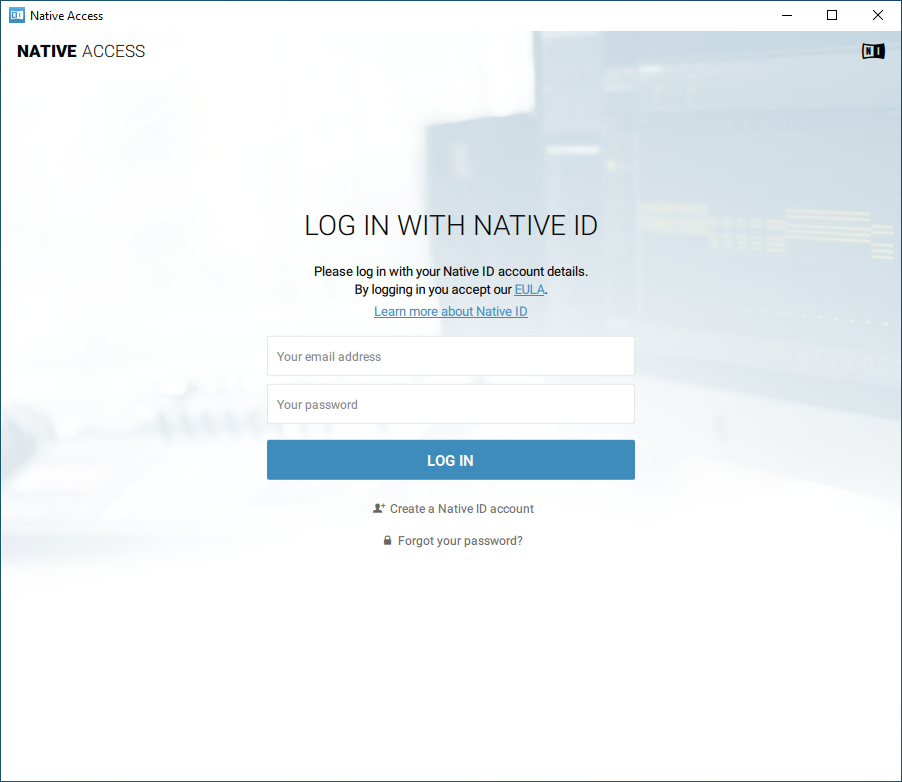
5. Log in to Native Access with your Native ID.
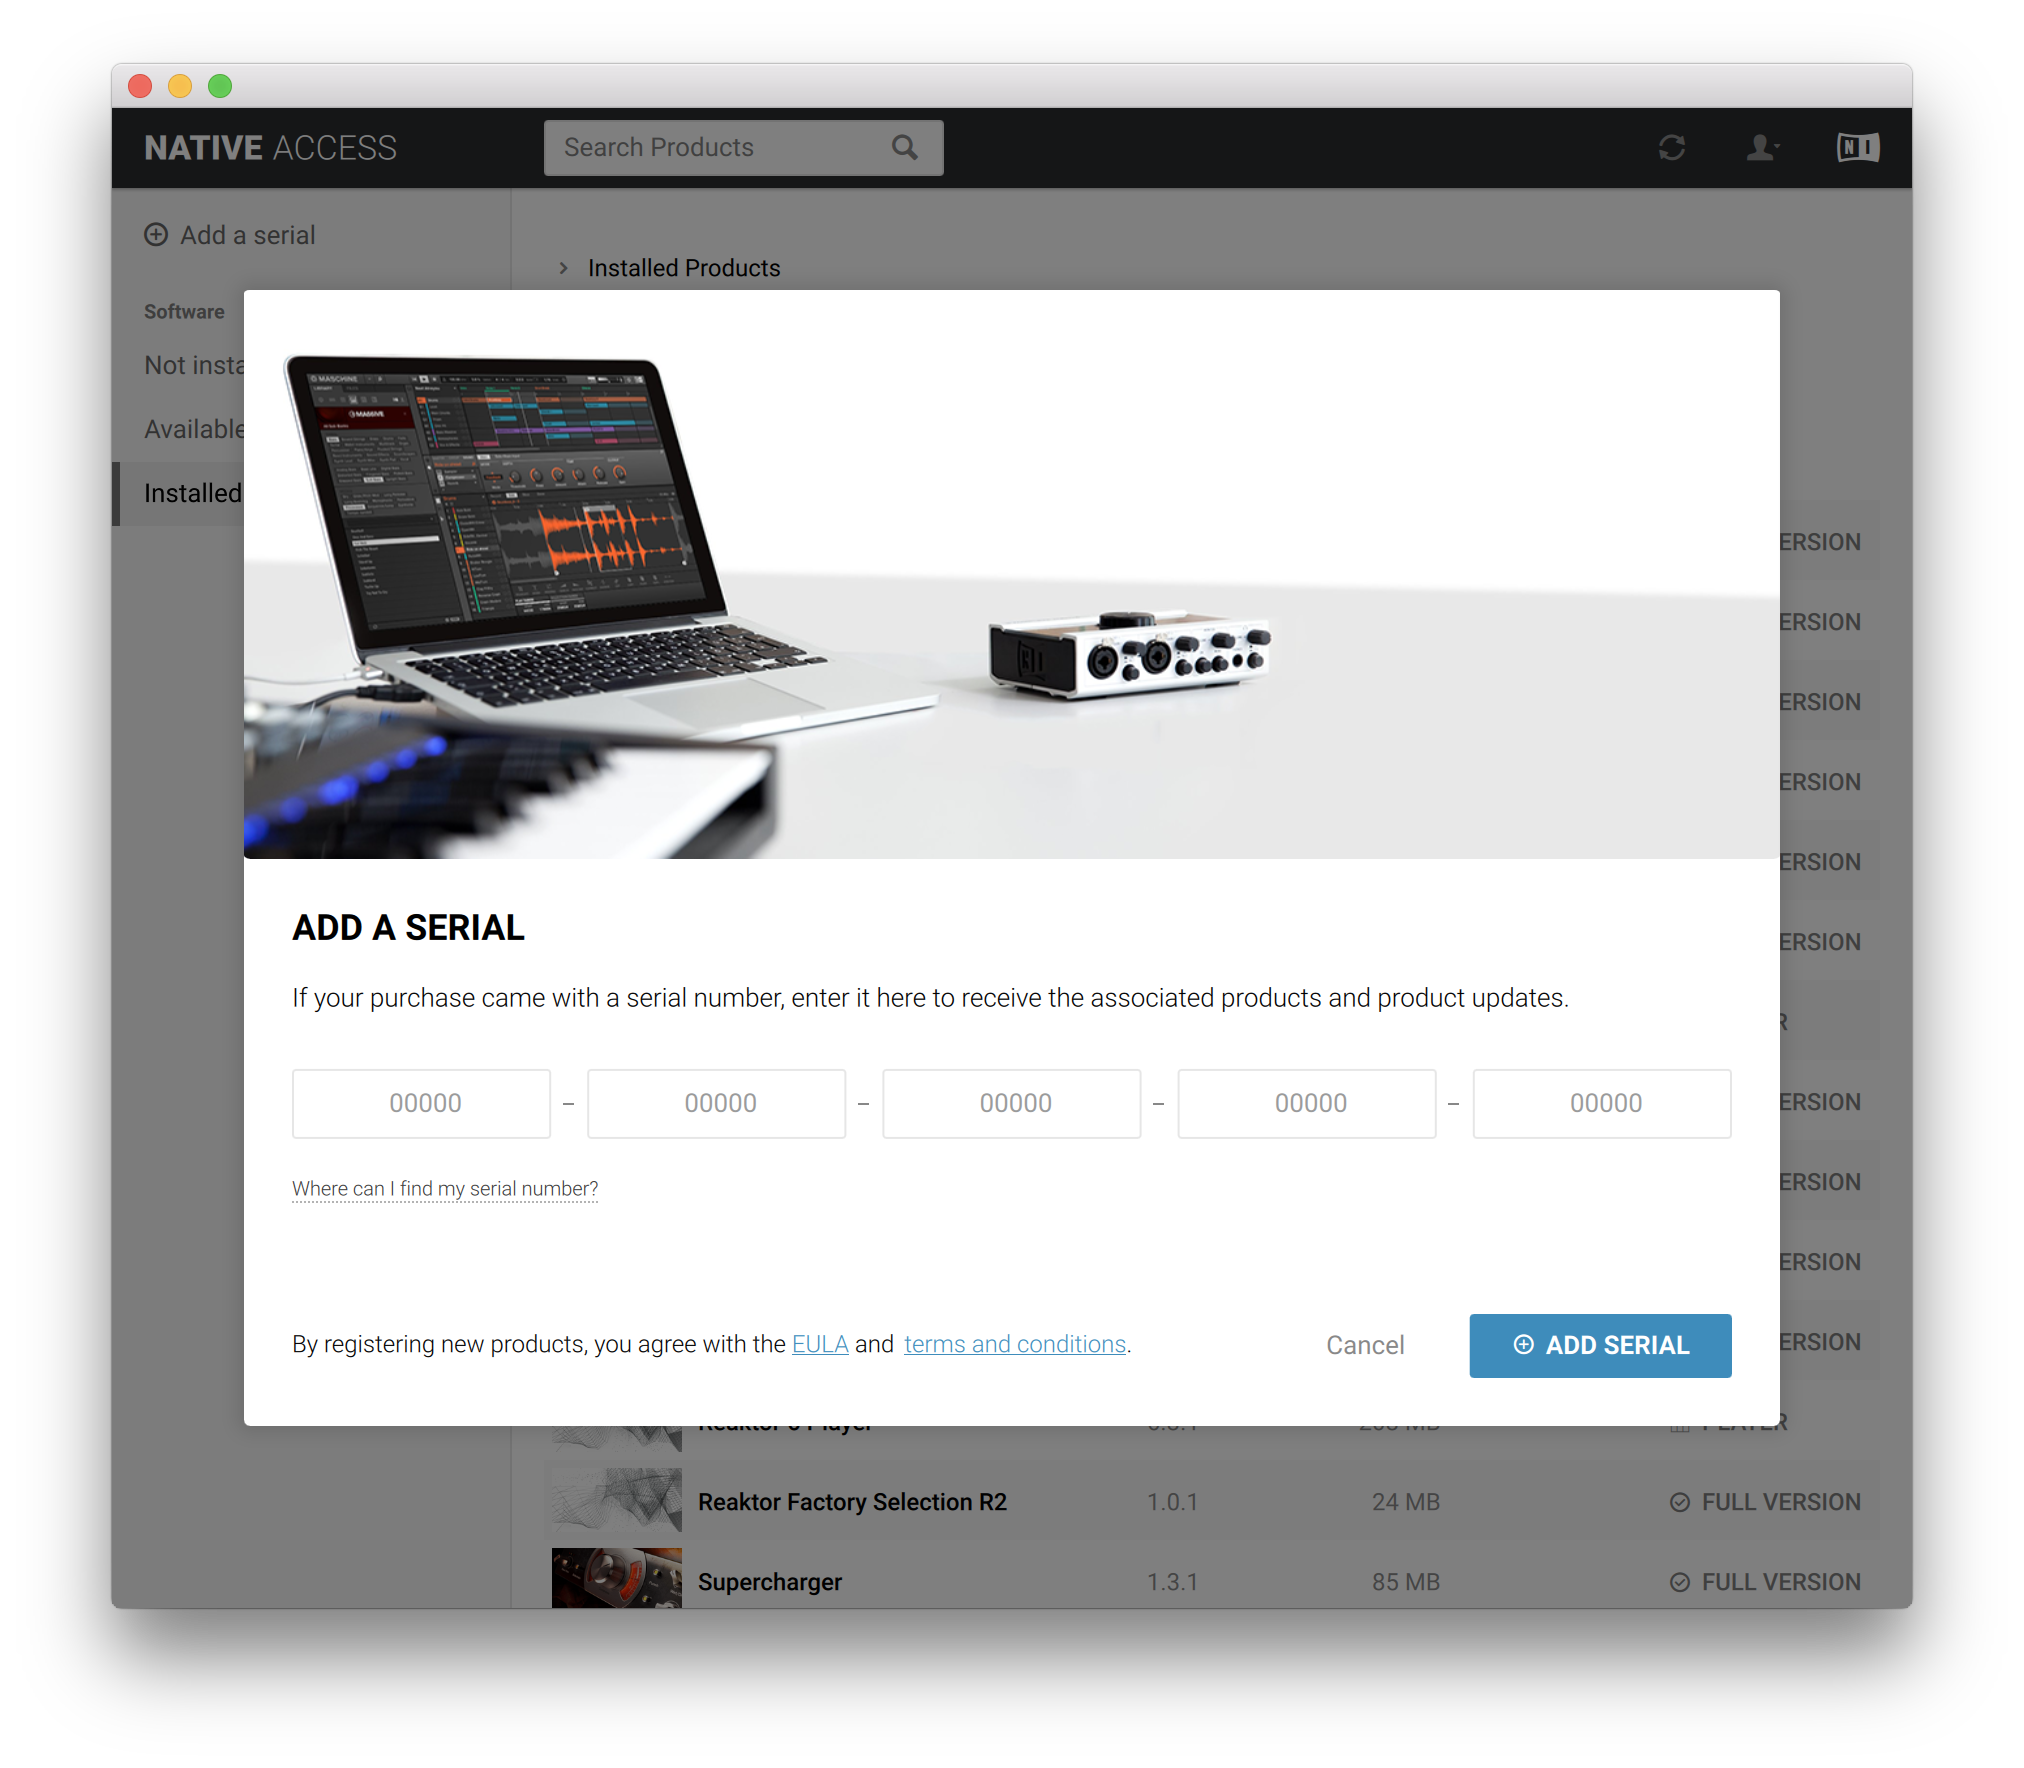
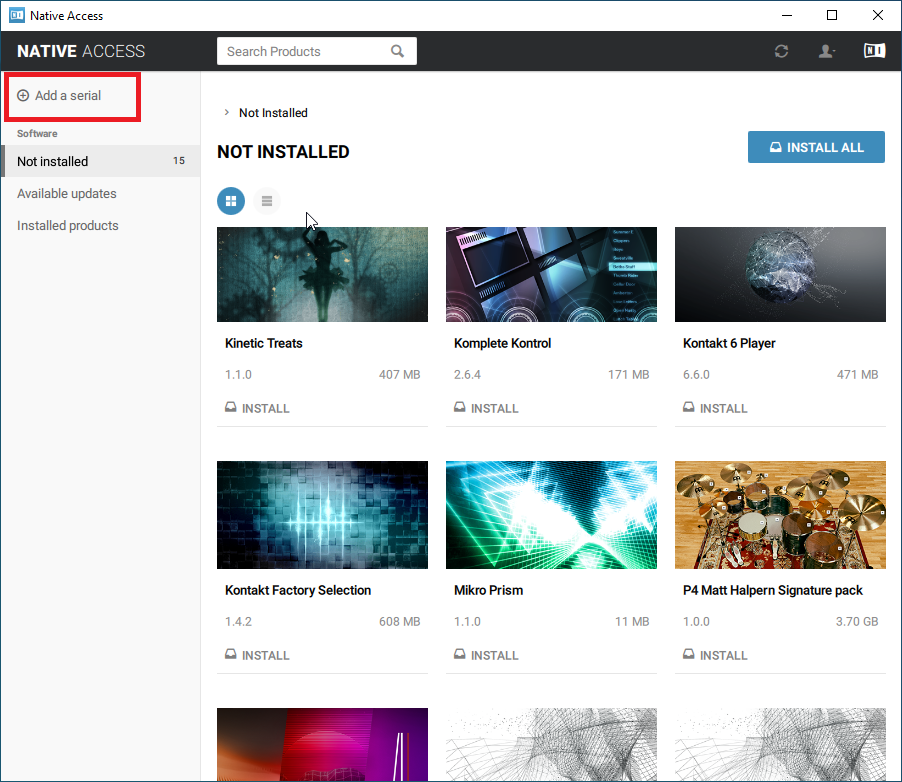
6. Click 'Add a serial'
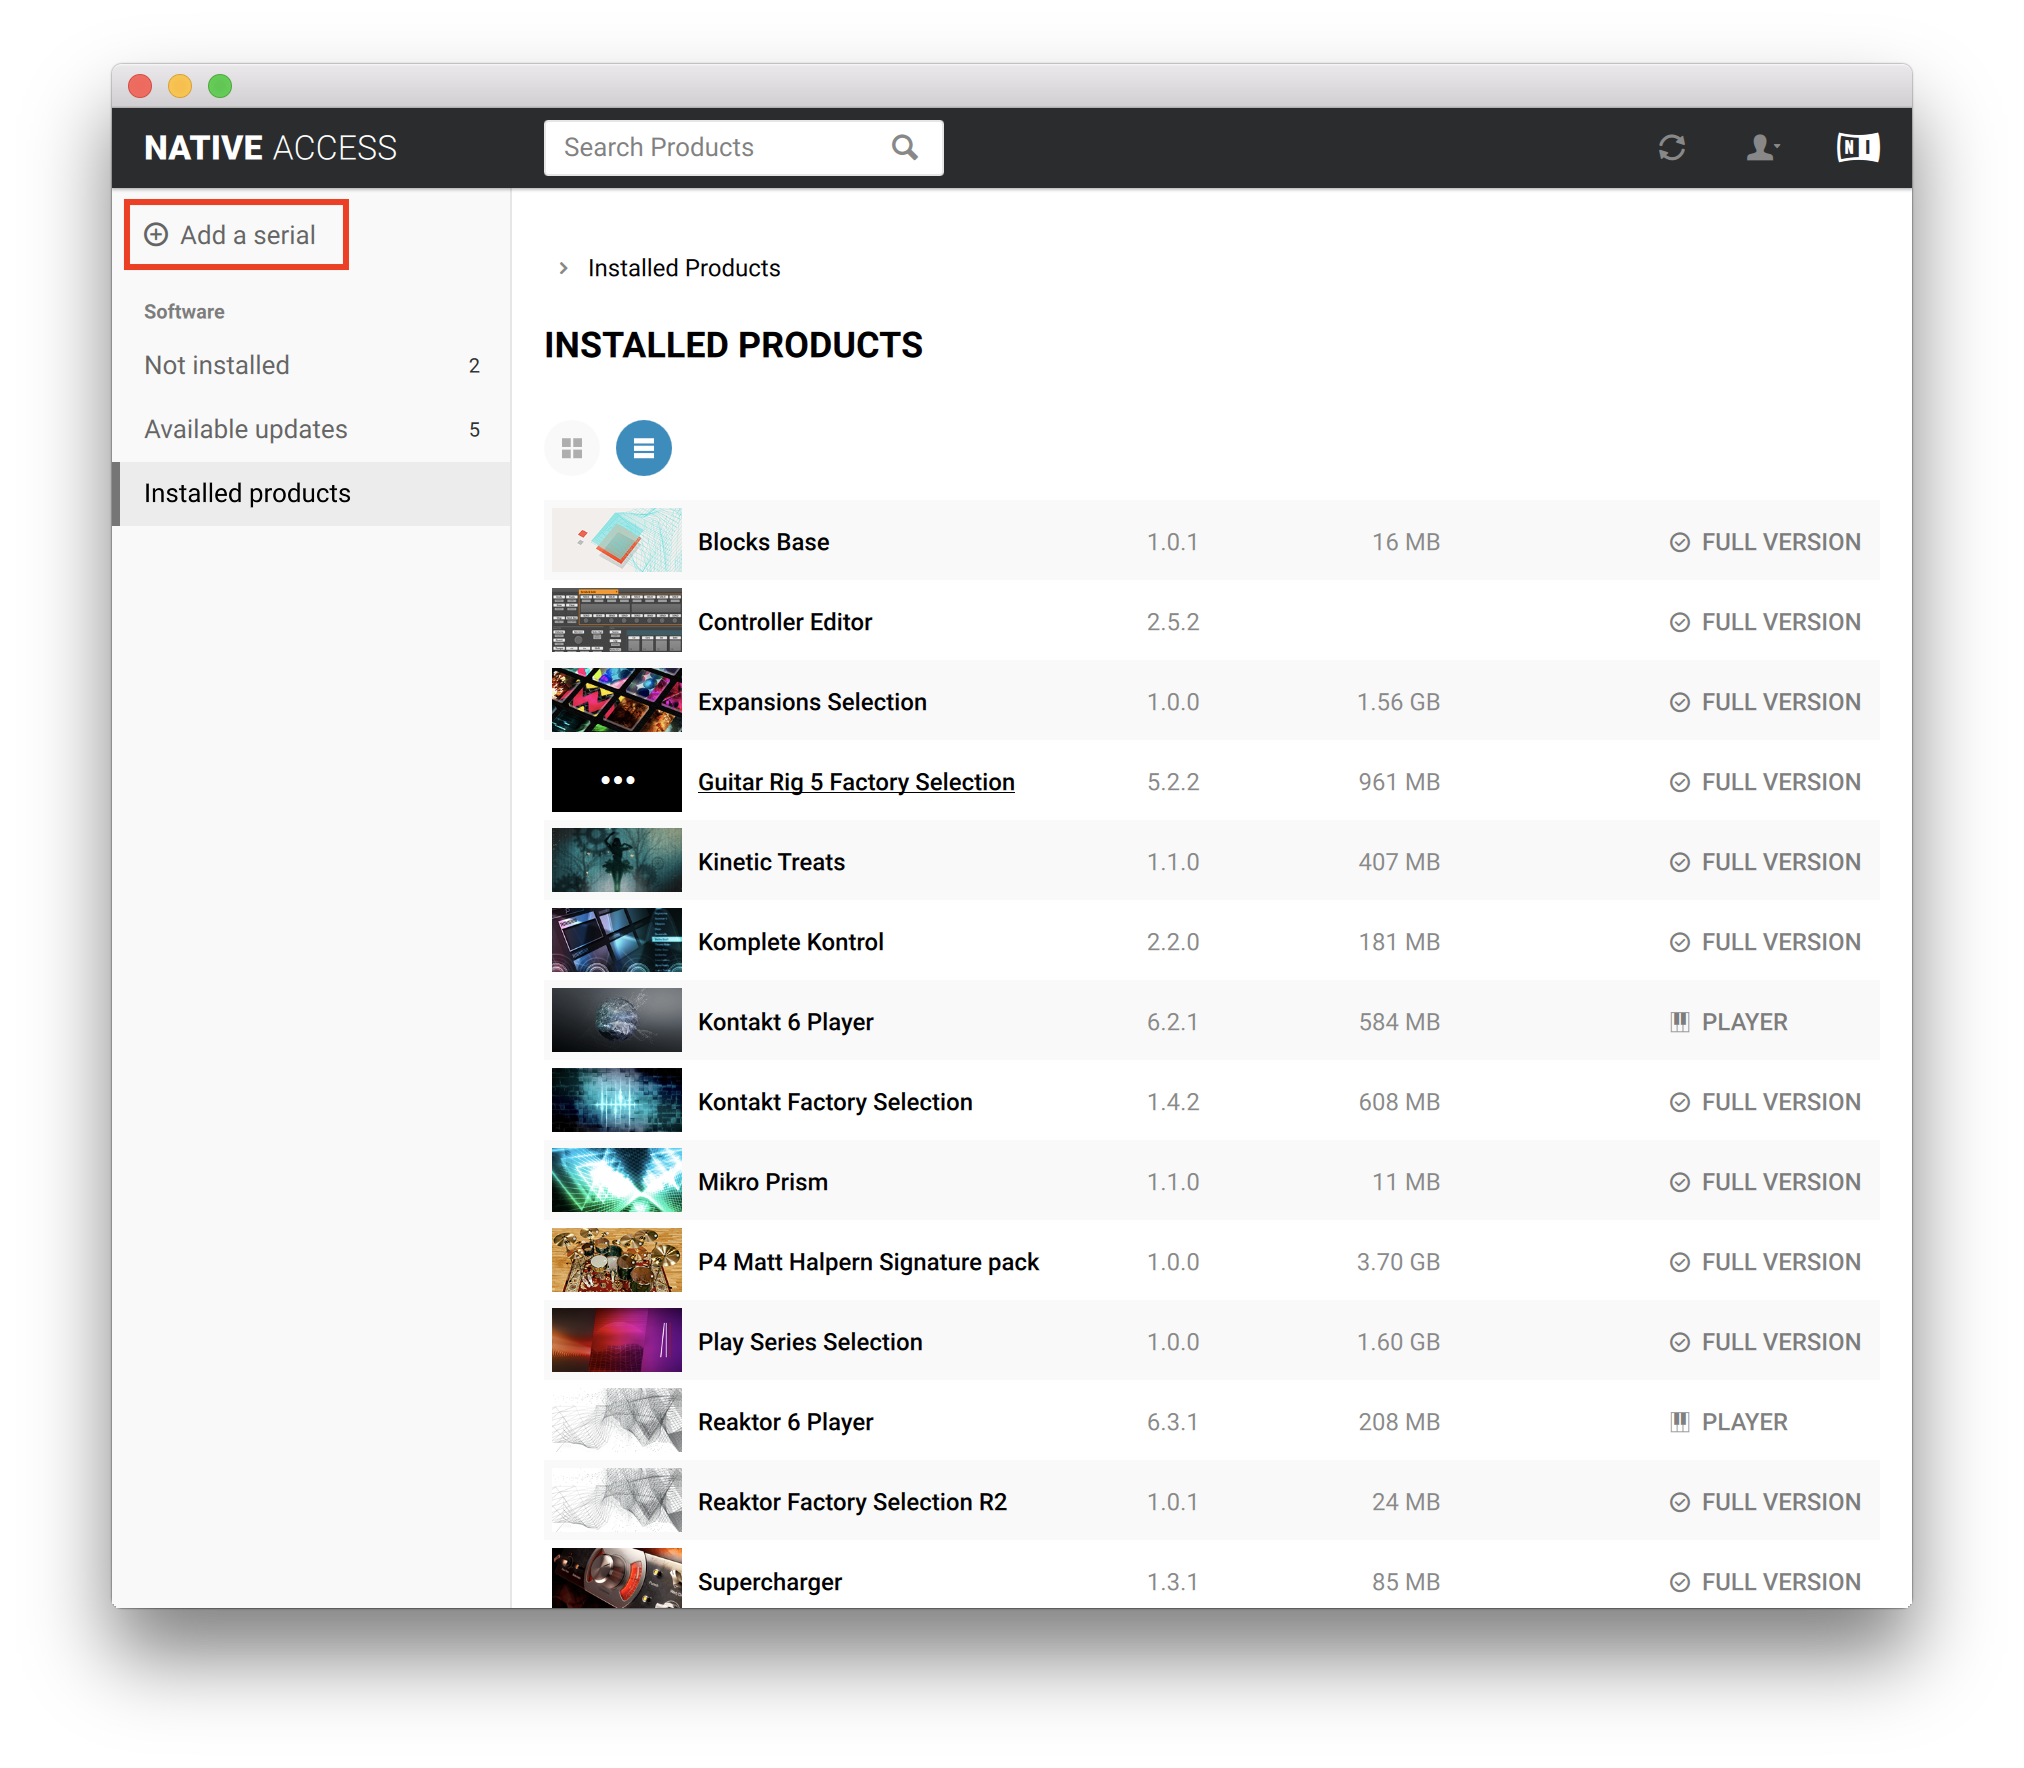
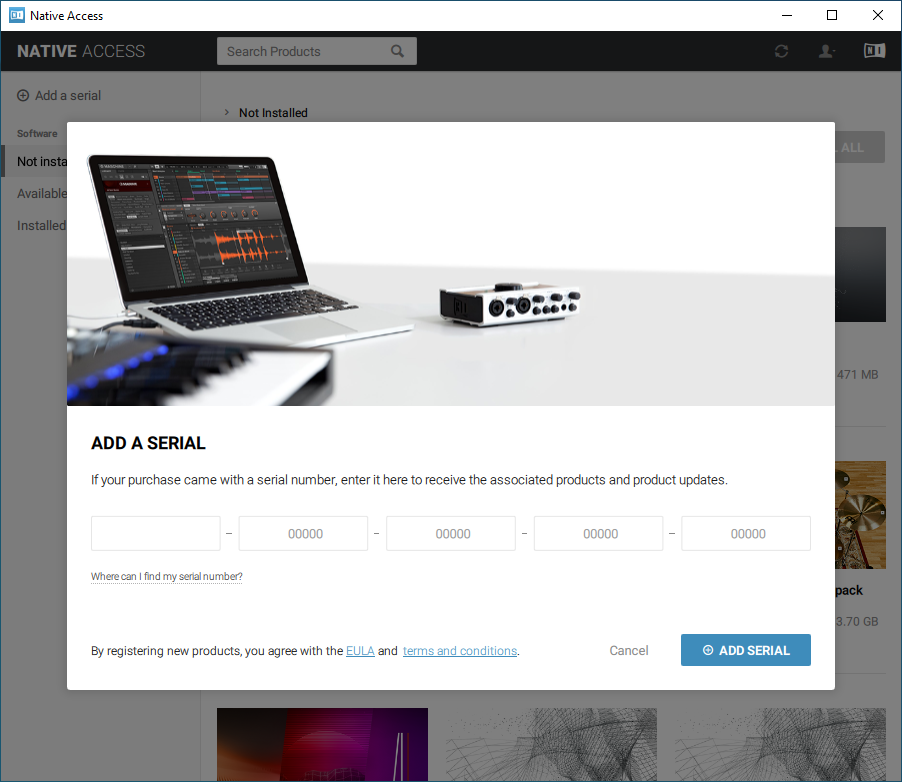
7. Enter your Serial Number found in your Plugin Boutique account > Click 'ADD SERIAL'.
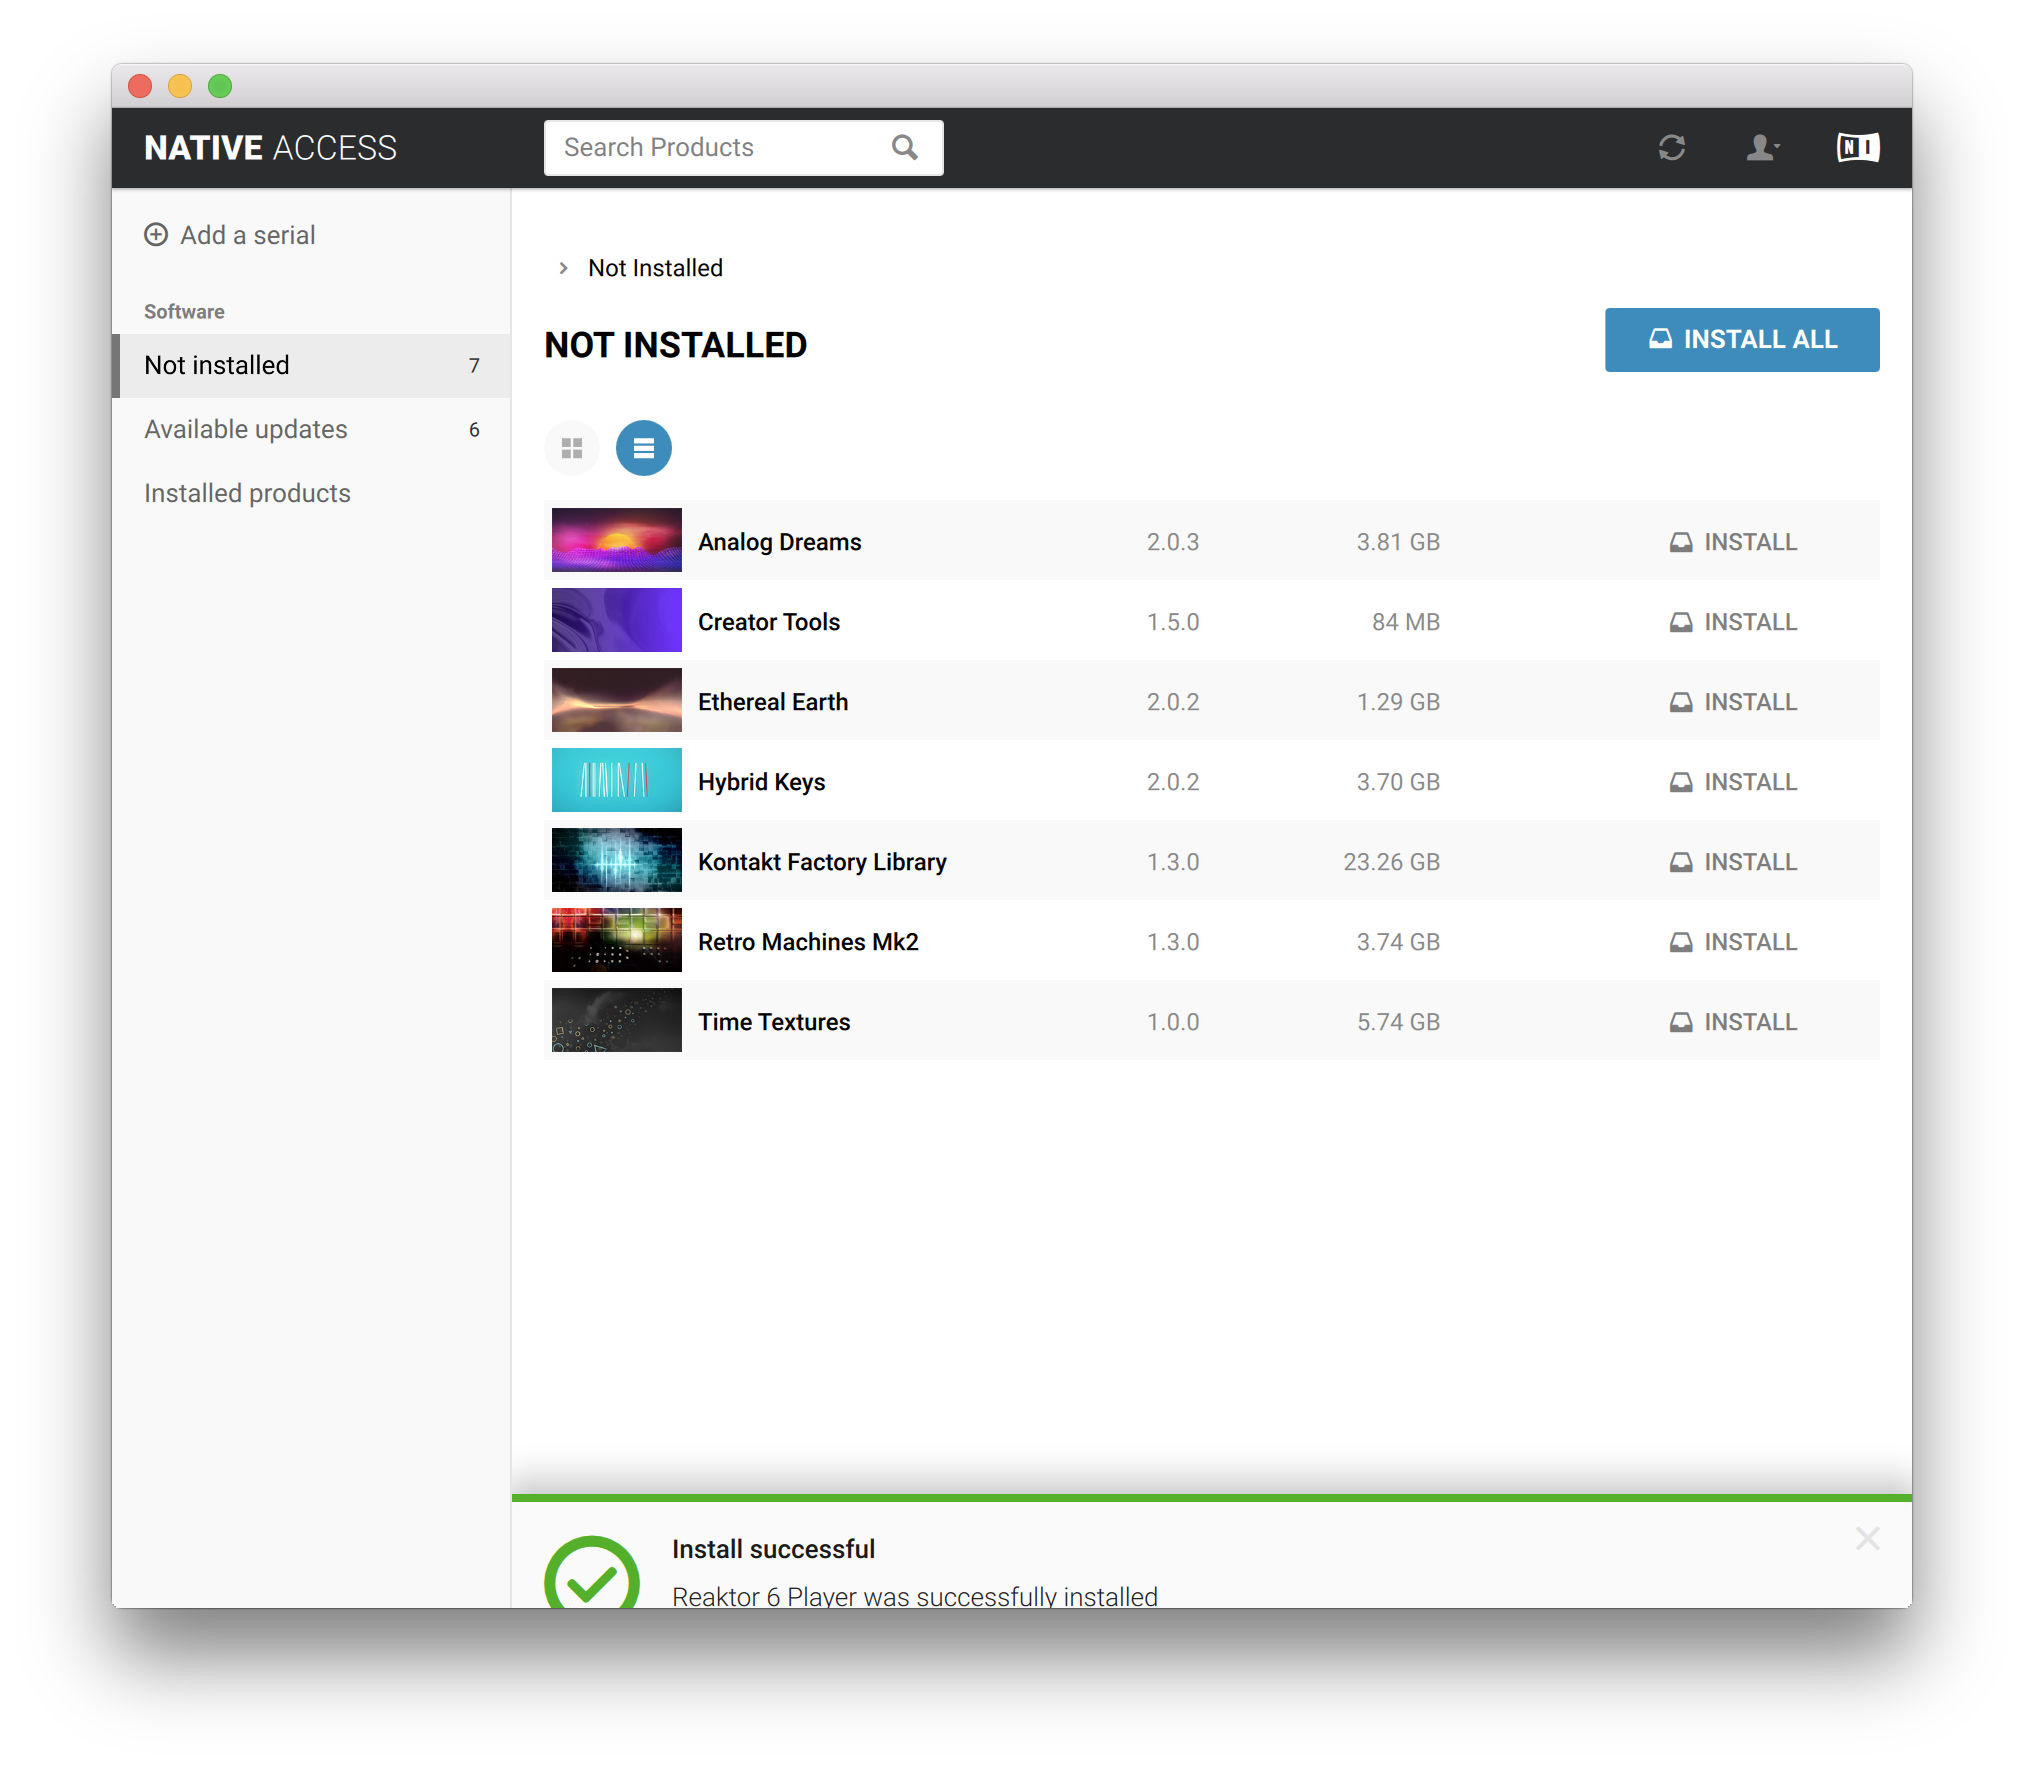
8. Click the 'Not installed' tab > Locate Time Textures > Click 'INSTALL'.
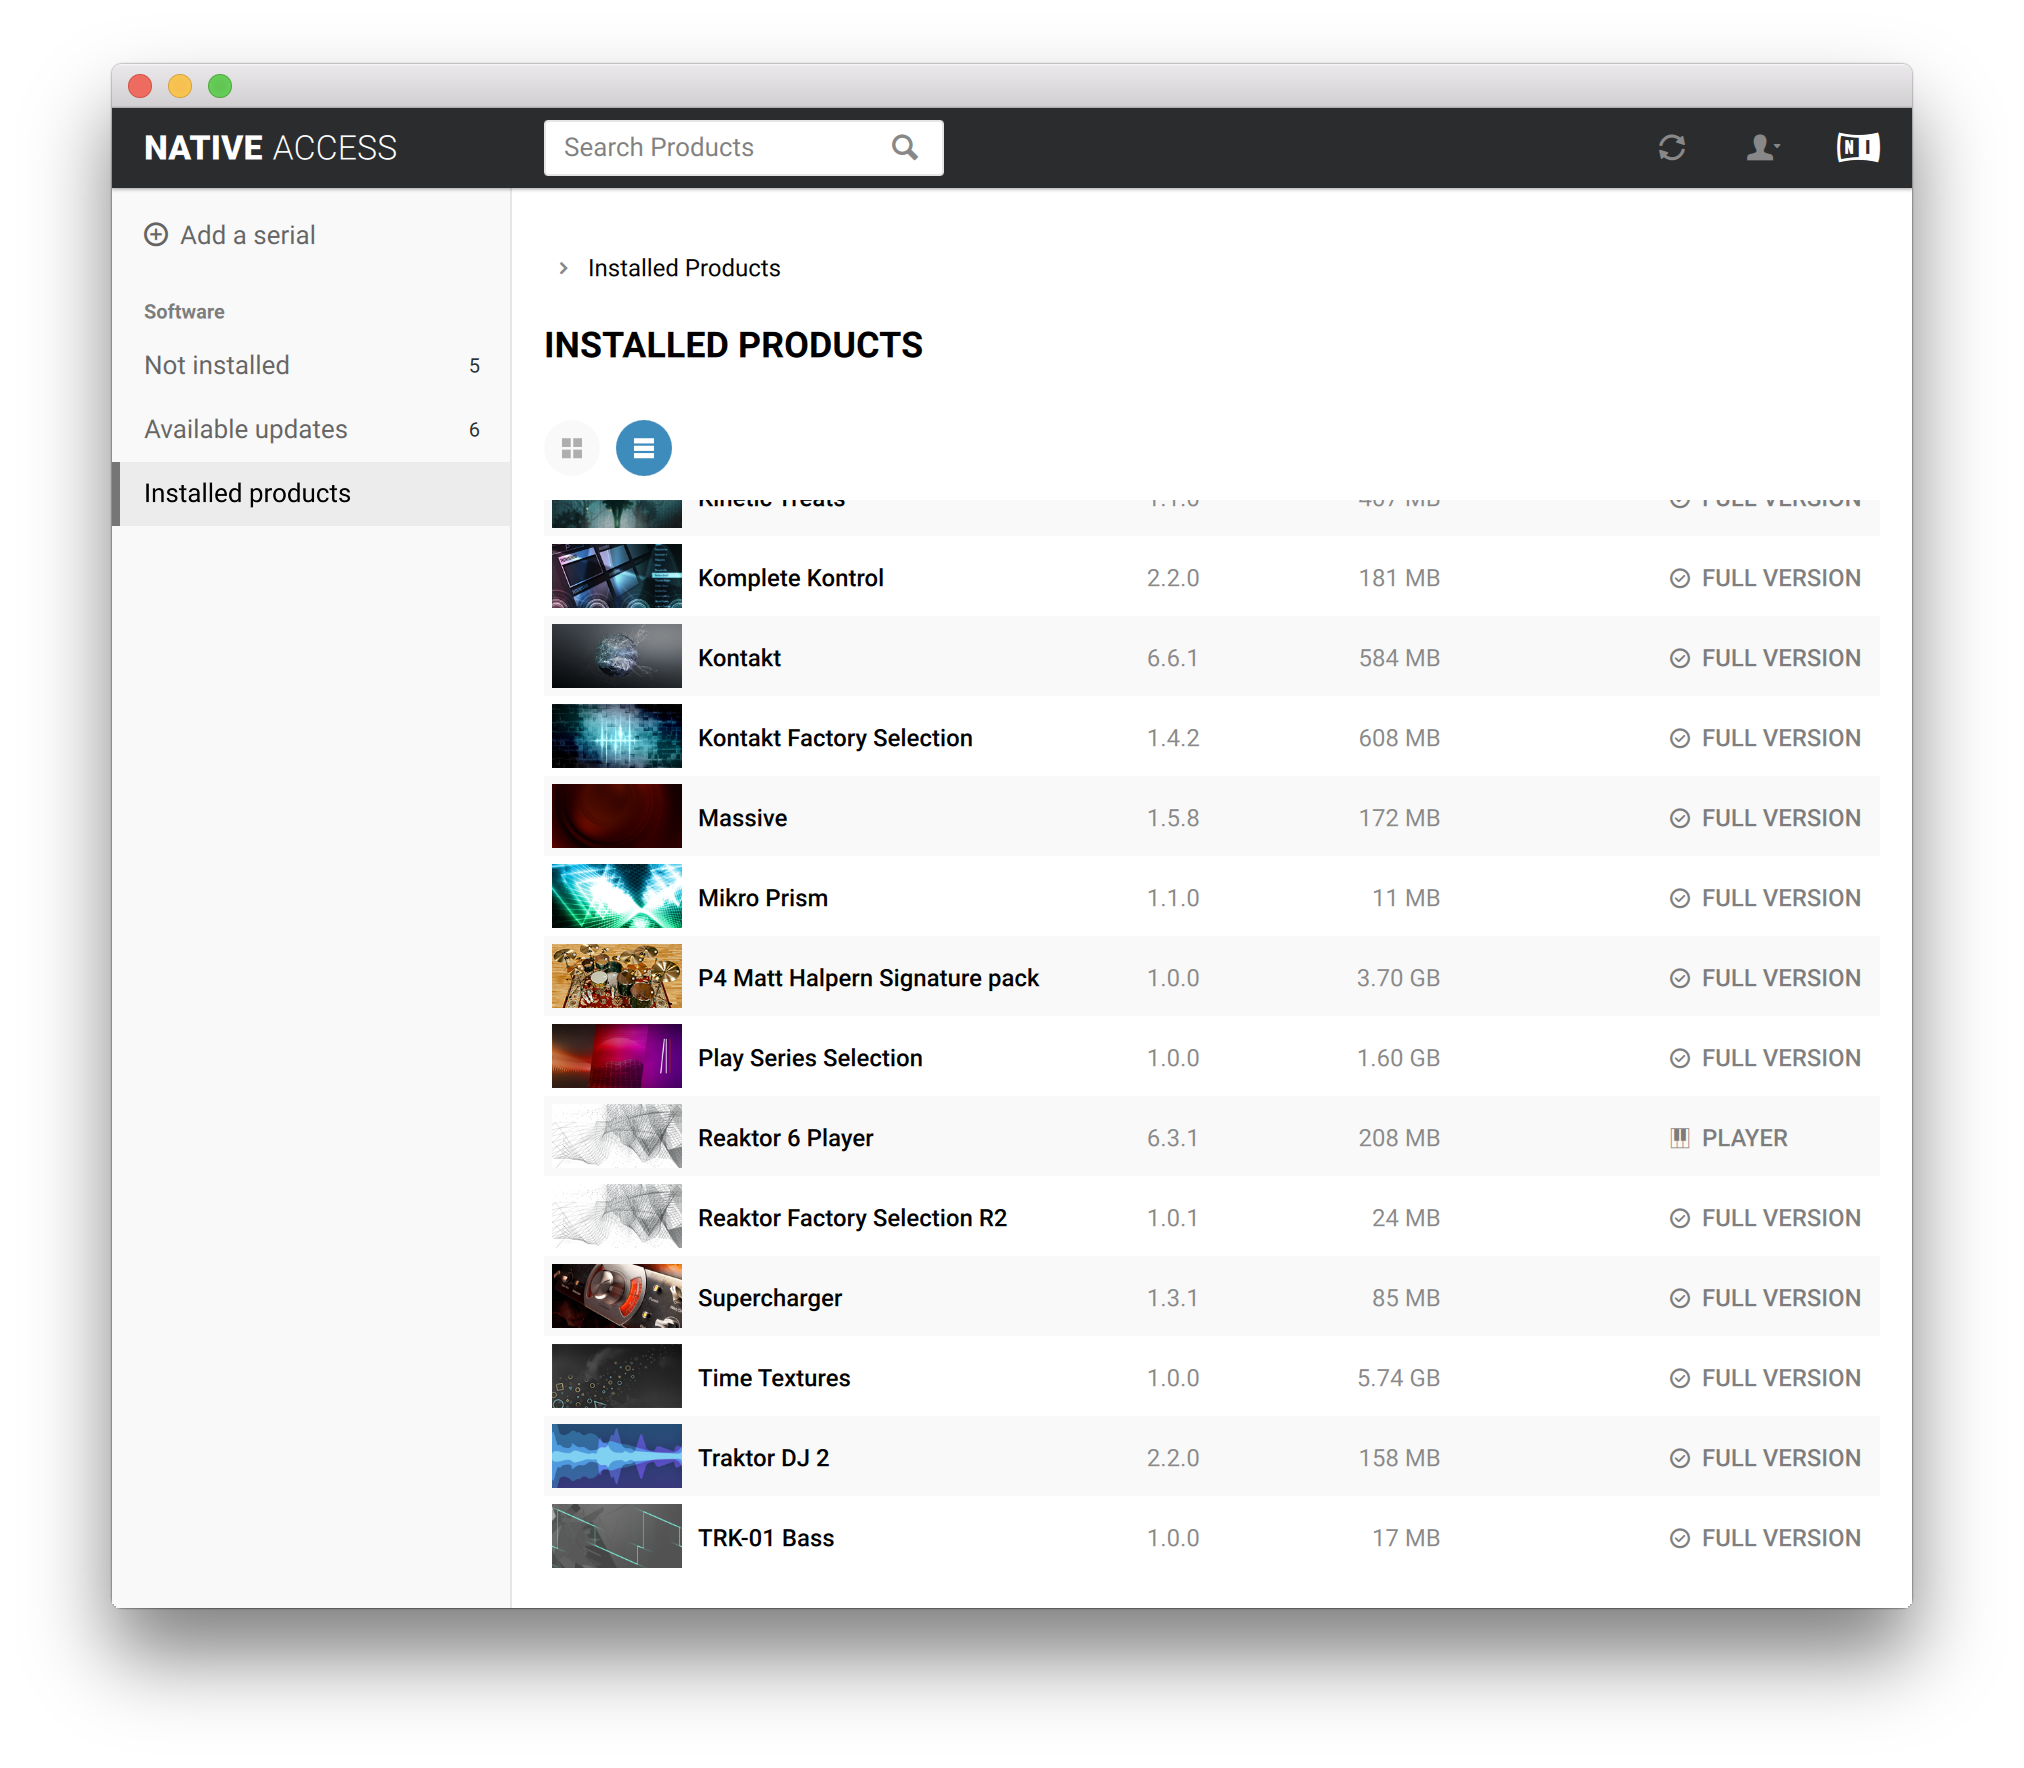
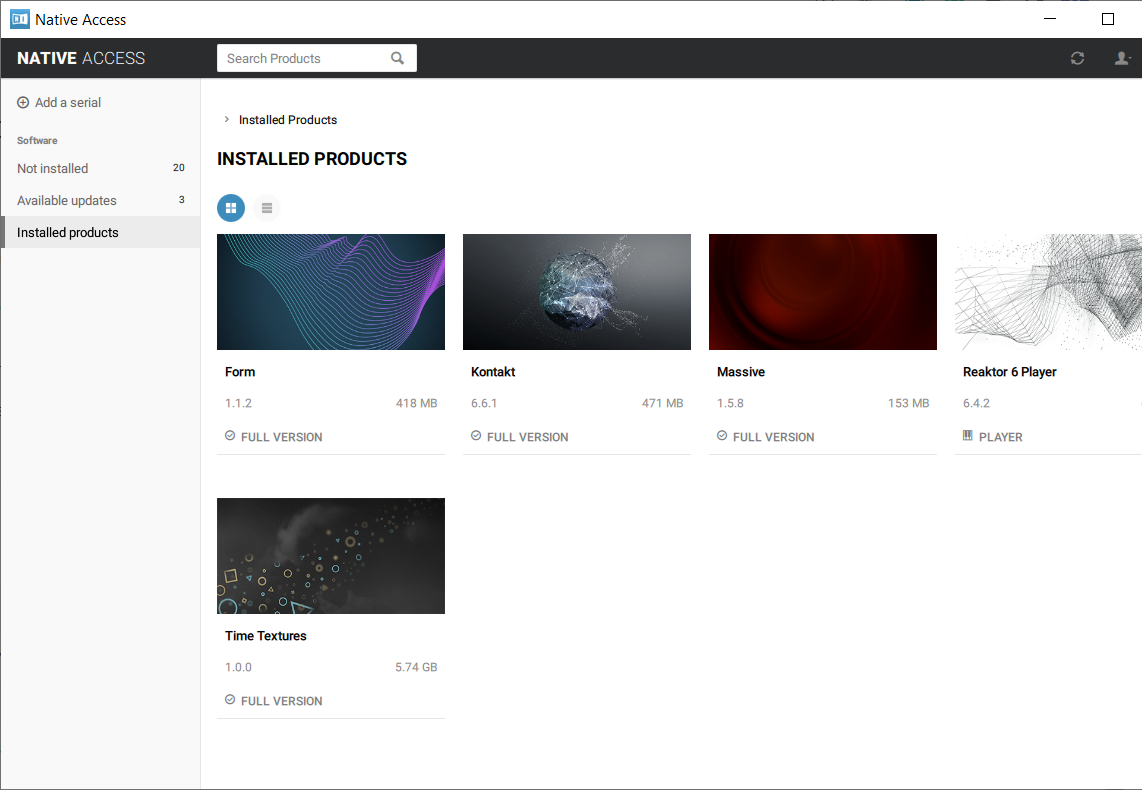
9. Time Textures is now installed on your system.
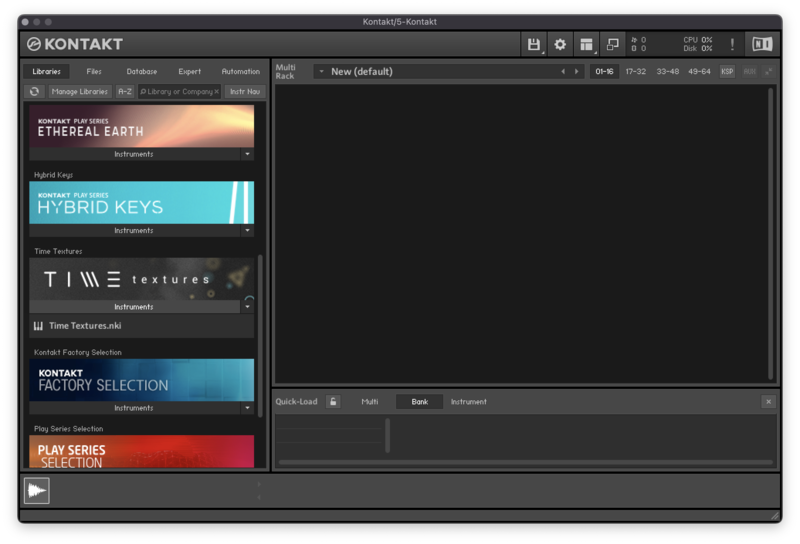
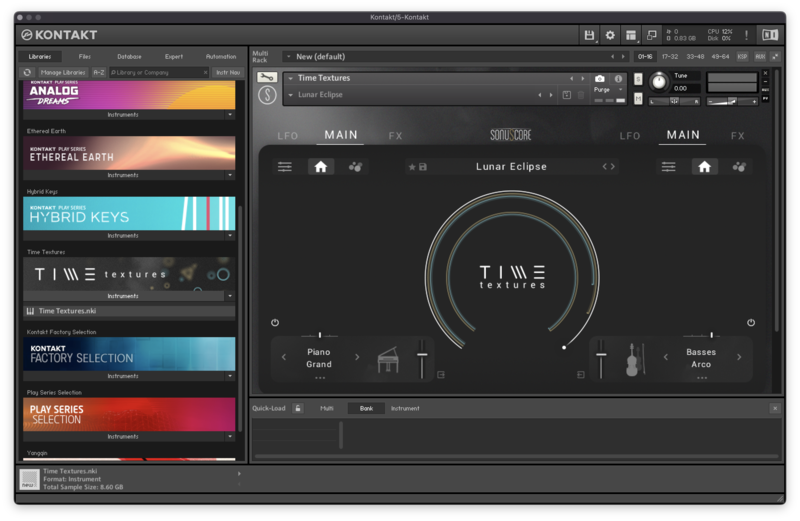
10. Open Kontakt in your DAW > You should see Time Textures on the left sidebar > Click the drop-down bar and drag the .nki file into the middle of the window.
Your software is now ready to use in your DAW!
Windows
1. Download the .zip installer file from your Plugin Boutique account.
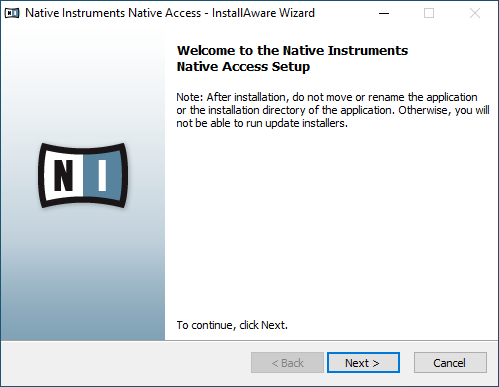
2. Double-click the extracted .exe file to begin the installation process > click ‘Run’.
3. Read the welcome message > click 'Next'.
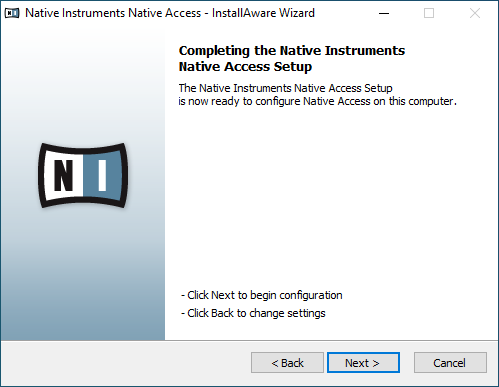
4. Click 'Next' to begin the installation.
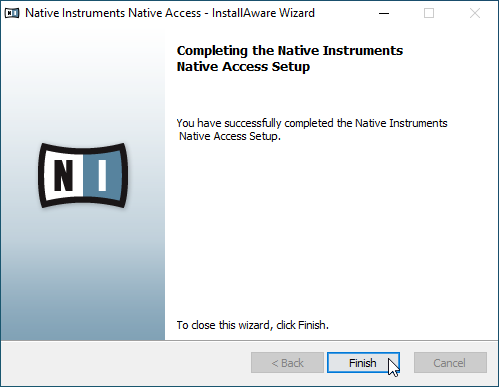
5. Native Access has now been installed > Click 'Finish'.
6. Open Native Access > Create a new Native ID if you do not have one already. If you do, skip ahead to step 8.
7. You will then receive an email with a confirmation link > Open the email and click 'CONFIRM EMAIL'.
8. Log in to Native Access with your Native ID.
9. Click 'Add a serial'.
10. Enter your Serial Number found in your Plugin Boutique account > Click 'ADD SERIAL'.
11. Click the 'Not installed' tab > Locate Time Textures > Click 'INSTALL'.
12. Your new Kontakt Instrument is now installed on your system.
13. Open Kontakt in your DAW > You should see Time Textures on the left sidebar > Click the drop-down bar and drag the .nki file into the middle of the window.

Your software is now ready to use in your DAW!